Vendor Center |
  
|
| Show/Hide Hidden Text |
Vendor Center |
|
| Show/Hide Hidden Text |
A vendor is any company or individual who provides you with product for resale or with services such as electricity, rent, etc.
POSitive encourages the use of Purchase Orders for maintaining stock levels, hence the need to create vendors, identifying what products each vendor can provide. POSitive also supports the ability to purchase a given product from multiple vendors, thereby giving price comparisons the ability to select which vendor to purchase from. POSitive tracks purchase order history, cost changes, and can handle returns to the vendor.
The accounts payable feature of POSitive provides a means of paying for products and services and recording those transactions to an optional POSitive Checkbook and General Ledger journal.
Click here to watch our Vendor Setup video.
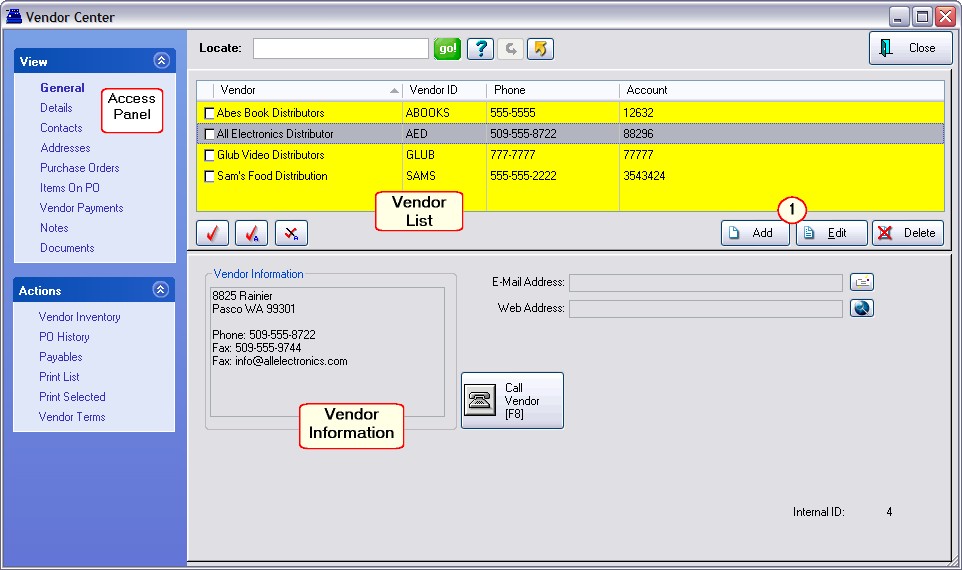
This is an all-inclusive feature and function menu for your vendors. It is divided into 3 main parts:
Vendor List |
The list of all of your vendor records. Various tools such as Locate, Query, Find, and Filter quickly focus on the vendor(s) meeting certain criteria. Highlight a vendor and displayed will be the vendor address and phone, e-mail address, web address, and an option to Call Vendor. Clicking on the icons at the end of the E-Mail Address or Web Address will launch e-mail and internet browsing. |
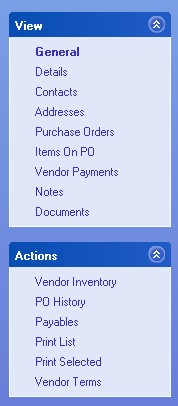
Access Panel |
Lists various views, properties, and actions relative to the highlighted vendor account. |
Vendor Information |
Displays specific detail or other information about the highlighted vendor. The contents of this section will change as various properties on the Access Panel are selected. |
Technical Note - Internal ID - The number in the lower right corner of the screen is a generated number to keep track of each vendor added to this list.
CAUTION: if you delete a vendor it cannot be recovered.
(1) Choose to Add or Edit a vendor. (see Details - Vendor Center)
SELECTION OPTIONS |
|
Locate |
First, select the column to be sorted by clicking on the column. Second, begin typing search characters. (You do not have to click into the Locate field.) Press Enter - will find the first item beginning with the search characters Press CTRL-Enter - will find all items with the search characters somewhere in the field. |
|
The equivalent of Enter. |
|
Select from an unlimited number of saved queries or filters which you can create and modify as needed. |
|
Restores the list to show all records. |
|
Sends displayed listing to HTML, Excel, Word, etc. (see Send) |
|
Checkmarks the highlighted item. Clicking in the box beside the item will also tag or untag the item. |
|
Checkmarks all displayed items. |
|
Unchecks all displayed items. |
Add |
Create a new vendor - (Duplicate Vendor Name Alert) |
Edit |
Edit an existing vendor. |
Delete |
You can choose to Merge the vendor's data with another vendor or totally Delete the vendor from the list. Warning: If there are no pending transactions for the vendor, it can be deleted. Be aware that if it is deleted all vendor inventory, contacts, and other related data will be lost. You may want to consider renaming the vendor so it will not be used again. |
|
VIEWS |
GENERAL - Displays vendor address and phone, e-mail address, option to Call Vendor, and the vendor Internal ID number. |
|
DETAILS - A Vendor record can be edited to change address, phone, terms of payment, credit limit, SKU controls, shipping and return options. (Optional - assign unique GL Account numbers for Payable and Expense accounts.) (see Details - Vendor Center) |
|
CONTACTS - Lists staff members' position, phone, and e-mail. (see Contacts) If the contact has multiple phone numbers and e-mail addresses you may add the contact multiple times. |
|
ADDRESSES - The vendor may have different offices and addresses for inquiries, returns, and billing. Here you add as many addresses as apply and set an address as a default address for RMA shipments and invoice payments. When an entry is highlighted, the contents of the entry are displayed on the right for easy viewing without editing. (see Shipping Addresses) (more)
|
|
PURCHASE ORDERS - A listing of current Purchase Orders for the highlighted vendor (see Purchase Orders) (more)
|
|
ITEMS ON PO - Displays all items currently on all purchase orders of the highlighted vendor. Edit button will open the highlighted purchase order. (see Items on PO) STATUS |
|
VENDOR PAYMENTS - Shows payment history for the highlighted vendor. (see Vendor Payments) |
|
NOTES - A log of notes recorded about or for the vendor. These notes can include summations of conversations, agreements made, disputes raised and resolutions, or general information about the vendor and contacts. Each recorded note logs the date and time and a synopsis line of the note contents for easy selection. Notes can be edited or deleted as needed. (see Notes) (more)
|
|
DOCUMENTS - Attach important documents to the highlighted vendor. (see Document Manager ) |
|
ACTIONS |
|
VENDOR INVENTORY - Opens a separate window of inventory assigned to the vendor. (see Vendor Inventory List) |
|
PO HISTORY - Opens a separate window of Purchase Order History By Vendor listing all vendors. (see PO History) |
|
PAYABLES - Opens a separate window of Accounts Payable for all unposted and posted transactions for the highlighted vendor. |
|
PRINT LIST - Prints a simple listing of all vendors showing vendor ID, name, city-state-zip, and phone and fax numbers. |
|
PRINT SELECTED - Prints general information about the highlighted vendor. |
|
VENDOR TERMS - Opens a separate window of all vendor terms. (see List of Vendor Terms) |
|
•manually - Go to Vendor Center: choose Add, and fill in the specifics about the vendor.
•automatically through an import of a list of vendors - Go to Maintenance: Import: Vendors
•automatically through an import of inventory - if the import file contains a vendor name which is not currently in POSitive, POSitive will create the vendor automatically. The vendor information will need to be edited and specifics about phone, address, etc. will need to be added.
(see Details - Vendor Center)