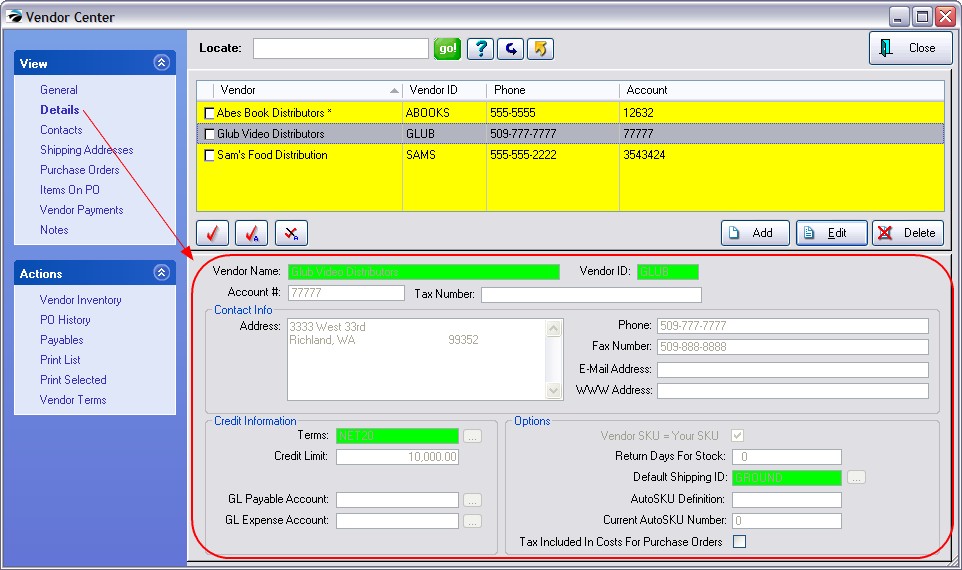
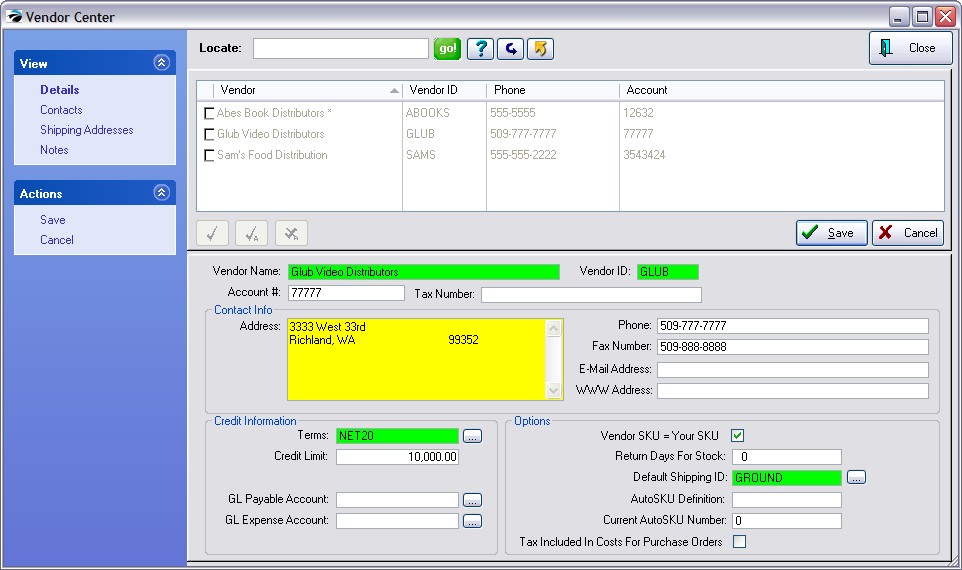
To establish a vendor account you enter the vendor's name, address, credit terms, various options, and names of contacts. You can keep a journal of notes regarding the vendor as well as review yearly financial transactions. Changes can be made to this vendor record as needed.

Colored Fields are required for the vendor account to be saved.
Vendor Name - The company name. This entry will be used for address labels and other correspondence. NOTE: the vendor name has to be unique; cannot use the same name twice.
Vendor ID - Your own code for identifying this vendor account. It can be a number system to match your accounting program or an abbreviation of the name or any other code you wish to use.
Account # - Your account number by which the vendor knows your business. Your account number will be included on correspondence with the vendor.
Tax Number - the vendor's federal or business license number

Address - free form field to include
•Address 1 - postal box or street address
•Address 2 - (a second line as needed)
•City, State, Zip, Country
Phone - main office number
Fax Number - fax machine number
E-mail Address - business e-mail address
WWW Address - business web site
Terms -This field is a required field. Choose a payment term preferred by the vendor. Use the lookup button to find a term. (see List of Vendor Terms)
Credit Limit - The maximum dollar amount for their accounts receivable.allowed by the vendor.
For non-inventory vendors such as phone company, rent, etc. choose an appropriate GL Expense Account only.
(Recommendation: Leave Blank) Only if you want to keep all transactions related to this vendor under unique GL accounts would you need to fill in these fields. If these fields are left blank, then the default settings from GL Interface Setup will be automatically applied.
GL Payable Account - The GL Account number you want to use for tracking liability transactions with this vendor.
(Default is AP Setup: Default Accounts Payable)
GL Expense Account - The GL Account number you want to use for tracking expense transactions with this vendor.
(Default is AP Setup: Invoice Expense Account)
Vendor SKU = Your SKU - This option Vendor SKU = Your SKU is a shortcut feature to eliminate duplicate typing. Typically, this option is used for small vendors who have an informal listing of inventory or for vendors whose products are one of a kind and you are willing to use the same SKU as the vendor's definition. If checked whenever you add inventory and link it to the vendor, both SKUs will be identical.
Return Days For Stock - Some vendors allow for stock to be returned at no charge if it is returned within a given time limit. Enter the number of days allowed by the vendor. If this field is active, POSitive will report which inventory items are nearing the cutoff date which is calculated from the invoice date using this entry.
Default Shipping ID - This field is a required field. The Default Shipping ID is the most common means of shipping used by the vendor. The code includes the estimated number of days it takes for product in transit which will aid you in determining order placements. From the opened window Vendor Shipping Options, highlighting an entry and pressing Select sets a new default method for this vendor. (see Vendor Shipping Options)
AutoSKU Definition - (Optional) an identifying code for this vendor to be used when a Category AutoSKU is activated. This is an optional setting which can be included automatically as part of your product SKU. (see AutoSKU Setup)
Current AutoSKU Number - (Optional) The next available SKU number for products from this vendor when a Category AutoSKU is activated. (See AutoSKU Setup)
Tax Included In Costs For Purchase Orders - (Optional - visible only with International Setting) If the vendor's selling price on a purchase order includes taxes, then checking this option will automatically calculate taxes on the PO.