Inventory Record |
  
|
Inventory Record |
|
Each line in the Inventory Listing section of Inventory Center represents an inventory item.
When selling the item, you will highlight it and then double-click or use the Select button in the upper right.
Click on the column title of either SKU or Description to set sort order for the column. A dark colored line will appear below the title of the column being selected by the mouse and a triangular symbol will appear to show the column's sort order.
![]() Click once to sort in Ascending Order (A-Z).
Click once to sort in Ascending Order (A-Z).
![]() Click again to sort in Descending Order (Z-A).
Click again to sort in Descending Order (Z-A).
There are several tools or methods available to find specific products. (see Selection Options)
Most of the information displayed is extracted from the Details section which you can edit as needed. (see Details)
Check Box |
Used only when you want to select multiple items at the same time, clicking in the box will add a checkmark. There are buttons for Tag, Tag All, and UnTag All which can be used instead of the mouse. If you only want the highlighted item, then clicking the Check Box is unnecessary. |
Type |
I = normal Inventory |
SKU |
The product code or Stock Keeping Unit. Generally, there is only one SKU per inventory item. However, if you choose to use secondary SKUs, sorting by this column will display the item multiple times; once for each SKU. (see SKU Management) |
Description |
This description of the inventory item prints on the customer invoice and on all inventory reports.. However,different descriptions can be used if there are secondary SKUs using Alternate Display Information, then the Alternate description will be visible in the inventory list and on customer invoices, but not on inventory reports. (see SKU Management) |
Retail |
Upon opening the Inventory Center price level 1 is usually displayed. However, the default price level displayed can be pre-set in System Setup: Inventory: General The titles of the price levels are set or controlled in System Setup: Inventory: Pricing. View Each Price Level This price will be in RED if there is a promotional price in effect today. (see Promo Pricing) |
Reg. Price |
This is the "regular" or normal price of the item. It is also dependent upon the customer in focus. Bulk inventory items will show the Each price even if you are selling various package sizes. (see Bulk Inventory) |
Total Stock |
The total number of items in the store. |
Available |
The number of items which are "unclaimed" and can be sold to the next customer. This field is calculated by subtracting the number held or reserved from the total in-stock count. (see Stock) The symbol n/a is displayed if the item is not tracking stock counts. (see Details) |
On Order |
The number of items being purchased from a vendor as listed in existing purchase orders. (see Vendors and Stock) |
Committed |
The number of items being purchased from a vendor which are already claimed for customer orders. |
Extra |
The number of items being purchased from a vendor which are "unclaimed" and can be sold to the next customer. |
Minimum Stock |
The number of items to be on the shelf at all times. POSitive will generate an Order List and add this this item if the Total Stock is less than this minimum number. |
Maximum Stock |
The maximum number of items to order from the vendor. There is a switch on the Category which will prompt POSitive to bring the order number up to the maximum. |
Minimum Order |
A number imposed by the vendor as a minimum number they will ship. |
Last Cost |
(optional) Right-Mouse Click on a line item will allow you to modify the view and include or exclude any of these fields. |
Unit Cost |
If the inventory item is purchased in bulk and sold in smaller units, then this is the cost of each individual unit |
Department |
The name of the department to which the item's category is assigned. |
Category |
The name of the category to which the item is assigned. An item can only be assigned to one category. |
Long Description |
This long description handles an additional 12 characters for the name of the inventory item. By default this description is identical to the shorter description but can be modified or totally overwritten. This long description can be hidden from this list and from the inventory item by turning off the option in System Setup: Inventory. Also optional is the modification of inventory forms and invoices to use this description instead of the brief description. |
Primary Vendor |
The main vendor assigned to the inventory item |
Primary Vendor SKU |
The product number used by the primary vendor for re-ordering the item |
Internal ID |
A system generated number to uniquely identify the inventory item. |
The columns of information displayed can be rearranged. This helps you focus on the most important elements of the item and defines the output of your inventory list if you choose to Send it to an external document. (see Send)
In addition to determining the sequence of columns, you can choose to not display some columns. You may create as many "Views" as you wish, save them, and recall them as needed.
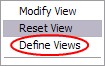
•Right Mouse Click on a line item.
•Choose Define Views at the bottom of the list of options.
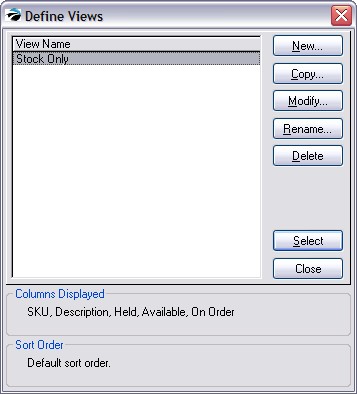
•Choose New and give it a name.
•The "Define the Column Layout" screen shows all the fields of information available.
•Using the Add / Remove and Reposition buttons, select which fields on the right will be utilized on the left.
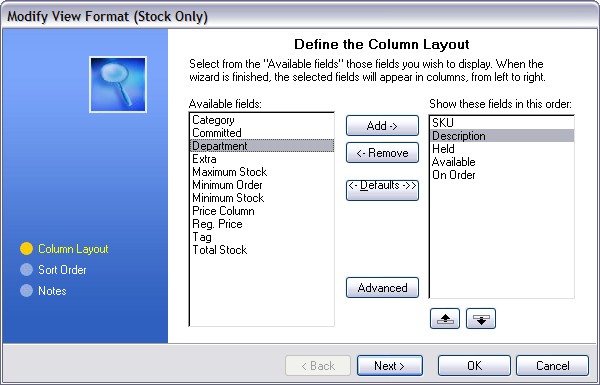
•Choose OK and your selection is saved. (see Views for more detailed instructions)
When you right mouse click on an inventory item, Reset View restores POSitive's default layout.