Import Physical Inventory from File |
  
|
| Show/Hide Hidden Text |
Import Physical Inventory from File |
|
| Show/Hide Hidden Text |
The "Import Physical Inventory From File" option in POSitive provides the following useful procedures.
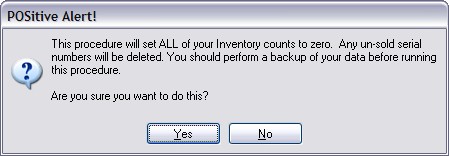
•How To Zero Inventory Stock Counts - sets all or selective inventory to zero count. Important Note: Serial numbers which have NOT been sold will be UNLINKED. Are you sure you want to proceed?
•How To Import A Physical Stock Count - use a prepared data file as a source of stock counts
•How To Scan A Stock Count Directly Into POSitive - use a barcode scanner for counting
•How To Interpret and Update The Results - review and then perform the update of stock counts
As a business you may need to perform physical stock counts of everything in the store. One option is set all your stock counts to zero, thereby giving you a fresh start. Or, you could choose to leave the existing stock counts and you can report on discrepancies between your physical count and the POSitive current count. There are some special procedures to follow if you cannot count everything in the store in one day.
To open this screen, go to Inventory: Physical Inventory: and select Reconcile From File
You may wish to reduce all stock counts of you inventory to zero so that you can start fresh.
Important Note: Serial numbers which have NOT been sold will be UNLINKED. Are you sure you want to proceed?
IMPORTANT: Make a Backup first.
Go to Inventory Center: Actions: Physical Inventory: and select Reconcile From File
Click on the "Zero Inventory Counts" under Actions
You will be prompted to confirm the process.
(See: "Zero Stock Counts" for more information.)
You may now re-enter stock counts using one of the following methods.
You will need a comma or tab delimited file listing your inventory. For each inventory item in the file, you will need the SKU, Description, and Stock Count.
There are two simple methods for creating this file.
One, use a handheld data collector to scan items in the store and to record the stock counts. Using instructions for the brand of data collector, save the stored data to a file on the hard drive.
Two, use the export feature of POSitive (Inventory Center: Define: and Send) to create a comma delimited file to include just the SKU and Description and perhaps the stock count. With Microsoft Excel or some other program you can edit the file to enter your true stock counts. Note: be sure to save the file as a comma or tab delimited file. Then follow the steps described below.
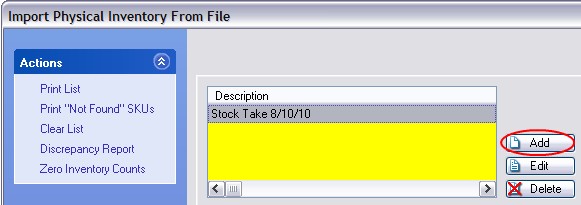
Choose Add
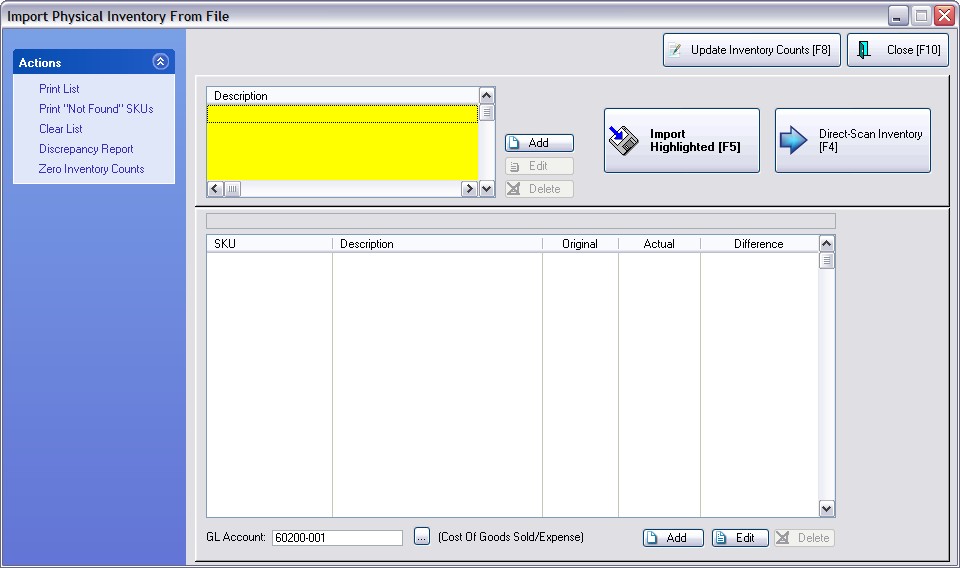
In the upper left corner of the Import Physical Inventory From File screen is where you select the file to be used as an import file.
You will be prompted through the Physical Inventory Importer.
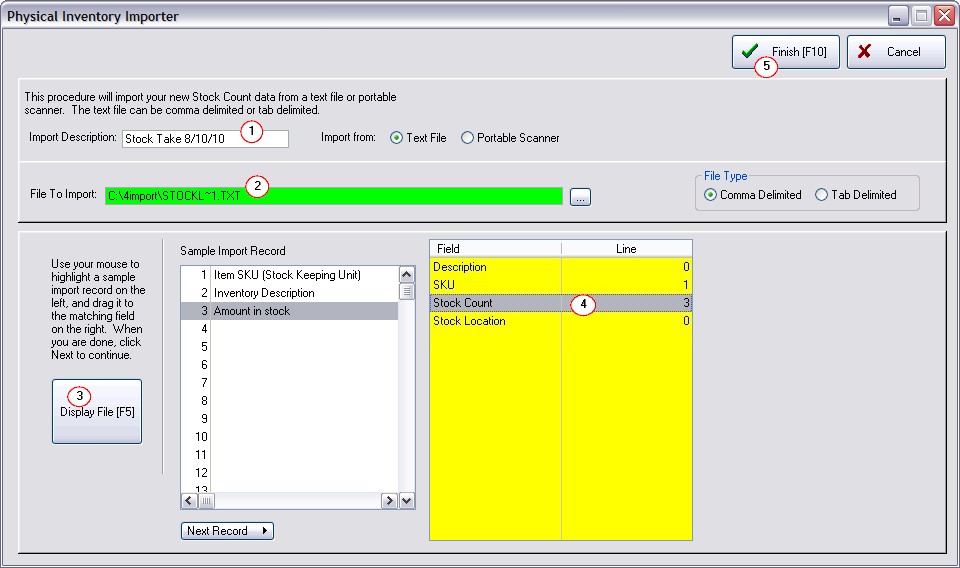
1) First, you will give this setup a name (Import Description),
2) Then choose the file to be used for the import (use the browse button).
3) Now click on Display File [F5] button
4) Using drag and drop techniques link the SKU and Stock Count from the left hand window to the right hand window.
5) When you are done, choose Finish [F10] and this saves the import definition.
NOTES: The description field is not required to make the connection to the correct item, the SKU is sufficient
Stock Location - (previously known as Bin Location) This allows you to assign the stock count to a specific Location rather than to the general stock count. (see Stock Location)
Most likely you will want to make sure the lower panel is empty; choose the Clear List [F7] button.
When you are ready, highlight the added file description (upper left panel) and select Import [F2].
Special Notes:
The Edit and Delete buttons will affect the highlighted Import file Description.
If you have multiple files to import, setup definitions for each as described above, clear the list, and choose to import each one before proceeding to the next steps..If the same SKU exists in multiple files, POSitive automatically combines the counts together.
See below for an explanation of the results and what to do next.
You may want to scan inventory directly into the Import Physical Inventory From File window rather than use a file as described above. You can designate which Stock Location is to be affected. All you need is a scanner. Or, in lieu of a scanner, you can manually type the SKU and enter the stock counts. See Direct Scan inventory for more details. |
Most likely you will want to make sure the panel below is empty; choose the Clear List [F7] button.
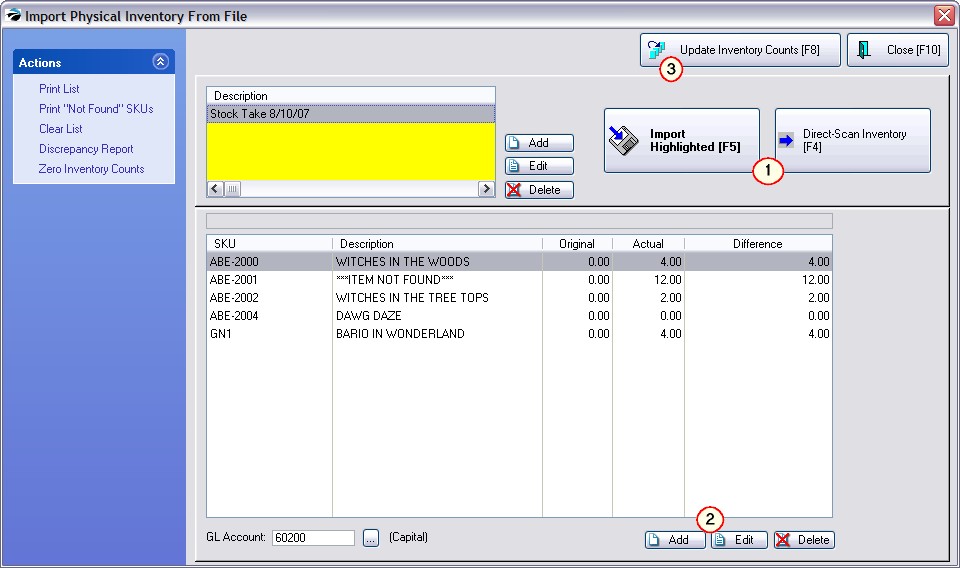
Once the inventory has been imported or direct scanned, you will see your list of inventory items.
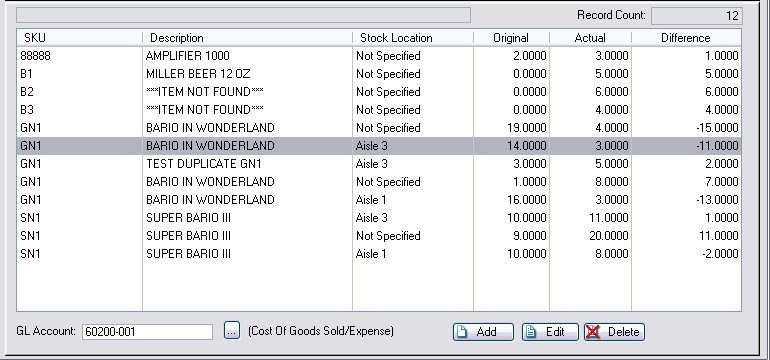
For each item,
•Stock Location - depending upon the import file source, you can designate where the items are shelved.
•Original means the stock count of the item currently in the POSitive inventory list.
•Actual is the count you have just imported or entered.
•Difference is the variance between Original and Actual.
***ITEM NOT FOUND***
When using the Import [F2] or the Direct Scan Inventory method, this reports that a scanned item is NOT in your current inventory list.
This would suggest that the scan was misread or mistyped or simply that the SKU of the item is no longer a valid SKU. Perhaps the inventory item is there in your inventory, but the SKU was changed or deleted. Or the item simply may be a new inventory item yet to be added to POSitive.
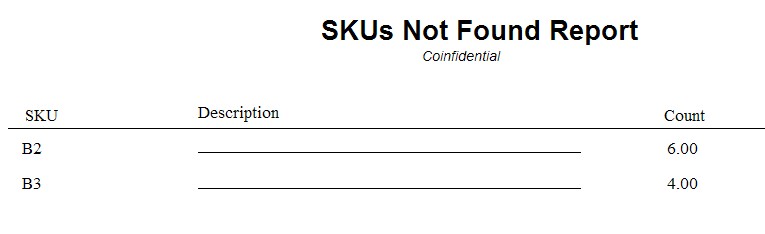
The "Print 'Not Found" SKUs [F6] will print a list of these items so that you can review reasons for the discrepancy. (sample)
|
You can review your list in three ways.
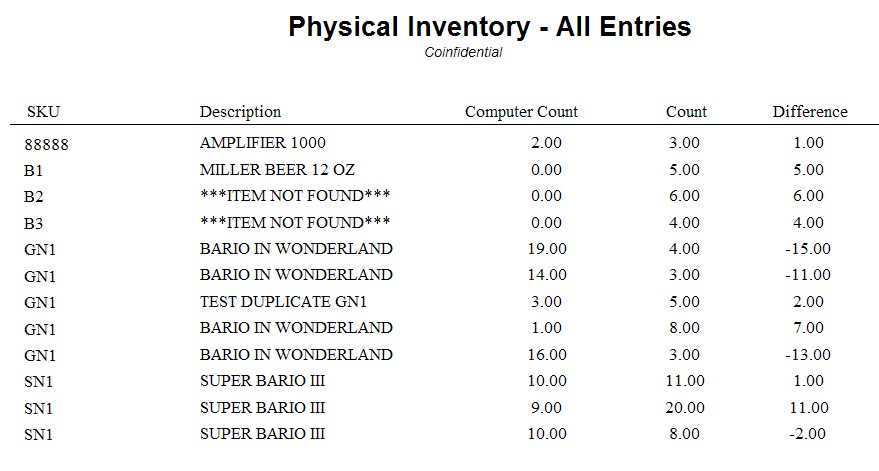
•Physical Inventory - All Entries - prints everything in the list. Choose Print [F5] and select Print All. (sample)
|
•SKUs Not Found Report - prints a list a items for which there is no equivalent SKU in your inventory list. Choose "Print 'Not Found" SKUs [F6] (sample)
|
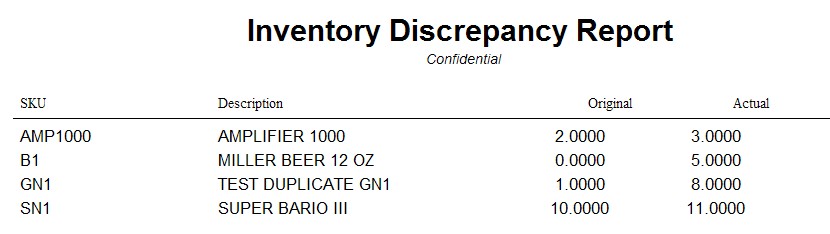
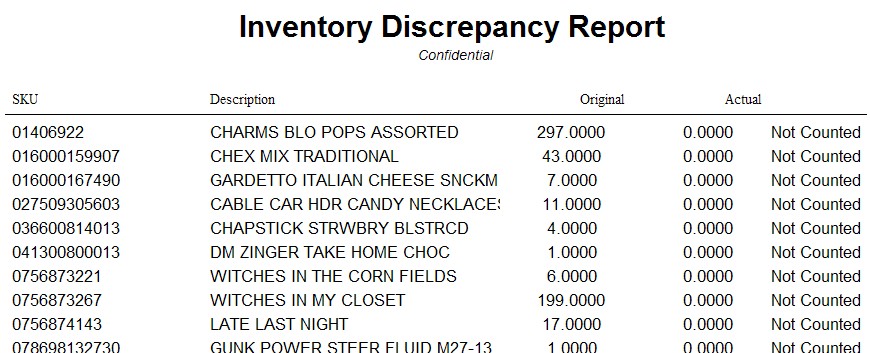
•Discrepancy Report - prints a report of all items from this Stock Take that do NOT match POSitive's stock list. (sample)
|
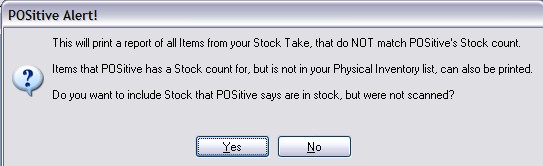
•You can also print a listing of inventory which was NOT scanned or imported which is useful for determining if inventory has been lost or stolen. Choose Discrepancy Report [F9], and answer Yes. (sample)
|
After interpreting the results, you may wish to Add, Edit, or Delete entries in the list to assure that everything is correct. With the Add button, you can scan or lookup the SKU. (Note: if you type in an unknown SKU you will not be able to update inventory because the SKU does not really exist in POSitive.)
The Edit button allows you to adjust the Actual count. And the Delete button will remove the line item from the list.