Accounts Receivable Setup |
  
|
Accounts Receivable Setup |
|
To use Accounts Receivable some advance setup is required. As new customers are placed on store account, you have some flexibility on a per customer basis.
Advanced Setup
For Accounts Receivable to work well for you...
•____ Activate Accounts Receivable options on the POSitive Setup Form. See POSitive Setup for more information about each option.
•____ Define Customer Terms Go to Customer Center: and select Customer Terms under Actions.
•____ Review employee security settings relative to handling Accounts Receivable. See Security Settings
•____ (Optional) Create Customer Categories for activation of accounts receivable settings and credit limits for select customers only.
•____ (Optional) You may edit the AR Statement form if for some reason the existing forms do not meet your needs. Contact POSitive support for more information.
Starting a Store Account for a Customer
Creating an AR account for a customer begins once an invoice has been started and is about to be tendered. When tendering the invoice, only an authorized store employee can select Store Account and adjust the credit limit as needed. There is an opportunity for management to come to the register and authorize charges to account.
1) Create an invoice for the customer and add all the inventory items to the invoice.
2) Press the Tender [F10] button to accept payment.
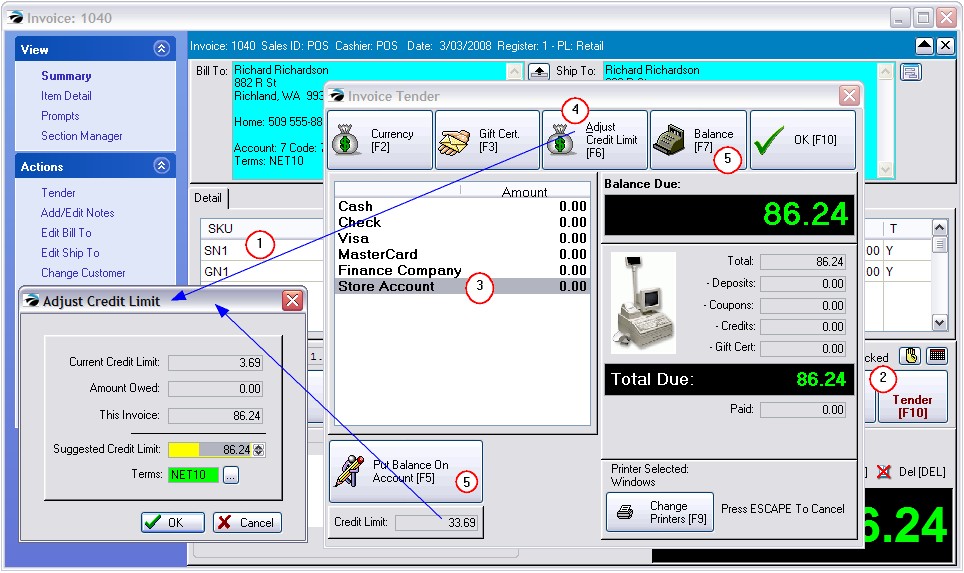
3) Highlight Store Account on the Tender screen. If this option is not visible, press ESCape to cancel taking tender and edit the customer record.
NOTE: This option will only be visible if the customer record is complete with name and address. There MUST be an entry in the Address 1 line for the Store Account tender type to be active.
4) If the customer does not have a sufficient credit limit, you will be prompted that the credit limit has been exceeded. Choose the Adjust Credit Limit [F6] button. Enter your sales ID and password. This will open the Adjust Credit Limit screen. POSitive will automatically boost the credit limit just enough to allow this invoice to be processed. If desired, change the credit limit and or the Terms of payment and choose OK.
5) Press either the Put Balance On Account [F5] button or the Balance [F7] button to enter the full amount due on Store Account. (Note: you can split payment by filling in a partial amount for some other tender type, and then enter the remaining amount on Store Account.)
The invoice will be processed, printed, and charges placed on Accounts Receivable..
Related Topics
General Ledger: Contact POSitive support for more information.