|
2.2. Add SKU Button |
  
|
| Show/Hide Hidden Text |
|
2.2. Add SKU Button |
|
| Show/Hide Hidden Text |
A "SKU Button" is a button on your touchscreen which will add a specific product to the customer's invoice. To add this button requires some specific steps which you will perform on Page 4.
It is assumed that your POSitive program has some inventory items which we can use in this tutorial. If you are not sure, take a minute and go to Transactions: Inventory and take a look to see what items are listed in the Inventory Center. Make note of the SKU and Description of an interesting item. If you have nothing in the Inventory Center, then create one.
Assignment: Display Page 4.
This page should have no buttons yet in the right-hand area of the screen. If you are seeing buttons on page 4, then choose another page number until you find a blank page.
How To Add a "Blank" Button
1) Enter 4 in the Page Displayed field and press Enter or choose Go
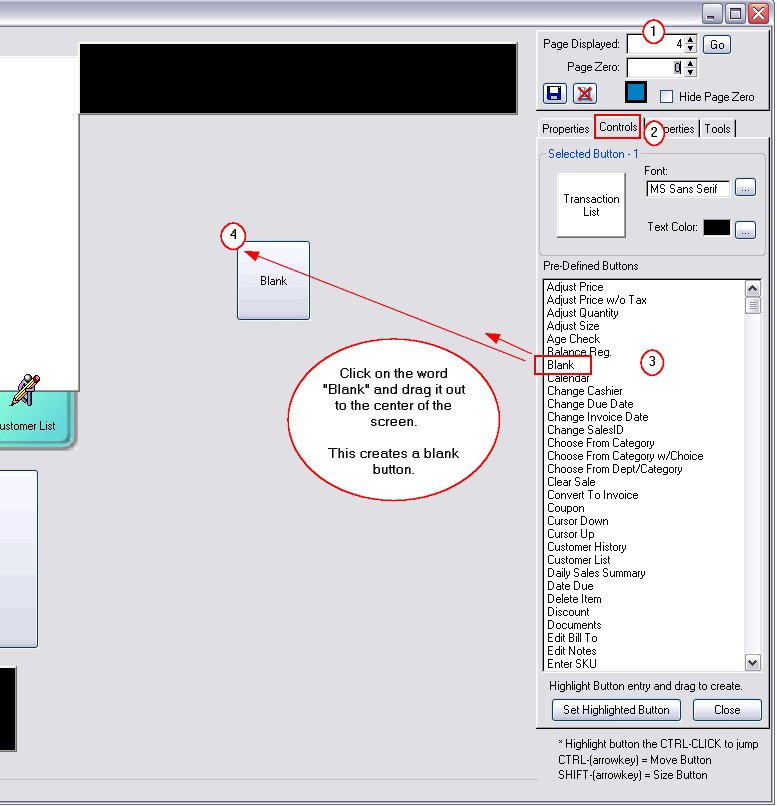
2) Click on the "Controls" tab of the Tool Panel. You will see a long alphabetical list of "Pre-Defined Buttons."
3) Use the scroll bar to find the Pre-Defined button named "Blank" and highlight it.
Drag & Drop The "Blank" Button
3) Now that you have highlighted the Pre-Defined button named "Blank" depress the left button on your mouse and keep it depressed as you move the mouse to the center of the touchscreen work area as pictured below.
4) Let go of the left button on the mouse and the "Blank" button is added to the touchscreen work area.
Change The Button Type
Always keep an eye on the "Selected Button" image on the Tool Panel. It should say "Blank."
5) With the "Blank" button highlighted, click on the "Properties" tab of the Tool Panel.
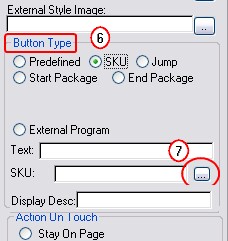
6) In the center of the Tool Panel: Properties tab is a group called "Button Type." Activate "SKU" by clicking on the word SKU.
Do you need a more detailed view?
|
Select the SKU
7) Click on the Lookup button at the end of the SKU field. This will open a POSitive Alert with options.
8) Click on the button named "Inventory." This will open the "Locate Item" screen.
Your inventory will be listed; you will not see mine.
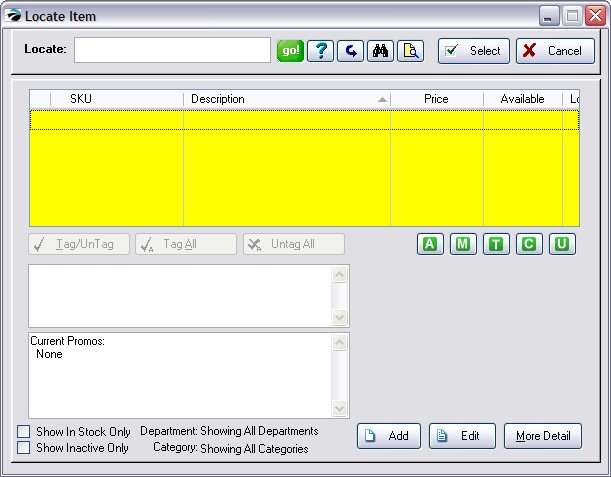
If the Locate Item screen is blank..
If you are seeing this blank "Locate Item" screen when you clicked on "Inventory" of the POSitive Alert, then it is possible that there are no Inventory Items in your Inventory Center. You should check with your Boss about this. Or you may choose ADD at the bottom of this screen and create a fictitious inventory item to be used with this tutorial. If you need more help, contact your dealer or POSitive Software Company.
|
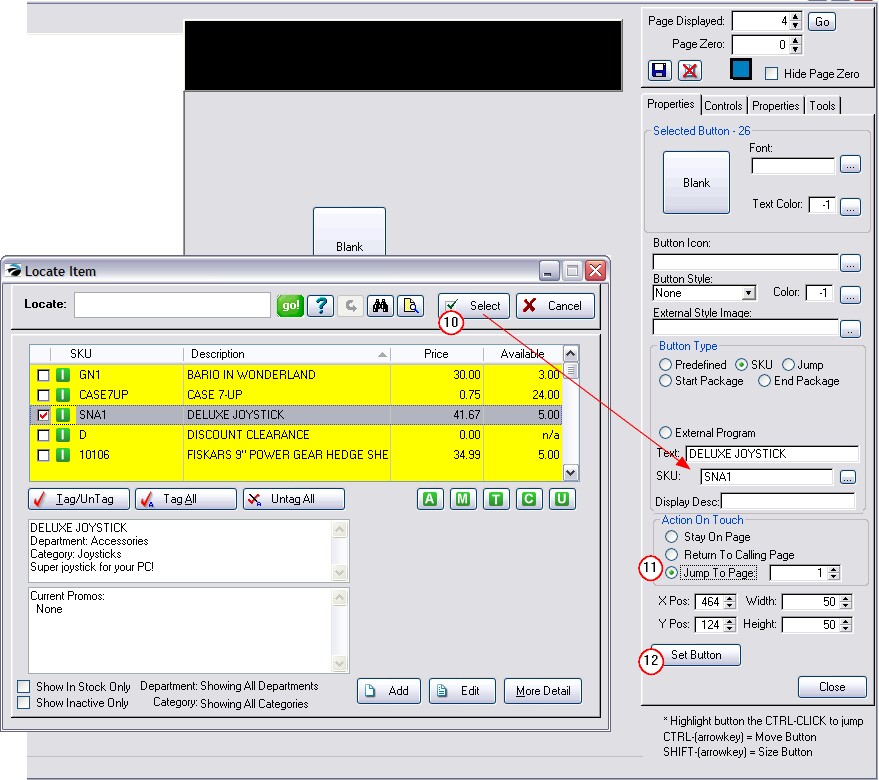
9) Highlight any inventory item which looks interesting to you. Make note of the SKU and Description.
10) Click on the Select button.
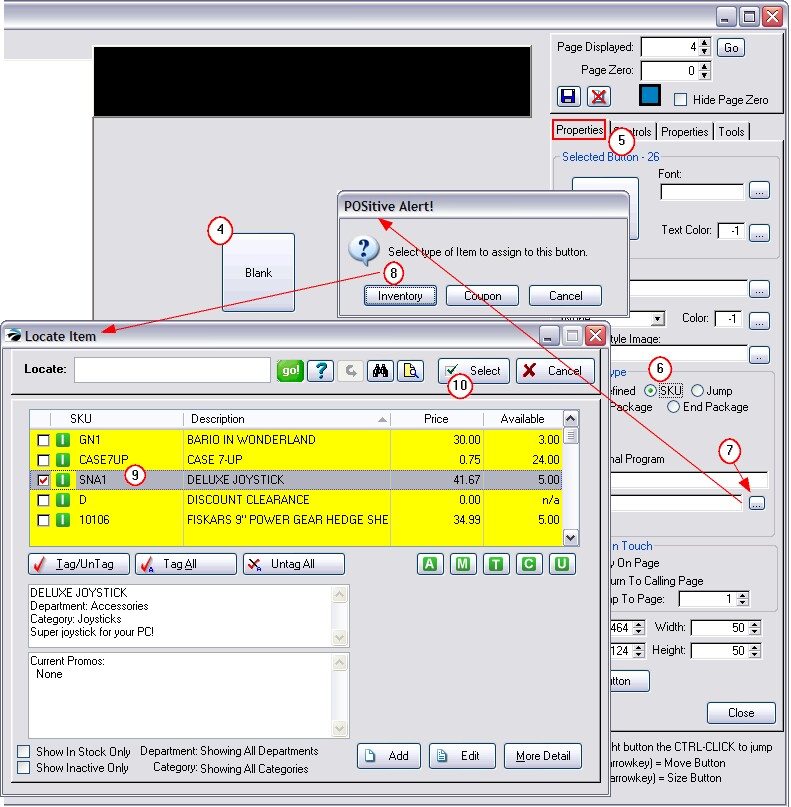
10) When you chose the "Select" button, the SKU and Description of the inventory item you had highlighted are populated into the "Text" and "SKU" fields as shown here.
Action On Touch
Whenever a button is selected the button must perform a secondary action. In most cases you want the touchscreen to return to Page 1.
11) Activate the "Jump To Page" button and enter a 1 in the box to the right. IMPORTANT: make sure it says 1.
Set Button
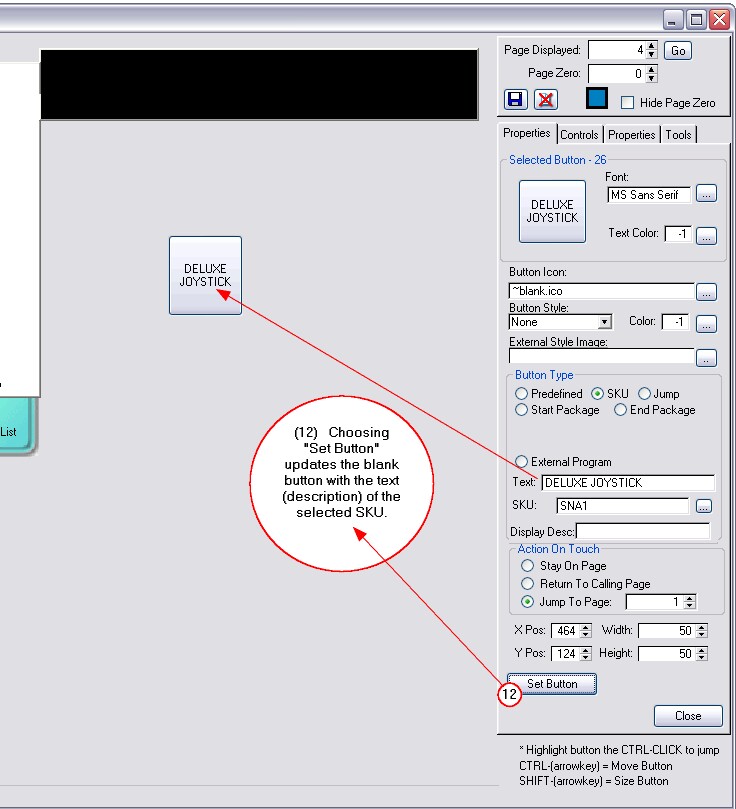
12) Click on the "Set Button" button.
12) When you clicked on the "Set Button" button, the description of the inventory item became the text on the button.
If your Description was very long, then you could edit the description in the Text field to something shorter, yet understandable. Use the "Set Button" to lock in your changes. An alternative to abbreviating the description is to make the button bigger, as you learned in 1.5 Edit a Button.
Setting Button Style and Other Favorites
13) As you learned in 1.5 Edit a Button, you can change the color and other properties of this button.
Assignment: make this button look like you want it to.
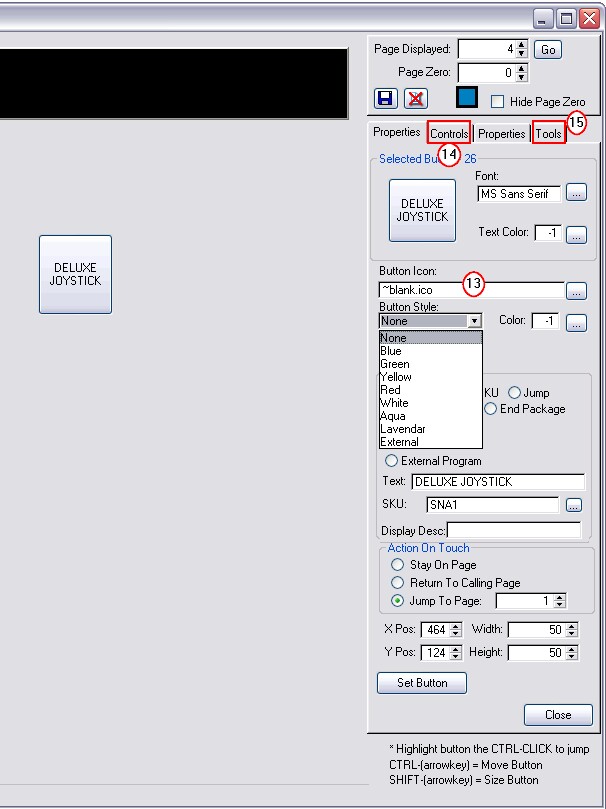
14) Assignment: Practice making more SKU Buttons. Go to the Controls tab, highlight the Pre-Defined "Blank" and drag it into the center of Page 4. Repeat the steps described above and finally color the button to your satisfaction.
15) Assignment: SAVE YOUR WORK! Open the Tools tab of the Tool Panel. Choose Export Project and give it a NEW name. See 1.7 Save Your Changes