|
2.3. Add Jump Button |
  
|
| Show/Hide Hidden Text |
|
2.3. Add Jump Button |
|
| Show/Hide Hidden Text |
Open the Tutorial Touchscreen Layout
In section 1.6 Delete a Button, we removed the "Discount" button from Page 1
If you are still seeing the "Discount" button, remove it now.
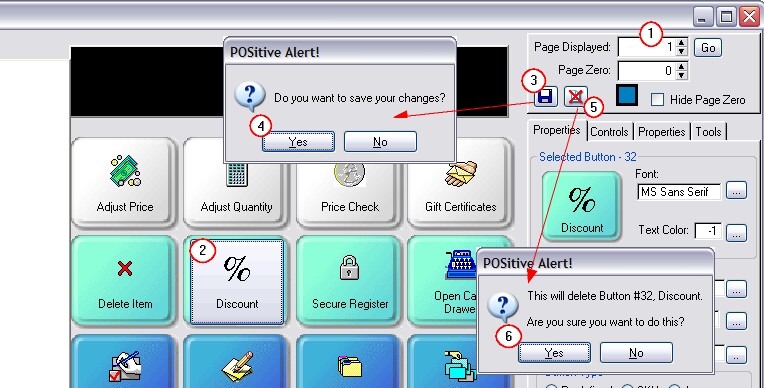
1) Go to Page 1 2) Click on the "Discount" button. Always keep an eye on the "Selected Button" image on the Tool Panel. Make sure that Discount is showing in the panel. We are going to delete this button, but first, let's save the touchscreen design. Save Changes It is a good practice to save changes before making some dramatic changes to the touchscreen. You have learned how to export the project, but to make safeguard backups, you can simply save to disk. 3) Click on the "Save To Disk" icon 4) You are asked if you want to save your changes. Click on the "Yes" button. Although you have saved your changes, they can only be recovered by exiting without saving changes so that this save just made can be recalled. Delete the Discount Button We are going to delete the Discount button to make some room for a new button. 5) Click on the "Delete Button" next to the "Save To Disk" button. You will be warned asking if you really want to delete the Button "#32: Discount" 6) Click on the "Yes" button. There is now a hole where the Discount button was.
|
Add A Jump
We are now going to add a "Jump Button" in that empty space. The purpose of the jump button is to be able to change "Pages" to access other buttons. In this case we will be jumping to the buttons you had created on page 4.
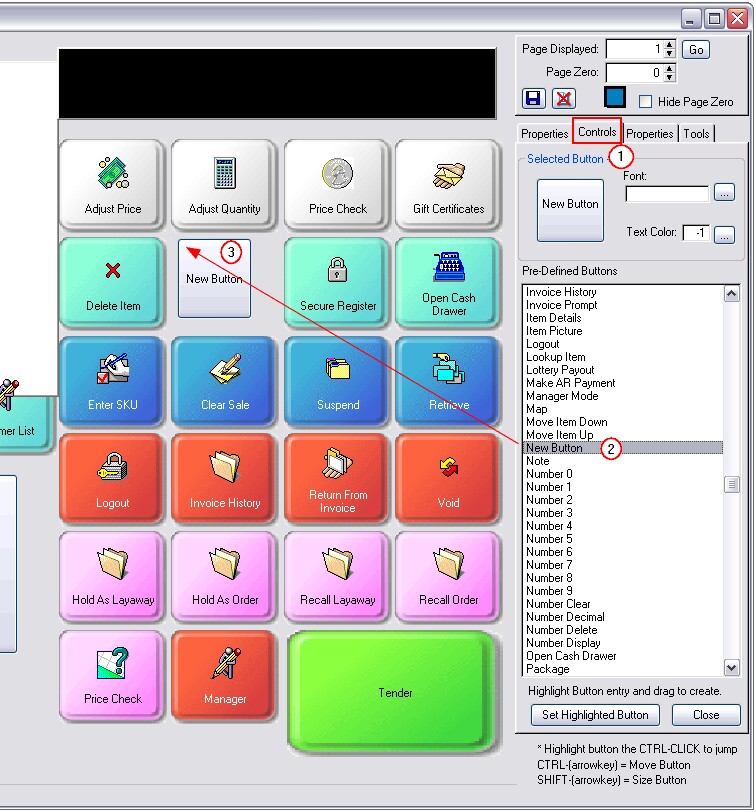
1) Click on the Controls tab
2) Highlight "New Button" in the list of Pre-Defined buttons and depress the left button on your mouse and keep it depressed as you move the mouse to the "empty" spot left by deleting the "Discount" button as pictured below.
3) Let go of the left button on the mouse and the "New Button" button is added to the touchscreen work area.
What is the difference between "New Button" and "Blank"?
There is no difference in function or purpose of the "Blank" button which you learned about earlier and the "New Button" we were just using. They are both in the list of Pre-Defined buttons, accomplish the same function, and you can use them interchangeably. |
Change the Button Type to "Jump"
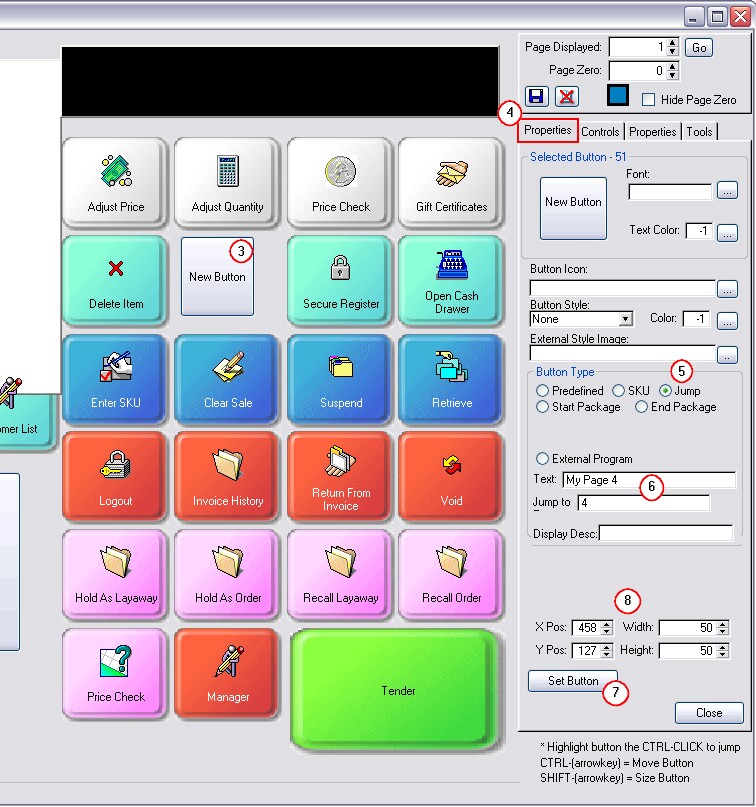
4) Click on the Properties tab of the Tool Panel
5) Click on "Jump" as the Button Type in the center of the Tool Panel
The purpose of "Jump" is to take you to a different page when the button is chosen. We will make this new button jump to your page 4 to which you added some Inventory Items with the SKU button you learned about in 2.2 Add SKU Button.
Enter Text and Jump To Page Number
6) In the Text field type "My Page 4" and in the Jump to field type a 4.
7) Click on "Set Button." The title "My Page 4" is now in the button.
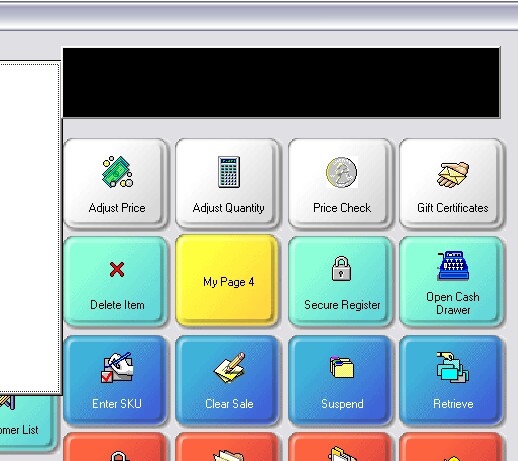
8) Notice that this "My Page 4" button is smaller than the others. You will need to set the X and Y positions to make this button align with the others. Use the skills you learned to color the button yellow and make it the correct size.
If you click on neighboring buttons you can figure out the common Width and Height. |