Overview Accounts Payable |
  
|
Overview Accounts Payable |
|
Accounts Payable lists the monies you owe your vendors and other creditors. Typically, when you receive products through purchase orders, the charges will be automatically added to this list. (Vendor Term requires "Post To AP" activated)
You can access this list by going to Accounting: Accounts Payable: and choosing AP Processing. Or, you can open the Vendor Center, highlight a vendor, and choose Payables under the Actions at left.
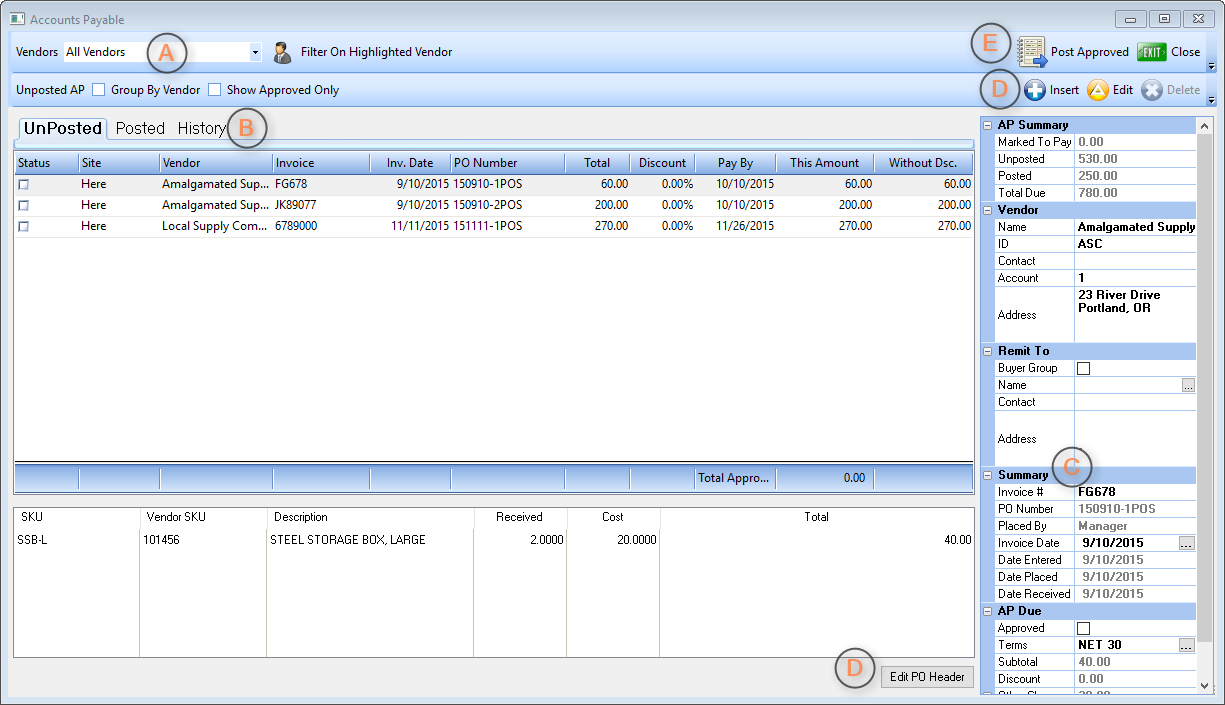
A) Focus on All Vendors or on a specific Vendor - Choose from the drop down. Once you have selected the vendor, you can freely choose AP - Unposted, Posted, or History views to see all activity for that vendor.
B) Choose a View
•AP - Unposted - a listing of accounts payable charges which are under review. The screen shows the Vendor Invoice number, Vendor name, your PO Number and dates and total charges.
Note "In Process" means that the purchase order is still pending and that items have not yet arrived from the vendor.
Tip: The letters "ps" in the invoice number could indicate that you only have a packing slip and not the final invoice. (see Accounts Payable - Unposted)
•AP - Posted - a listing of accounts payable charges which have been approved for payment, but have not yet been paid. They cannot be edited at this stage; you must first "unpost" the transaction. (see Accounts Payable - Posted)
•AP - History - a listing of accounts payable charges which have been paid. They cannot be edited at this stage. (see AP History)
C) Review Details - this will open the panel at the bottom of the screen to show
•Summary - Vendor Name and Address, vendor invoice number, PO number, and dates placed and arrived. (Version 6: Summary has been moved to the Property Grid.)
•PO Detail - Displays the inventory items received on the purchase order plus taxes. (Version 6: PO Detail is now shown in the lower window.)
D) (Optional) Make changes to any highlighted transaction, or add a new transaction especially if the charges would not be added automatically by processing purchase orders. By choosing "Edit PO Header" you can change the invoice number, dates, and freight charges.
E) Once the transaction has been reviewed and you confirm that the charges are accurate, then tag (checkmark) and choose Post Tagged [F9] (Version 6: Select Post Approved) to prepare the items for payment. NOTE: you are simply moving them to the AP Posted section where you will selectively choose to pay and print checks per vendor.