|
Tax Setup |
  
|
| Show/Hide Hidden Text |
|
Tax Setup |
|
| Show/Hide Hidden Text |
As you first created your company, you were prompted to enter a basic tax. If that was not adequate, then you can make changes by going to Maintenance: Tax Rates
DO NOT delete existing tax rates and attempt to create new ones. Doing so can cause adverse results.
If you are defining MULTI-SITE tax Rates read this
Also, at the remote site, ALL CUSTOMERS should be assigned to "Quick Sale Default" on the customer record. This allows the customer to shop at any site and pay the local tax rate.
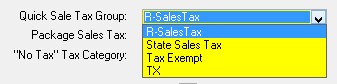
System Setup Tax Options "Quick Sale Tax Group" Rate setting will be what customers assigned to Quick Sale Default will be charged. For example, in System Setup at a remote site, they would select R-Sales Tax If the customer is having products shipped, then a Shipping Address with the proper tax rate (Destination Tax MUST be activated (see System Setup: Customers: Tax Group Based on Shipping Address)) should be defined in advance or at the time of invoicing. |
IMPORTANT NOTE: if your locality will be implementing a permanent or temporary tax, you MUST read Changing Tax Rates.
Making Changes
Go to Maintenance: Tax Rates and you will see a setup screen similar to this one.
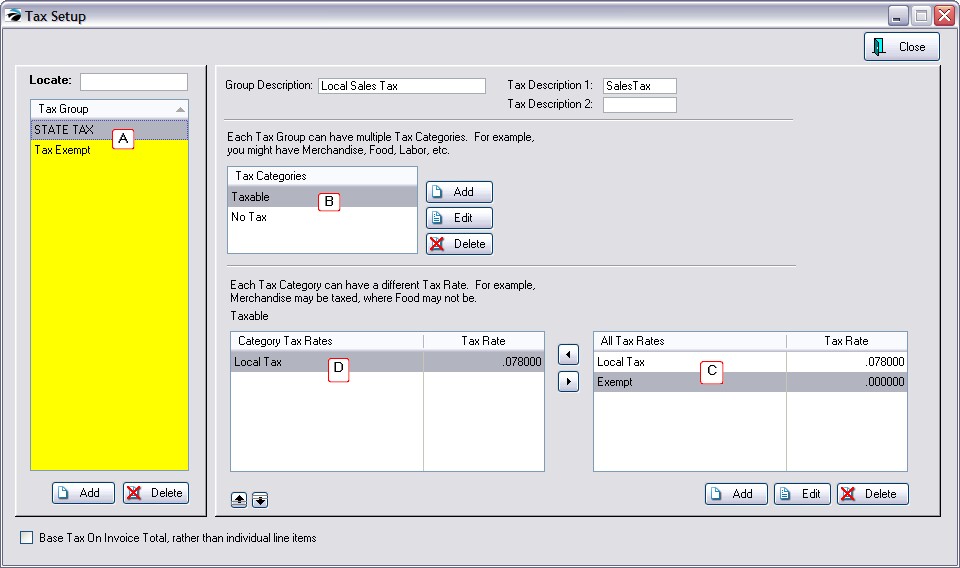
A) Tax Group - people are classified by their liability for paying taxes. Typical groups are state residents, out of state residents, governments, wholesale businesses, county residents, etc.
In the above example, State Tax would be everyone liable for paying taxes and Tax Exempt is for everyone else. As you will see below, other Tax Groups could be residents of specific counties or zipcodes which have a different tax structure.
Tax Description(s)
The term(s) listed here will print on the customer's invoice followed by the amount of tax being charged for purchases.
For a tax description, you can keep it simple: TAX or more descriptive 7.8%Tax. Do not leave the description blank. If left blank the tax total will not be printed on the customer invoice.
Tax Description 2 - (leave it blank)
Most businesses will not be using Tax Rate 2, so the Tax Description 2 should be left blank. The purpose of Tax Description 2 is to subtotal and report two different taxes on an invoice. For example, Canada assesses a GST and a PST tax and it is important to know how much is collected for each. In the USA, you could choose to separate the state tax total from the city tax total, but because you may also have a county tax and additional taxes, it is recommended that you lumpsum all taxes into one and let the bookkeeper calculate portions as reported in the sales tax report. (see Sales Tax Report)
B) Tax Categories - All inventory items, products and services, are assigned a tax category. By default, POSitive creates Merchandise and No Tax tax categories which should be sufficient for most businesses.
If a type of inventory, such as labor, has a unique tax rate, then you may add additional tax categories. Keep in mind that the simpler you can make it the better.
WARNING: Adding a new Tax Category requires editing of ALL existing Tax Groups so that each Tax Group will have an assigned tax rate linked to the newly added tax category.
C) Assign Tax Rate
Assign a Tax Rate from the All Tax Rates section to the Tax Category, by clicking on the Transfer Arrow.
D) All Tax Rates - (lower right section)
Most areas only need two tax rates: "Sales Tax" and "No Tax" which were created when you created the company.
Note: If you must charge tax based on a customer's place of residence or where the product is shipped to, then you need to add each county's tax rate. (see Tax Based On Ship To)