Add New Inventory Item |
  
|
| Show/Hide Hidden Text |
Add New Inventory Item |
|
| Show/Hide Hidden Text |
To create a new inventory item, you will first select the type of inventory item, the dept/category to which it will be assigned, and then fill in the details for Description, SKU, Cost, Prices, etc.
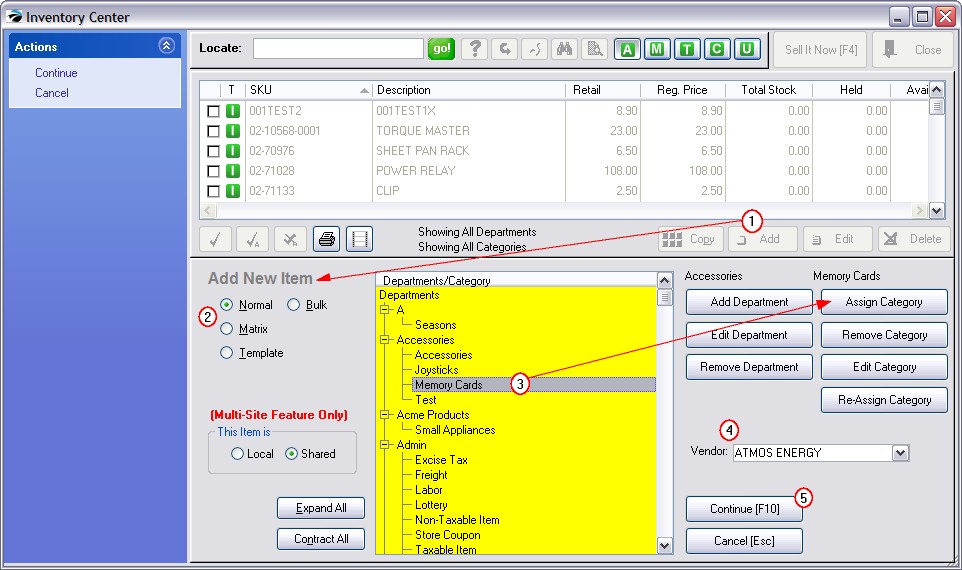
(1) After choosing the Add button, an Add New Item screen appears.
(2) Choose the type of inventory item: Normal, Bulk, Matrix, or Template.
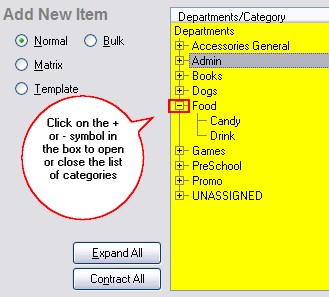
(3) Highlight the category for the item.(If the category does not exist, then highlight the Department and select "Assign Category" and ADD to create a new category) Use Expand/Contract All
When your list of departments and categories is large, it may be easier to find the specific category by Contracting the list of departments. Contract All - hides all categories of all departments 1) Click on Contract All button. Only the department names will be listed. 2) Click on the + symbol in the box of the desired department and all categories in that department will be displayed. 3) Highlight the desired category and continue. Expand All - displays all categories assigned to all departments
|
If necessary, choose to create and select a new department or a new category. (see Departments)
(4) (Optional) Choose the vendor for this item.
(5) Choose Continue [F10]. A new inventory record will be opened in which you enter the Description, SKU, Cost, Prices, etc.
To Add a Department - just click on the button. Fill in a department code (a number or abbreviation) and a name for the department. The Auto-SKU can be left blank.
To Add a Category - First, highlight the Department Name. Then choose Assign Category. If the category does not yet exist, choose the Add button and you will fill in the category name and default settings. Finally, when the desired category is visible in the list, choose Select. (see Departments)