|
Service Items - Non/Serialized |
  
|
|
Service Items - Non/Serialized |
|
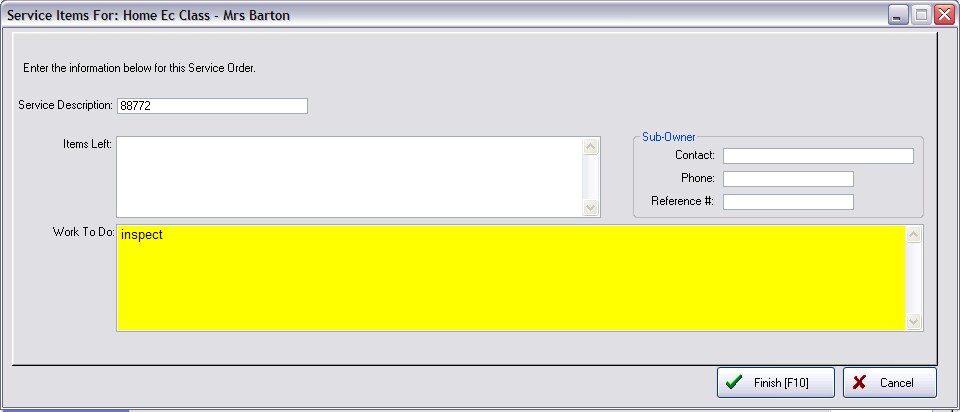
When creating a service order for a customer, you will be prompted to enter "Items Left" and "Work To Do." You may be prompted to select from or add to the list of serviceable items assigned to the customer.
Non-Serialized Service Items
Your are prompted to enter...
| • | Service Description - a free form field to describe the service work. |
| • | Items Left - a reminder of any materials left by the customer which need to be returned such as power supply, manuals, warranty papers, etc. |
| • | Work To Do - a brief description of symptomatic problems or general instructions |
Choose Finish [F10] when Done.
Add Additional Service Items (Optional)
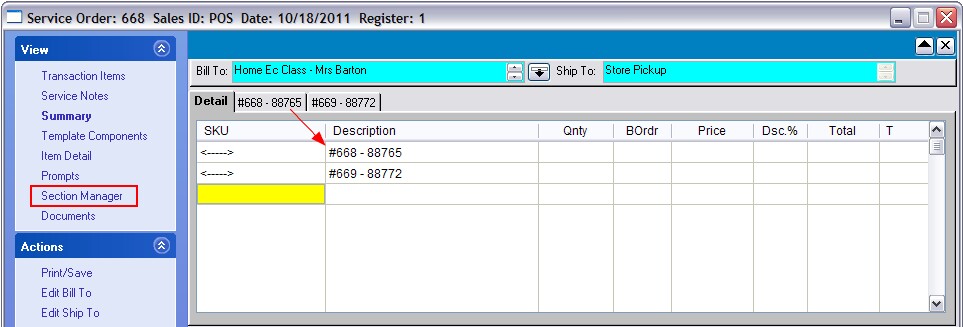
You may add multiple items to be serviced. This is especially practical but only if you are using Invoice Style screen with Sections function. Each entered service item will be tracked on a separate tab of the Service Order screen. Choose the "Add New Service Item" button.
Choosing OK [F10] will then generate the service order. You will be able to add even more service items while editing the service order.
Serialized Service Items
Instead of a simple Service Description as described above, you will be selecting actual serial numbers.
| • | Advance Setup: Go to Maintenance: System Setup: Inventory: Serial Numbers and activate "Track Serial Number In Service" option. |
| • | If you activate this option, then you MUST select or add a serial number at the time of in-take. TIP: If you choose to activate this option, it is suggested that you have a supply of pre-printed serialized labels so that you can label equipment which has no other serialized markings. You will then be able to research all work done on this serialized product. |
| • | If this option is not activated, you will not see the top half of the screen. |
Creating A Serialized Service Order
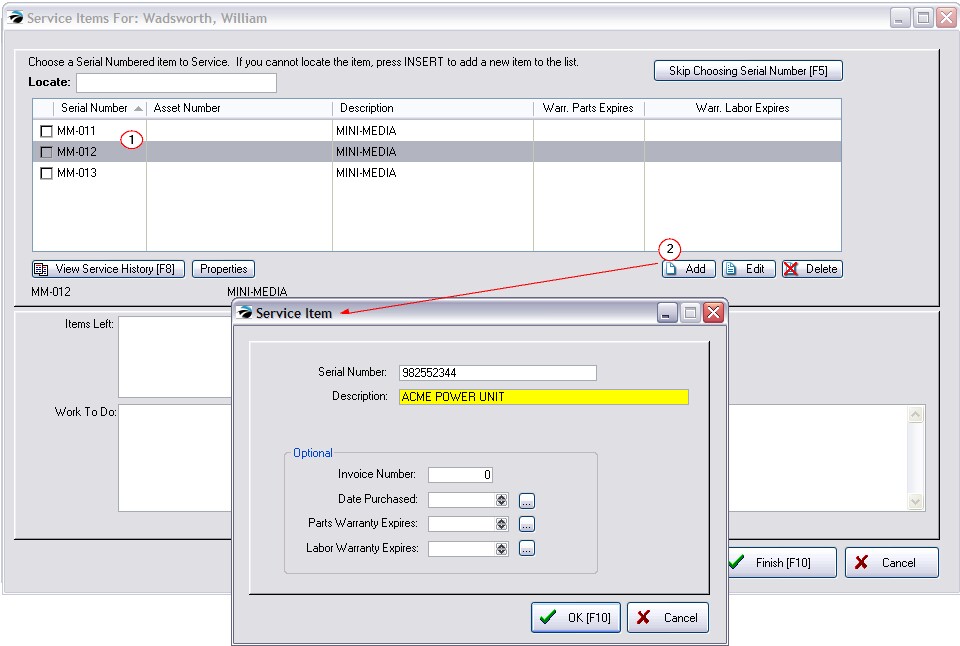
Upon creating a service order, the following screen will appear
The top half, which prompts for selection of a serial numbered item will only be visible if the "Track Serial Number In Service" option has been activated.
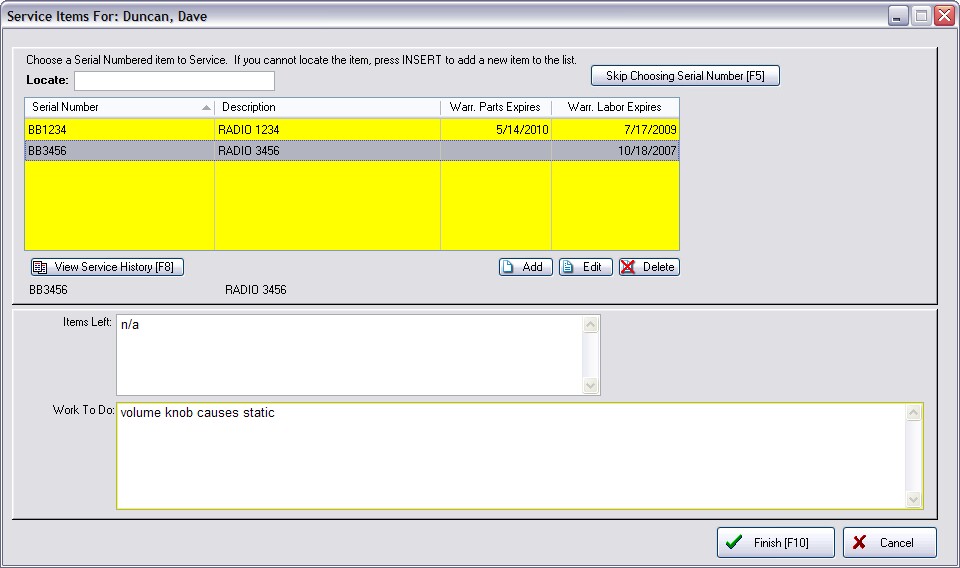
ADDING A SERIAL NUMBER
Skip Choosing Serial Number [F5] - if you do not want to add a serial number, you can bypass this step.
1) Use Locate to find the serial number needed. If not found,
2) Choose Add and fill in the details.
Locate
All Serial Numbers displayed here will belong to the selected customer. If there are many serial numbers, use the Locate field to find the specific item for service. Type a few characters and press Enter or CTRL-Enter. If not found, choose INSert key or the Add button to create a new one.
Enter Information
Fill in fields and/or make selections a needed. Then Press Finish [F10].
Select Item To Be Serviced - If the item to be service is already in the list, simply highlight the item. If not, choose Add.
You will be prompted to fill in the Service Item window with a minimum of a serial number and a description of the item.
| • | Serial Number - The serviceable item must have a serial number. The serial number could be one already engraved or attached by the manufacturer or it may be one which you assign to the product. It is suggested that you have a supply of preprinted serialized labels so that you can label items with no other markings.. |
| • | Description - A description of the model, type, or other identifying feature. |
The following fields are optional. If the item being serviced was purchaed from your store, the following information will already be recorded.
| • | Invoice Number - The invoice number on which the item was purchased. |
| • | Date Purchased - The date the item was purchased. |
| • | Parts Warranty Expires - The date when a warranty on parts will become ineffective. |
| • | Labor Warranty Expires - The date when a labor warranty will become ineffective. |
Choose OK [F10] when finished..\
Items Left
To assure that all peripheral items such a manuals, cables, or other parts are accounted for, fill in the note field with a list of other items left. This note will be printed on the service order so that the customer will have a printed record of items left.
Work To Do
Type the instructions for work to be done. However, experienced technicians have learned it is best to record the customer's description of problematic symptoms rather than jumping to conclusions about what needs to be done. Then, later service can be expedited as alternative causes are investigated and corrected.
View Service History [F8]
At any time, you may press F8 to view any prior service history for the selected item. Previous service notes may help in diagnosing current problems.
F10 = Finish
Press F10 at any time to complete the process and progress to the Review.
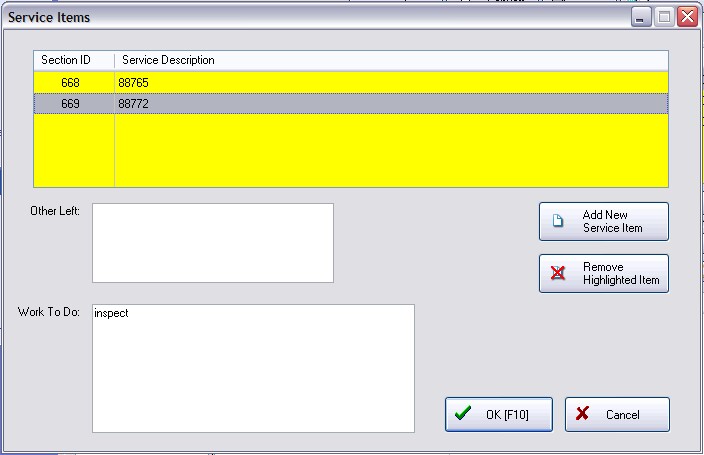
Review - Add More
A Review Screen will be displayed. (Optional) You may add additional serialized items to the same service order.
Note: on this review screen you will not be able to change the notes. You can do it later once the service order has been created.
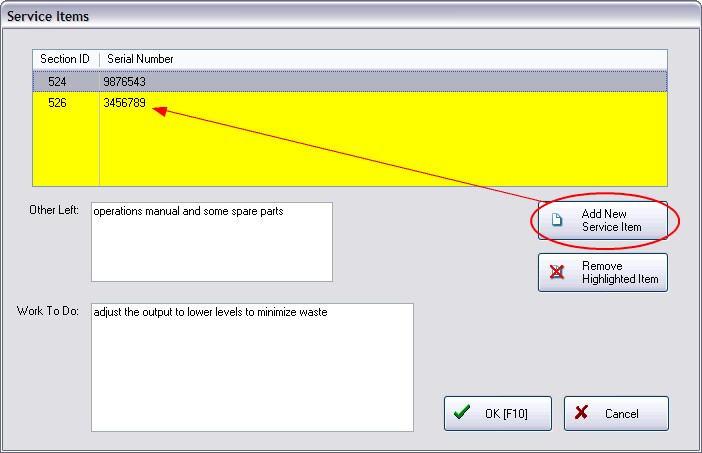
Add New Service Item - will return you to the previous screen for selection of another serialized item. You will be able to add separate service notes for the new item to be serviced.
Remove Highlighted Item - if you change your mind you may remove an item and not include it in the creation of the service order.
Section IDs will appear as sections or tabs on the service order. They are automatically numbered sequentially. In the above example, section 525 was removed by this button.
OK [F10]
A service order will be opened with the listed items on separate section tabs. (See Section Manager)