| Show/Hide Hidden Text |
The category is one of the most dynamic features of POSitive. All inventory is assigned to a category. Your listing of categories can be as general or as detailed as you need.
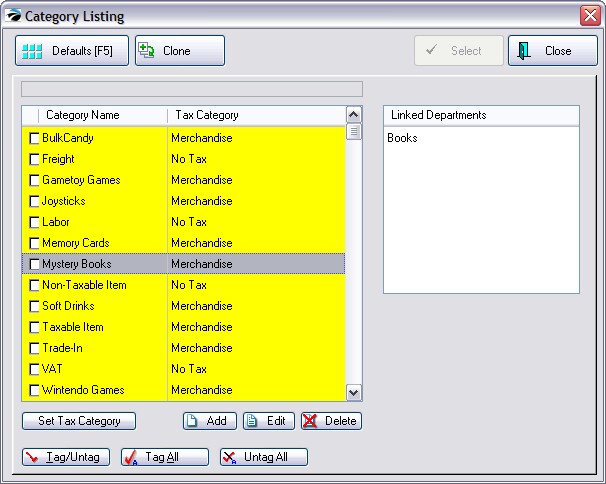
This is a listing of all categories in POSitive. From this screen you can
| • | Create a new category |
| • | Edit an existing category |
| • | Clone a category |
| • | Define or change category defaults |
| • | Activate automatic SKU generation |
| • | Re-set existing inventory defaults |
| • | Delete inventory items en masse |
| • | Move items from one category to another |
Because of the inherent power of the category, you should spend some time considering how to implement its features in your store. See What Categories Can Do
The Tag/Untag, Tag All, and Untag All buttons look like they would be handy for multiple tasks, but in reality they are only usable in conjunction with the "Set Tax Category On Tagged" function. |

How To Create Or Edit A Category
Click on Add or Edit and complete the category detail form. (See Category Detail Form.)
How To Clone A Category
Highlight the category which you want chosen
Click on the Clone button at the top
You will be prompted to give the new category a new name. You may also review and change any settings which have been carried over from the original category. This includes assigned User Defined fields, GL Account numbers, etc.
How To Re-Set Category Defaults
Category defaults are excellent time savers. When an inventory item is added to POSitive the defaults assigned to the category are automatically set on the new inventory item. See Default Settings for detailed information about their use and functions.
How To Update Existing Inventory With New Category Defaults
1) Highlight a category.
2) Choose Defaults [F5] button at the top left.
3) Change any of the current default setting(s) as desired..
4) Choose Reset Inventory [F5]. Then check mark only those items needing change.
5) Choose Process and confirm that you want to make changes. All items assigned to the category will be updated.
NOTE: Tagging of multiple categories is NOT applicable to this function.
DELETE BUTTON
Warning: Make a Backup. Deleting a category is a major modification of POSitive data. Be sure you make a backup before you begin.
NOTE: Tagging of multiple categories is NOT applicable to this function.
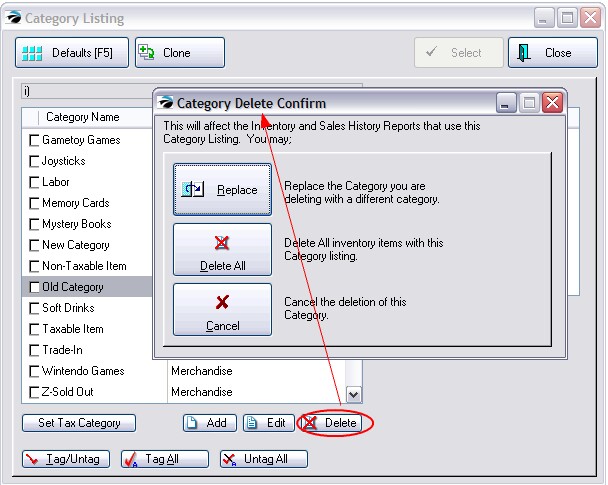
Your options at this point are to Replace, Delete All, Cancel.
| • | Replace - To Replace or merge is generally the best choice. This option transfers the items in the category being deleted to another existing category. |
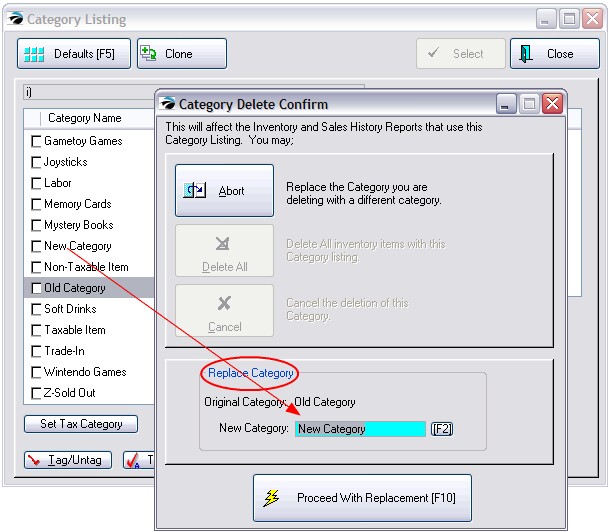
Before proceeding you should create the target category first. Then choose Replace and enter the name of the target category. Press F10 to process. The old category will be deleted and the attached inventory items will be reassigned
| • | Delete All - To erase all inventory assigned to the category. When you click on Delete All, a POSitive Alert gives you the option to cancel the process. |
| • | Cancel - Cancel the deletion of the category |
How To Delete A Category
1) Highlight a category.
2) Click on Delete.

3) Follow the prompts outlining your options. By selecting Replace you will be reassigning or merging inventory from this category to another one you designate.
4) By selecting Delete All you can erase all inventory items as well as the category. You will be prompted to confirm deletion of each individual item listed in the category.
Replace Categories
Warning: Replacing a category is a major modification of POSitive data. Be sure you make a backup before you begin.
The purpose is to transfer all inventory items assigned to one category and assign them to a different, yet existing category.
NOTE: Tagging of multiple categories is NOT applicable to this function.
How To Replace A Category
1) First, be sure the new target category exists.
2) Highlight a category.
3) Click on Delete.
4) Select Replace, you are able to merge all inventory from one category into another which you identify by name in the "New Category" field.
5) Choose "Proceed With Replacement [F10]"

Related Topics