Add Rows / Columns |
  
|
| Show/Hide Hidden Text |
Add Rows / Columns |
|
| Show/Hide Hidden Text |
If your vendor expands its product offerings of a certain matrix style, you can add additional rows or columns to link the new products to the same matrix.
First, find the original matrix and choose Edit. (How)
1) Open the Inventory Center 2) Choose the M icon to list all the matrix headers. (Top Center: A M T C U) 3) Highlight the matrix to be modified. 4) Choose Edit. This will open the "Matrix For: xxxxxx" screen. |
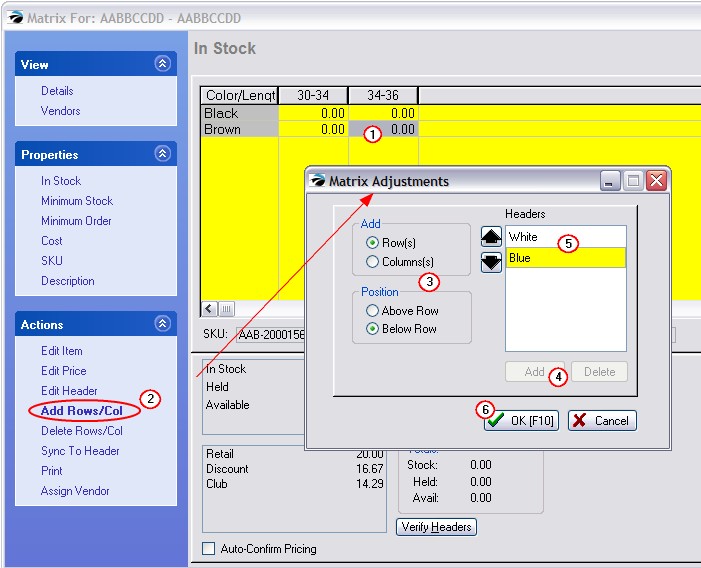
1) Highlight the last cell of the matrix. When you add a column or row, you can control the placement of by the location of the cursor. Typically you will want to start from the last entry. (see step 3)
2) Choose the "Add Rows/Col" button under Actions. This will open the Matrix Adjustments screen wherein you add additional names.
3) Select Row or Column as the type of entry to make.
Then select Position: Above/Below the cursor OR Right/Left of Column selected by the cursor.
4) Choose the Add button.
5) Type in the title of the row or column. Press Enter.
To add another row or column, choose the Add button again, type the title, and then press Enter again.
6) When you are finished, choose OK [F10]. In this pictured example, two new rows (White and Blue) will be added below the Brown row