Inventory items may track additional fields of information. These fields are named by you, the user, hence the term User Defined Fields.
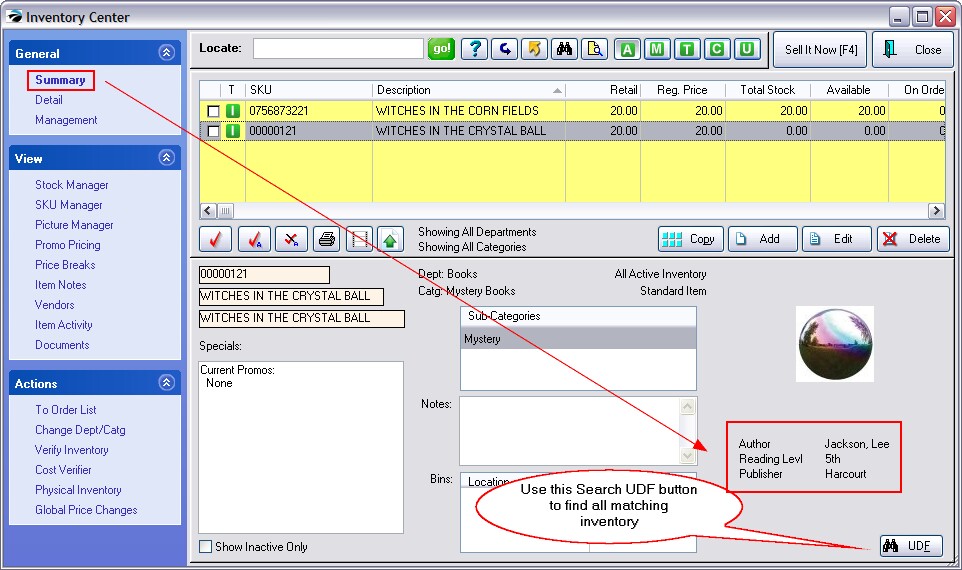
While browsing the Inventory list, you can see the contents of the User Defined Fields on the Summary view; and when searching for inventory, you can lookup all inventory of that field using the Search UDF button in the bottom right corner of the screen.
Advance Setup
Go to Maintenance: Definitions: User Defined Field Names - Inventory
Add as many fields as needed.
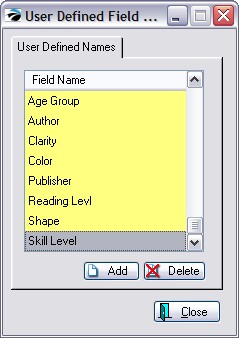
Note: You may add more fields to this list while editing the Category.
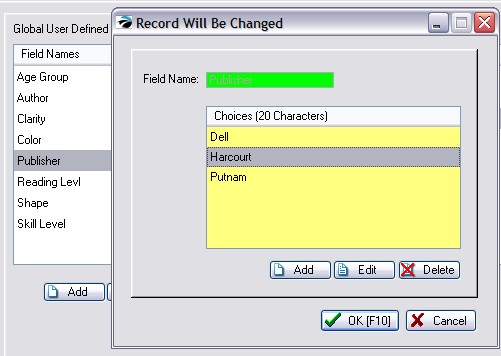
When adding a new User Defined Name, you may also add pre-defined selections.
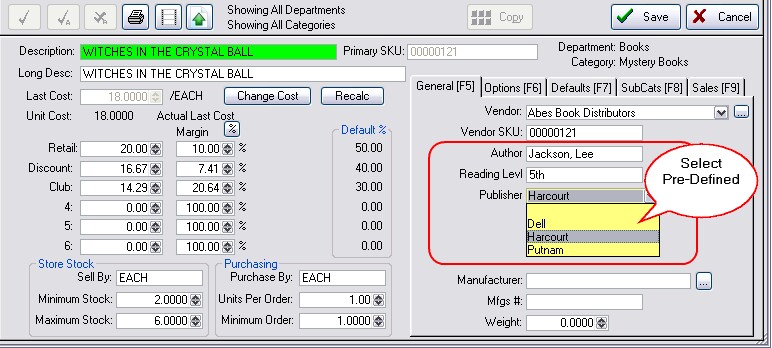
For example, when adding the name Publisher, you can enter the names of specific publishers. When selecting the user defined names for a new inventory item, these pre-defined names can be selected from a pull down menu.
Assigning User Defined Names To Categories
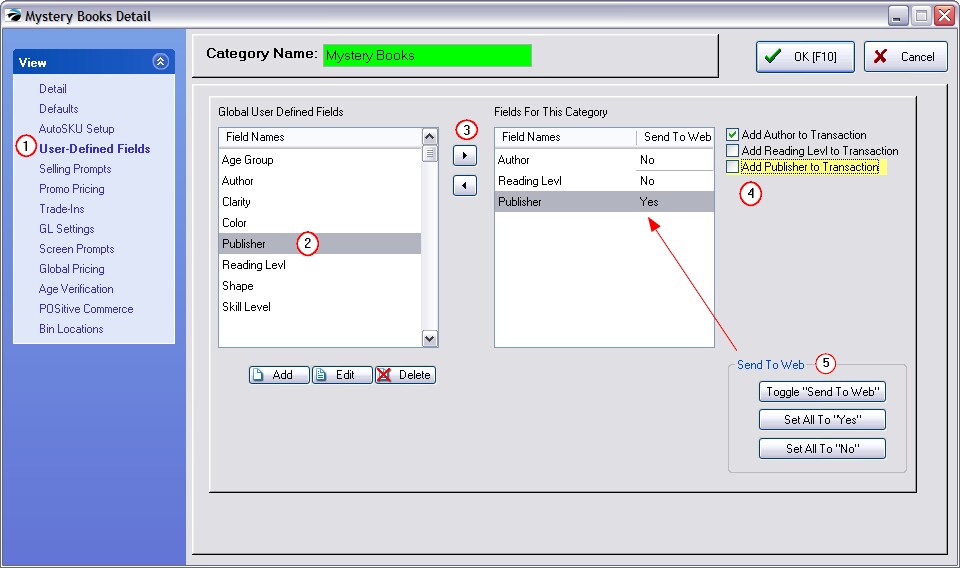
The category setup allows you to select just those user defined fields appropriate for the category.
1) While editing a category, choose User Defined Fields from the menu on the left.
2) Highlight the desired Global User Defined Field. (You may add new Field names as needed.)
3) Using the arrows, transfer it to the Fields For This Category. A maximum of six (6) user defined fields can be assigned to a category.
4) The contents of the field can be included on the invoice. Check mark those fields to be printed on the Transaction.
5) The contents of the field can also be visible on your e-commerce web site. Select YES for the fields to be posted to the web.

Setting User Defined Fields In Inventory
The Summary screen displays the User Defined fields and their content. In the lower right corner is the Search UDF button
Edit The Inventory Item
When you edit the inventory item, you enter the specific details into the appropriate fields on the General [F5] tab. Fields with choices have a drop-down to select the pre-defined values.
See also Search UDFs