|
Tender Button |
  
|
|
Tender Button |
|
The Tender button on the Touchscreen is usually larger than other buttons. You select this button when you are ready to take payment.
This will open a Balance Due screen with options for choosing the tender type and payment amount.
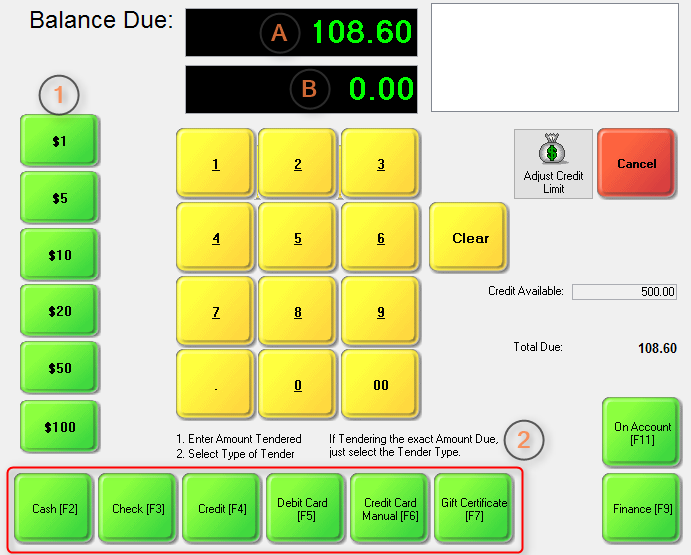
| • | If the customer is paying the Exact amount due, select the payment type from the bottom row of green buttons. |
| • | If the customer is paying in Cash or paying more than the amount due, choose (1) the amount and then (2) the payment type. |
Version 6 tender screen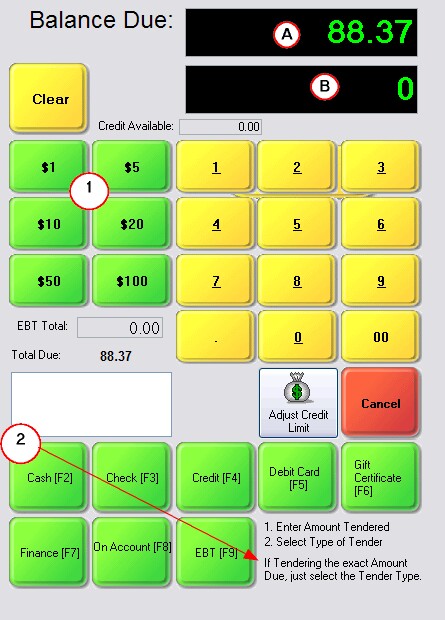
A) the total Balance Due on
B) the current amount taken as tender
If receiving Payment in Cash, choose a pre-defined denomination (1) and then choose the Cash [F2] button.
You may click on the pre-defined denominations multiple times to compound the amount being tendered. For example, clicking on the $20 three times and once on the $5 buttons will yield $65.00. The yellow buttons will add cents to the amount. You are limited to two clicks on the yellow buttons for the 10 and 01 fields
The Clear button will erase the entry in (B).
How To Handle Split Tender
You may use multiple payment types, known as splitting the tender, to pay for purchases. For example, the customer may want to put some of the charges on a credit card and pay the rest by check.
1) Select the amount to be charged to the credit card (clicking on the $20 three times and once on the $5 buttons will yield $65.00).
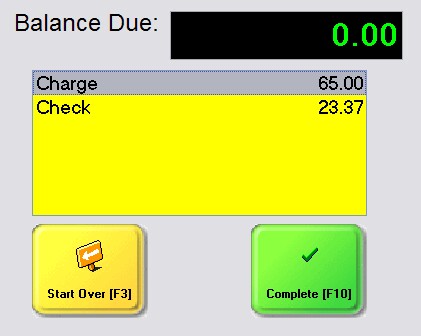
2) Then choose the Payment Type (Credit [F4]). This will then show a remaining balance of 23.37, for example, which is the difference of the original charge and the $65.00 on credit card.
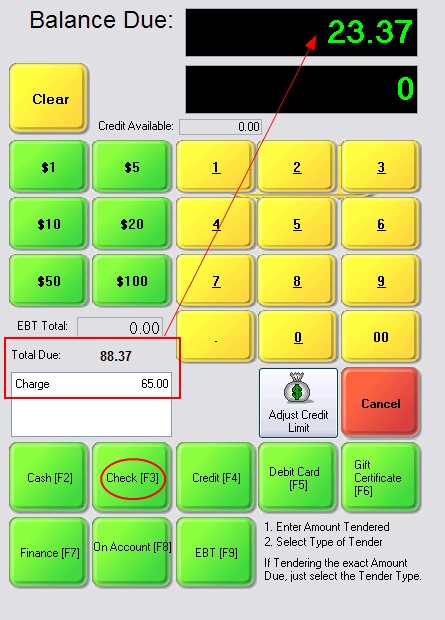
3) Simply select Check [F3] and the balance will be paid by check.
You will be able to confirm that the amounts are distributed correctly. Choose "Start Over [F3]" and you can re-set payment types.