Not a Feature of Standard Edition
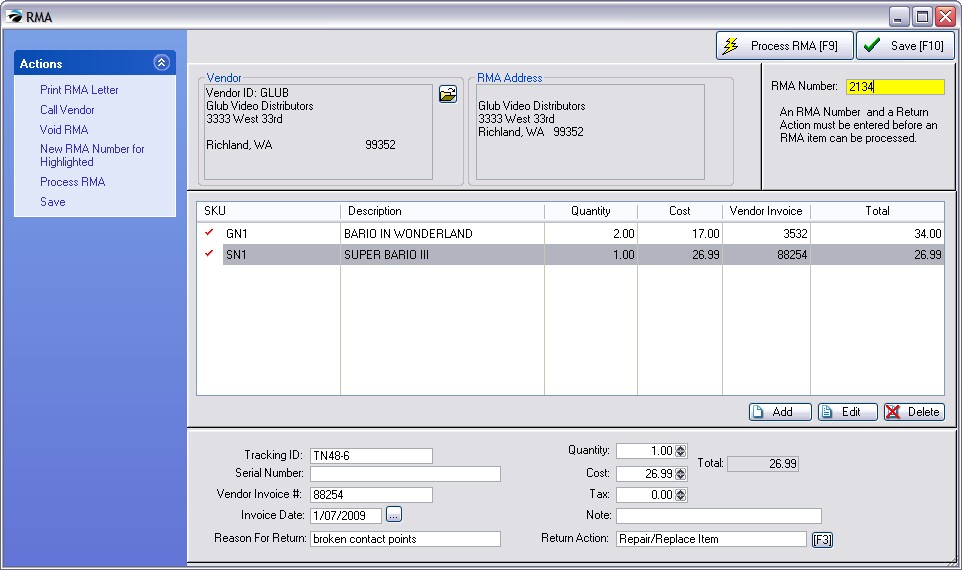
To open this screen, go to Purchasing: Send To Vendor: highlight a vendor and choose Process RMA.
Items were added to this RMA screen through processes described elsewhere. (see Process Customer Returns and Process Other Returns)
You may choose to manually add additional items using the Add button bottom right.

How To Send Out RMA Items
Before the any item in this list can be sent back to the vendor...
1) Enter "Reason For Return" - Each item needs to be edited to state why it is being returned.
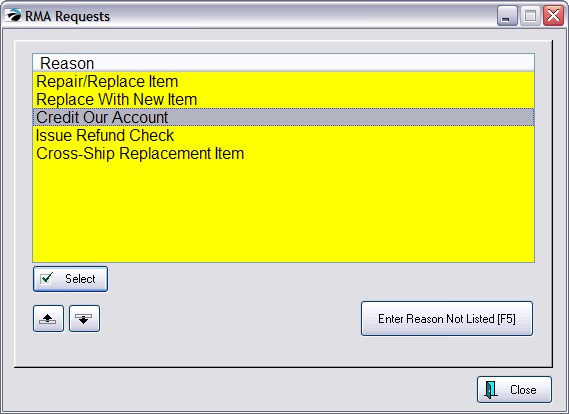
2) Choose a Return Action appropriate to the item. Use the Lookup [F3] button to list the options. You may select an action not listed by selecting Enter Reason Not Listed [F5]. Note: this list can be modified by management under Maintenance: Definitions: RMA Returns.

3) Once you select a Return Action the item will be tagged or checkmarked to be included in this RMA shipment.
Continue editing each item on the list.
4) This collection of items needs an RMA number. Enter an RMA number from the vendor in the RMA Number field. This number will apply to the items which have been tagged.
5) (Optional) The Call Vendor button gives you necessary vendor contact information so you may call the vendor for the RMA number or discuss other related issues.
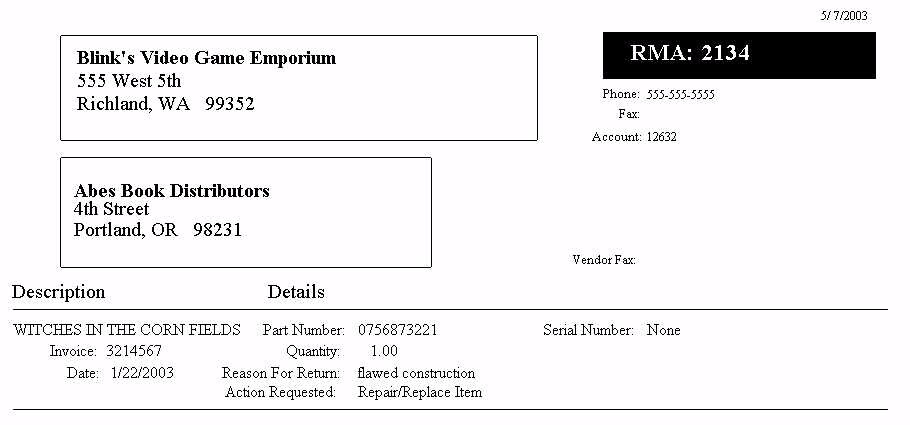
6) Print the RMA Letter. Some vendors want you to fax a copy of the items to be returned. You may print an RMA Letter and include it with the shipment. Press [F7] Print RMA Letter. You may want a copy for your own files.

7) Save For Later - You may save your changes for later until you add more items to the list of RMAs or while you wait for RMA numbers or more information..
8) Process RMA - Once the above required steps have been taken, this will process the tagged items. This RMA then becomes a part of RMAs In Transit. The items can be accessed again in the RMA Receiving List. Items not checked will remain for later processing. One exception to this rule are items flagged as Return For Credit Only which will be removed entirely from the cycle and the AP portion of POSitive will be adjusted accordingly.
Void RMA - To cancel all items listed.
New RMA Number For Highlighted
A vendor may prefer that some products be sent under separate RMA numbers. The RMA number in the upper right corner will apply to all items in this list. You will need to highlight such items, click on New RMA Number button, and a new RMA form will be created with a different RMA number.