|
POSitive Mobile |
  
|
|
POSitive Mobile |
|
POSitive Mobile - an application that enables Windows Mobile devices to connect in real time to a POSitive database to do price lookups and simple orders away from the cashier station, a great solution for sales of bulky items.
POSitive Mobile requires the installation of one of the Windows Mobile platforms on the mobile device: Pocket PC 2003, Windows Mobile 5 or Windows Mobile 6. You must also install Microsoft Dot Net Compact Framework 2.0 and the most current MS SQL Compact drive.
When you launch POSitive Mobile for the first time, you will see a prompt, which asks for configuration details: SQL Server, Login, Password, and Database.
POSitive Mobile makes a real-time connection to your SQL database and you’ll enter your set-up information on this screen.
You’ll also notice a printer tab below. This will be used for advanced printer settings in a future release.
You must complete the basic configuration before the program will let you continue.
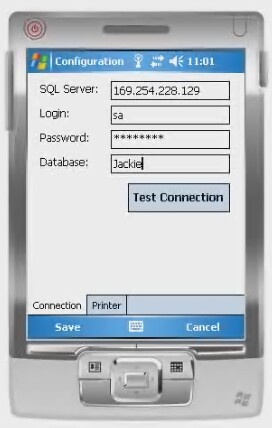
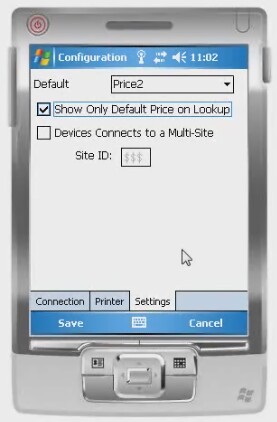
The initial release of POSitive Mobile will require you to enter the IP address of your SQL server and then the log in, password and name for the database you wish to connect to. Next, press the Test Connection to confirm that you can connect to the database. If the test is successful, you’ll see another tab appear called Settings. The setting tab will let you choose one of the price levels you have defined in POSitive as your Default price on the device, and you can select to show only the default price when doing a look up. POSitive Mobile will also support Multi-Site, but we will not show that feature at this time. Click on Save to continue.
This is the screen you will now see on start up. We’ll add more options as POSitive Mobile is developed further.
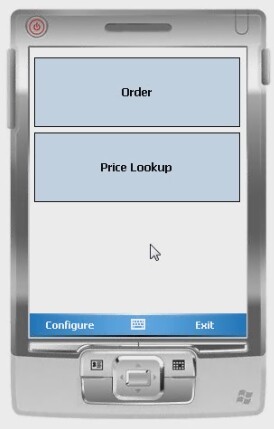
Right now we can create an order and save it to POSitive and perform a price look up by entering the SKU.
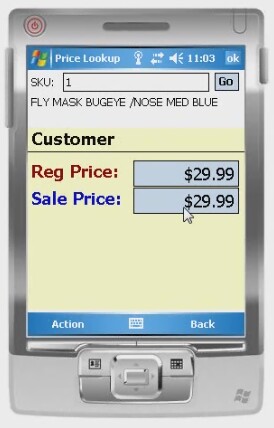
Notice that the Default Price level is prominently displayed. You’ll see both the regular price and a sale or promo price if applicable. You can also click on the Action tab and change to a different price level. You can also show all prices available as a grid.
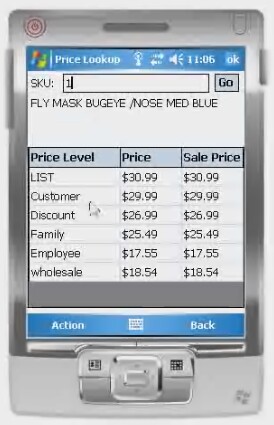
By the way, the price grid will also display if you don’t select a default price level during the initial set up.
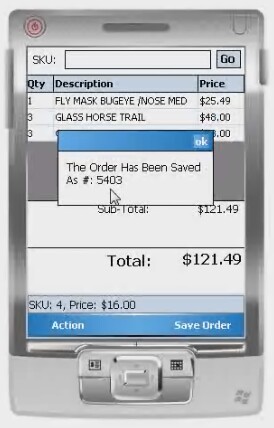
Let’s go back to the main menu and select order. This will let you do “line busting” or work with customers away from a register. As we add items, notice that we can use the same “quantity slash SKU” to quickly enter multiple items as you do on the register.
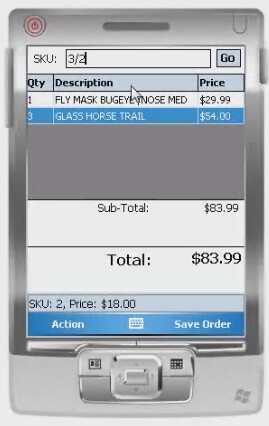
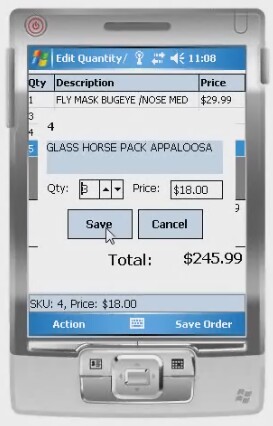
Our emulator doesn’t show it, but most Windows Mobile devices will have a keyboard that will let you manually enter information. Notice that down below we show the item SKU and unit price. You can also double click on an item and edit the quantity and price.
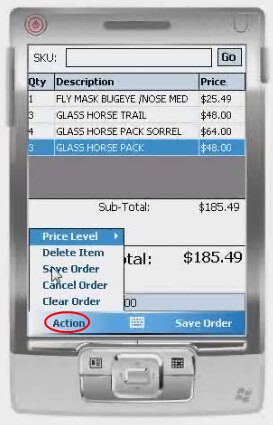
You can also change price levels… delete items, or clear or cancel the order. When you are finished you click on Save Order, confirm your action and the order is saved to POSitive as a suspended order.
You also have the option to print a receipt to a portable printer. In our example, the receipt has a time/date stamp, order number, a listing of items, total price and the order number as a barcode that can be scanned at the register to recall the order.
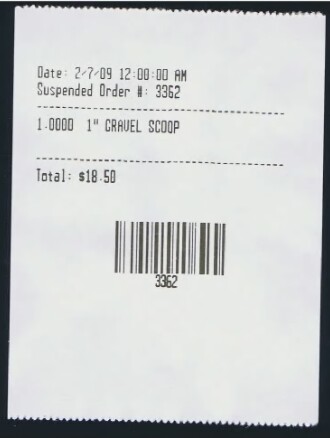
Since we’re not actually connected to a printer I’ll click on No and you can see an order confirmation message.
This has been a quick overview of POSitive Mobile for the Windows Mobile platform. Please contact your dealer or POSitive Software if you have further questions.