| Show/Hide Hidden Text |
The Site Manager is critical to overall site management.
This is accessed and reviewed only at the Master site. Any Security settings must be activated by the master site and will be applied to remote sites.
While running the Master Site, go to Maintenance: Definitions List: Multi-Site Manager
Add/Edit Sites
Sites must be defined by the Master Site. Choose the Add button.
|
Enter the Name and Address of the site.
IMPORTANT: Registration of the software is based upon this information. The name and address must be precisely entered.
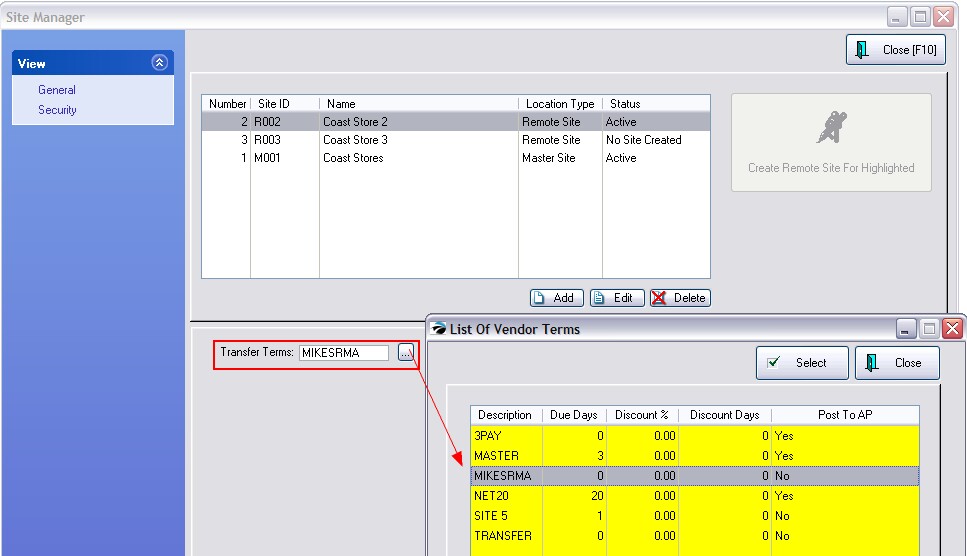
| • | Number - generated by POSitive. Simply indicates the sequence of sites added. |
| • | Site ID - a unique code generated by POSitive. M001 is always the master site. R001, etc indicates a remote site. These codes are used extensively throughout the program to properly assign customers, items, vendors and other features. |
| • | Name - name of site |
| • | Location Type - either a master or remote site |
| • | Status - The button at the far right changes the status of No Site Created to Active. This should be done only when you have finished all the preliminary setups. (Contact POSitive or your Dealer for specific information.) |

Set Transfer Terms
If you choose to transfer inventory between sites, you will want to select a "Vendor Term" for handling the generated purchase orders.
Once the Site is defined select a Term to be used for purchase orders transferring products between sites.
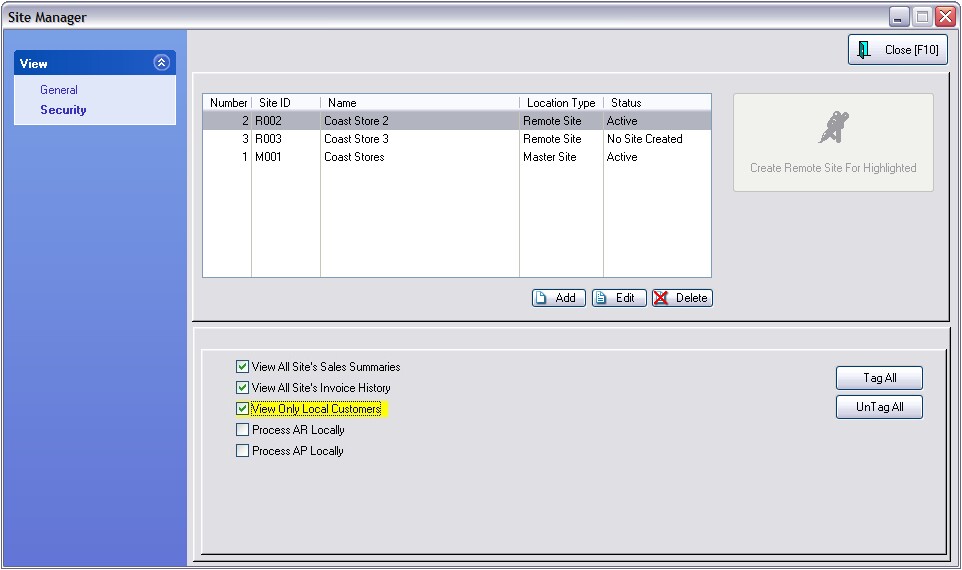
Site Security Settings
| • | View All Sites' Summaries - Run reports for specific site (usually set for master site only) |
| • | View All Sites' Invoice History - Review Invoice History for site (usually set for master site only) |
| • | View Only Local Customers - the site will only see customers added at that site |
| • | Process AR Locally - the site will handle all Accounts Receivable internally |
| • | Process AP Locally - the site will handle all Accounts Payable internally |
TIP: Review the needs of each site and set switches as necessary.
