| Show/Hide Hidden Text |
A matrix is a two dimensional grid consisting of rows and columns. The matrix organizes and displays related inventory items which differ by size, color, style, or other characteristics.
A matrix is typically used for managing articles of clothing such as shirts, shoes, and hats or hardware such as furnace filters, light bulbs, nuts and bolts, etc. But the matrix could be used for most anything.
POSitive...
| • | auto-generates an unlimited number of matrices, |
| • | allows you to expand or contract the matrix size using Add and Delete Rows/Columns, |
| • | flags discontinued items no longer available from the vendor, |
| • | supports open cell editing of cost, price, description, and |
| • | simplifies buying and selling of matrix items. |
| • | displays as single item on web-sites but automatically allows for color/size selection. |
Matrix Creation
1) Before creating a matrix, be sure to check the current Matrix Sequence Defaults under System Setup: Inventory.
2) The matrix is created by selecting Add on the Inventory Center and choosing Matrix as the type (at far left).
3) After selecting an appropriate department/category for the item being sold you fill in a normal looking inventory definition form. This definition is the "basis" for multiple items which will be generated as individual color/size items. After setting all the options desired, press F10. (see Matrix)
4) You will then select or create a matrix header which defines the names of the rows and columns of the matrix. (see Matrix Definitions)
5) Upon selecting a matrix definition, POSitive then creates the matrix group of individual items, one for each cell at the intersection of the row/column.
Here is a simple matrix of just 4 rows and 5 columns, but it could be as large as 50 x 50 cells.
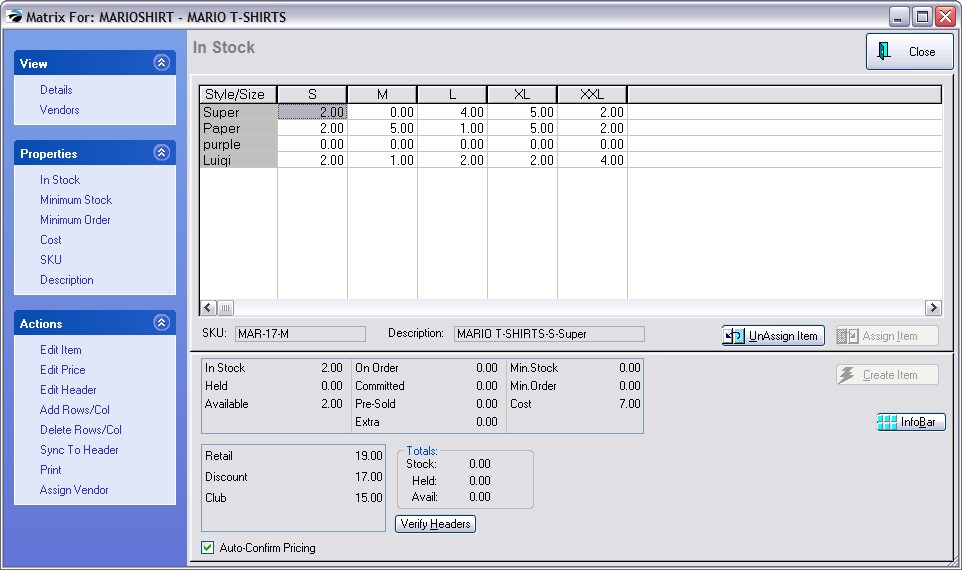
Once the matrix is generated, you may edit the contents of each cell, changing the costs, pricing, description and SKU.
"Non-useable" individual items, are displayed as XXXXX in a cell. These color/size combinations which are not manufactured or available from the vendor, can be removed by dragging the cell to the trash can icon.
If POSitive unexplainably creates matrices with nothing but XXXXX in all or some of the cells, there is a conflict with SKU generations because the SKUs to be generated already exist. RESOLUTION: To resolve this issue, go to Maintenance: System Setup: Inventory At the far right look for "Desc/SKU Length = 3" Increase the number of characters from 6 or 8. This will now generate SKU numbers which will no longer be in conflict with existing and future SKUs. |
Using Matrix Inventory
One advantage of the matrix is its consolidation of all related items into a simple and convenient screen for invoicing and inventory control purposes.
But you still have access to the items as single line item entries.
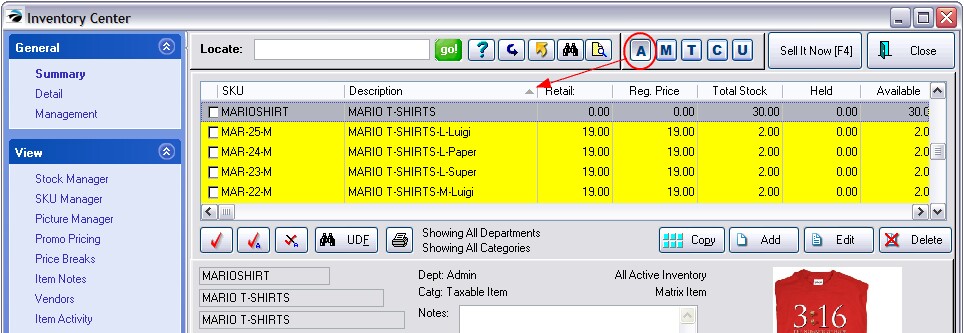
In the picture above, the matrix header is highlighted. Note the absence of the -M in the SKU. The stock count for the header is the total in stock of items linked to the matrix header. All of the related individual matrix items as sorted alphabetically by description.
To edit an individual item, highlight it, and choose the Edit button.
You can edit each item individually, however, they are still controlled by the matrix header. For example, you can change the description, SKU, cost and price, and notes for an individual item, but the vendor for the item is controlled by the matrix header. (see Sync Matrix Items To Header)
Alternate View
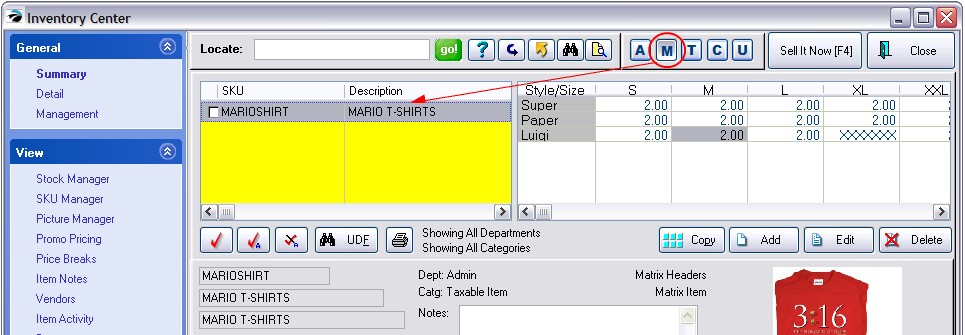
Another way to view the matrix is to choose the M (Matrix) icon at the top of the list.
The matrix header is displayed at the left and the individual items are in a grid view at the right. To edit an individual item, highlight it, and choose the Edit button.
Matrix Modification
You may modify the structure of the matrix by adding or deleting rows and columns. This makes POSitive™ flexible as your vendors expand or limit their product lines.
Although each item's SKU is generated by POSitive™ following a pattern you designate in System Setup: Inventory, you may easily exchange the SKU for the pre-labeled barcode on the inventory item.
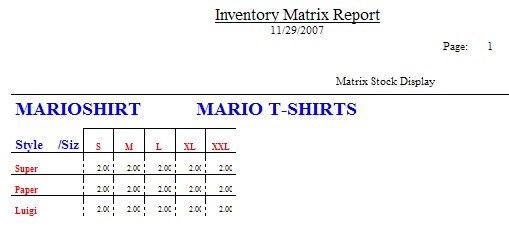
Print - You may print a report of the matrix to show stock counts, costs, order quantities or selling prices. The report appears in a grid format as shown here. (Printed purchase orders may also include this grid format or use the standard line item format.)
Selling Matrix Items
Selling matrix items is no different than selling other inventory items, just scan the barcoded label.
However, if you find the item through the Locate Inventory Item, you may choose the individual item directly or view the entire matrix and select the item.
While creating the invoice, choose Lookup Item. Highlight the desired item and press Enter.
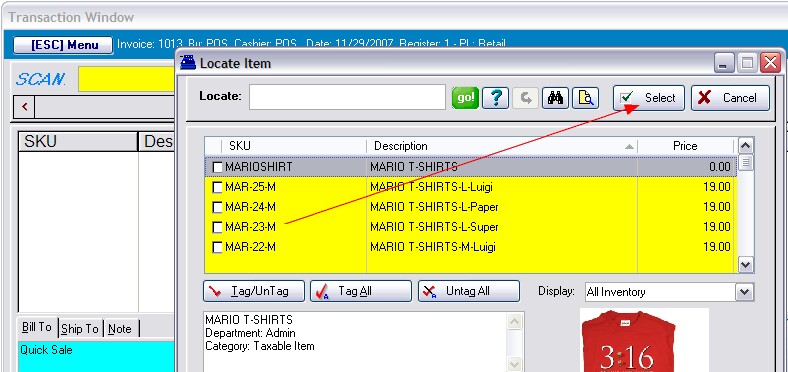
If you Select the Matrix Header (as highlighted in the picture above) instead of the individual item, you will be able to select from a grid which also shows the in-stock count of each item.

Purchase Orders
You have several choices of using the matrix grid or selection of individual items for ordering and purchasing products from your vendors. (see Matrix On Purchase Orders)
Each matrix inventory item is known by the vendor as a specific SKU which can be set per item. However, vendors will readily be able to identify items by the description generated by POSitive™ because it includes the column/row or color/size information.