This is a GLOBAL setting for all stations, but can be activated for just certain types of transactions, i.e., Invoices, Layaways, Orders, Service Orders, or Quotes.
When activated, every designated transaction will prompt, either at the start or end of the transaction, for the information defined on this screen. The captured information will saved as part of the invoice or transaction and can be printed on the invoice if desired.
This is an excellent tool for gathering and recording more information about your customer or your services rendered.
For Example
One application of this feature is for use in auto repair shops to track vehicle information or in airport Duty Free Stores which require documenting the customer's flight and seat number to qualify for purchasing without paying tax.
System Setup
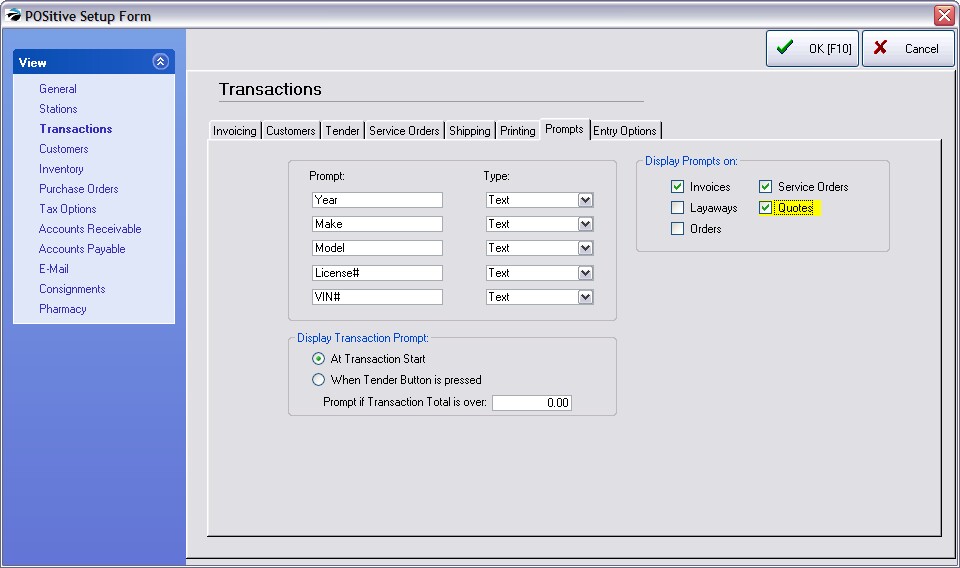
Go to Maintenance: System Setup: Transactions: and open the Prompts tab.
Informational Promptings
Prompt - In the Prompt field enter a word or phrase to remind the cashier of the information needed.
Type - In the Format field select one of the following:
| • | Text - a single line of text |
| • | Date - entry must be a date |
| • | Note - (only available for the first prompt) an extended text field in paragraph form. |
Display Transaction Prompt
| • | At Invoice Start - fill in prompts before adding products to the invoice |
| • | When Tender Button Is Pressed - choosing to tender the invoice |
| • | Prompt If Invoice Total Is Over: - enter a dollar value |
Display Prompt On
| • | Invoices |
| • | Layaways |
| • | Orders (NOTE: these are optional modules for SE and Full versions) |
| • | Service Orders |
| • | Quotes |
Create An Invoice Or Quote
For example, when creating or tendering the invoice, one is prompted for each field of information. Type the information. You may choose Cancel if it is not needed.
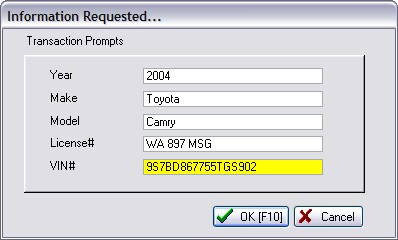
TIP: Consider creating an Invoice Button so that if the Invoice Prompt is skipped or incorrectly entered you can re-open this Invoice Prompt. (see Invoice Button Definitions)
Invoice Printout
Once the invoice is processed, the Invoice Prompts can be printed on the invoice either at the top above the customer information or at the bottom of the invoice.
NOTE: you will need to design the invoice layout yourself.
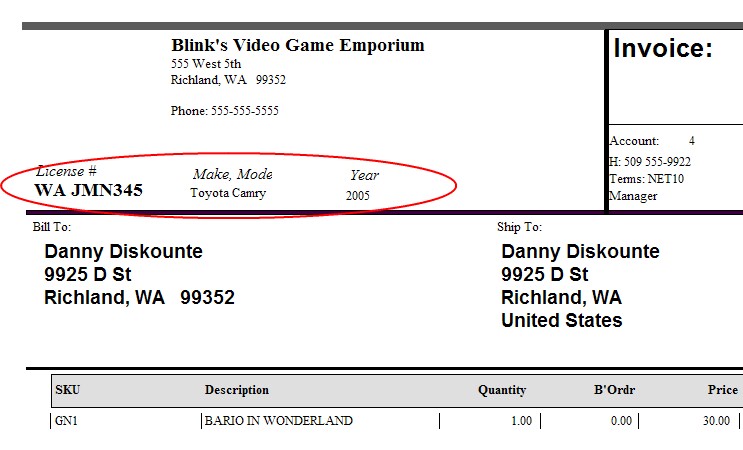
TIP: To include the information on a 40col invoice printout, you will need to modify an invoice form to include the Invoice Prompt 1, 2, 3, 4, 5 information
Invoice History
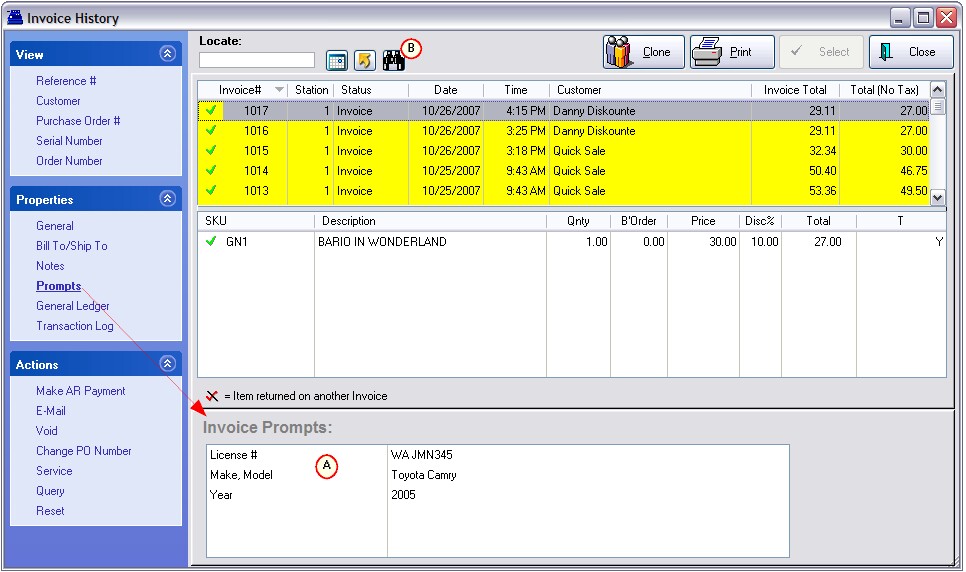
Invoice History gives ready access to the captured information in two ways:
A) visible on the Invoice Prompts panel, and
B) searchable by the Invoice Quick Find button at the top of the Invoice History screen. (see Invoice Quick Find)
How To Modify The Invoice Form
Printing of these Prompts on the Invoice is not automatically available. You first need to edit the Invoice Layout form and make the necessary additions. Specific directions are given elsewhere, but the basics are as follows.
Open the Report Editor and select the STANDARD Invoices form
1) Before making any modifications, go to File: Save Layout As and give it a name such as "WithPrompts". You should never make changes and save the layout again as the Standard, because it can be overwritten when upgrading versions of POSitive.
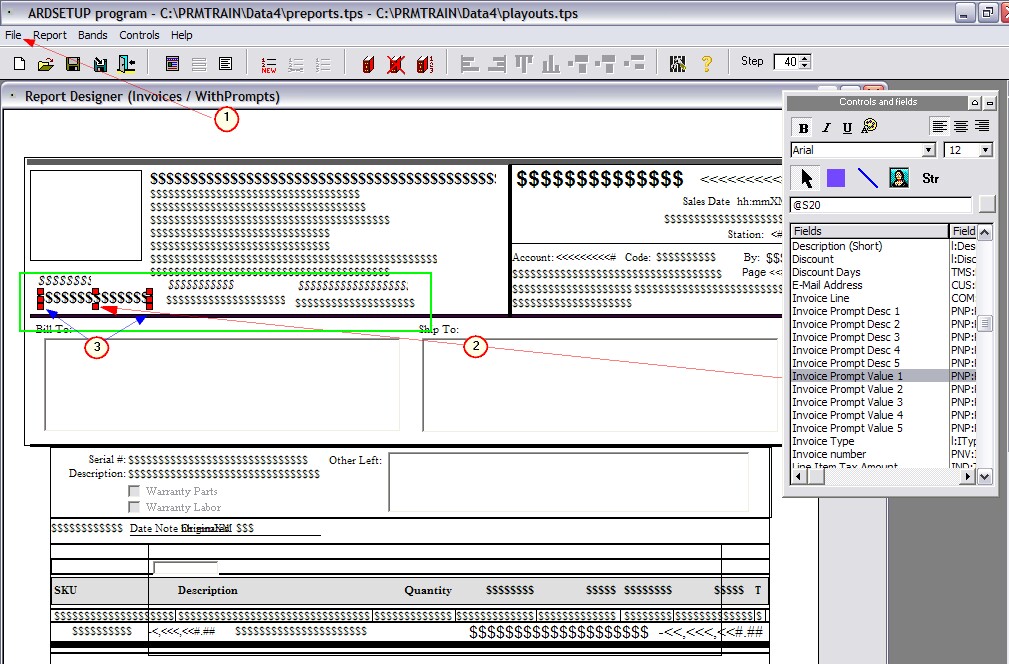
2) Drag Invoice Prompt Description and Invoice Prompt Value fields into the (green) section below the company information. Repeat for each Prompt to be printed.
3) (Optional) Right-mouse click on the selected field and choose Control Properties. Here you can change the font and other attributes of the field.
4) Save your work.
STATION MODIFICATIONS
The changes to the form will not be automatically used when you print invoices. You must modify your station settings. Go to Maintenance: Station Settings: Printers/Email,
Select Invoice on the left and choose this WithPrompts layout as the form to use with Invoices. Repeat for Service Orders, Quotes, etc. as needed.