EMV Tendering Screen
When Vantiv or other EMV payment processing is selected in version 6 the same tender screen is used for Register, Invoice and Touch Screen layouts.
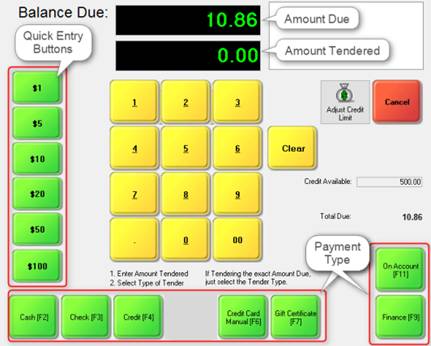
The green buttons on the left side are for quickly entering a dollar amount, such as $20. The yellow buttons in the middle are for entering in dollars and/or cents, such as $11, or $10.90. The green buttons along the bottom are for payment type. Is the customer paying by cash, check or credit card? Or, maybe the purchase is going on their house account or to a finance company? By the way, if the customer is paying the exact amount, you can skip having to enter the payment and simply press the tender button you want.
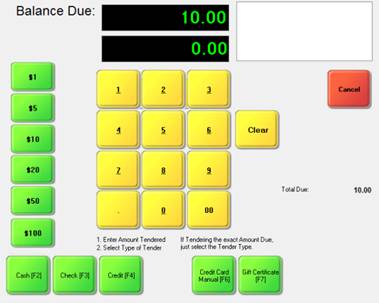
The payment buttons can also be hidden based on the type of sale you’re making. For example, you may hide the On Account and Finance buttons if you’re making a “quick sale” and don’t have the customer’s name.

It is important to note that the position and order of the tender type buttons is preset, and this affects how they must be defined in the Tender Definition screen.
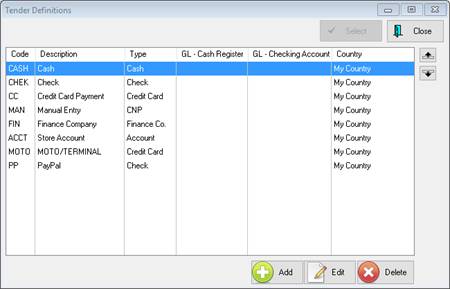
Go to Maintenance, Definitions List, Tender, Tender to add or edit Tender Types.
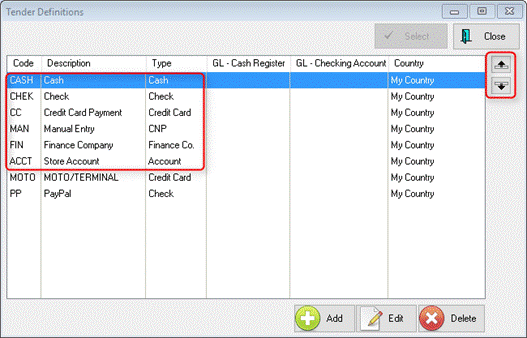
Please note that Cash, Check, Credit Card and Manual Entry must be listed in the order shown above. If not, they will not be correctly linked to the Tender Screen buttons. To change the order, highlight a Tender and use the Up/Down arrows on the right side to move. Click the Add button to create a new tender type or Edit to modify an existing one.
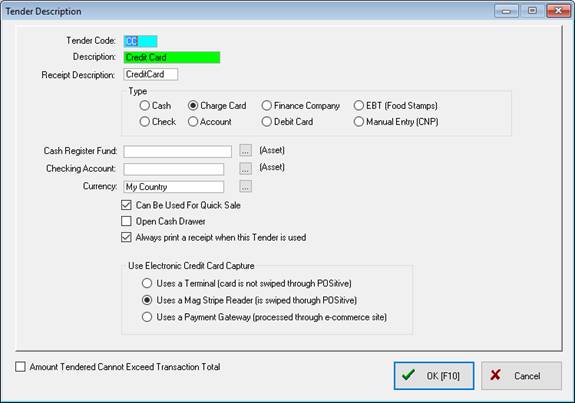
In our example above, this is what a Credit Card tender definition look like. If you are using Vantiv/Mercury Payments there is no need to have separate tender definitions for Visa, MasterCard or other credit cards. Additional information on “Type” and accounting setup may be found in your help file, or ask your dealer or POSitive support for assistance.
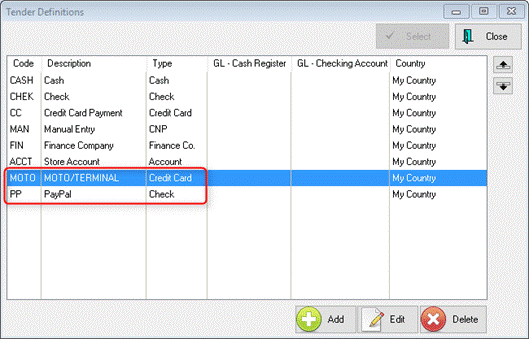
If you need to have more than one credit card option, for example if you have a stand-alone terminal or a Smartphone app you can use if you lose your internet connection, you may add those options at the bottom of the Tender list. The same goes for other Tenders, such as PayPal, which can be assigned to Check.
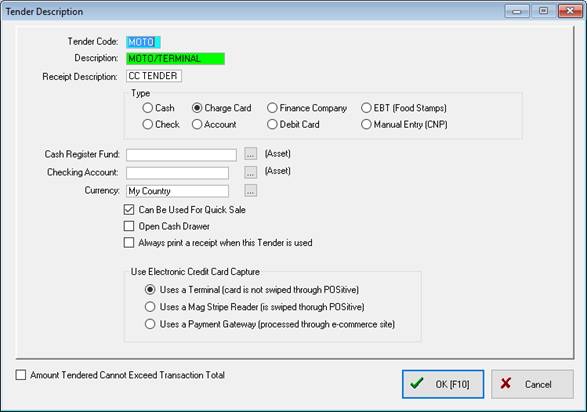
In our example we’ll be using a backup terminal. The Type is set to Credit Card and the Credit Card Capture is set to “Uses a Terminal (card is not swiped through POSitive)”. You would also use the same setting for a Smartphone app.
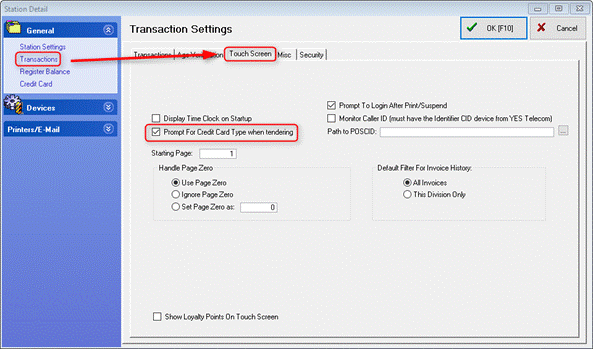
Next, go to Maintenance, Station Manager, select your Station and Edit. On the right menu select Transactions and click on the Touch Screen tab. Put a check next to “Prompt For Credit Card Type when tendering”. Click OK to save.

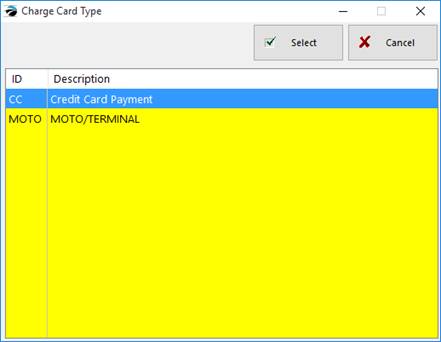
Then when you take payment and select the Credit Card tender, you’ll be given a list of options to choose from. Select your option to complete the transaction.
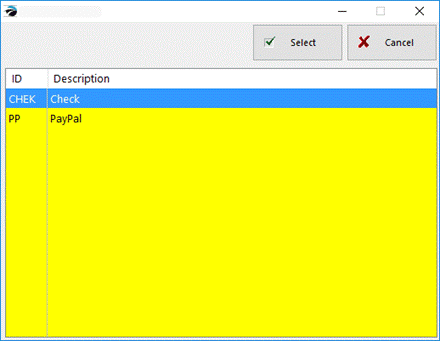
If you select Check you’ll see the tender types assigned to that category. In our example we show PayPal as an option.
Please contact your dealer or POSitive support if you any questions.