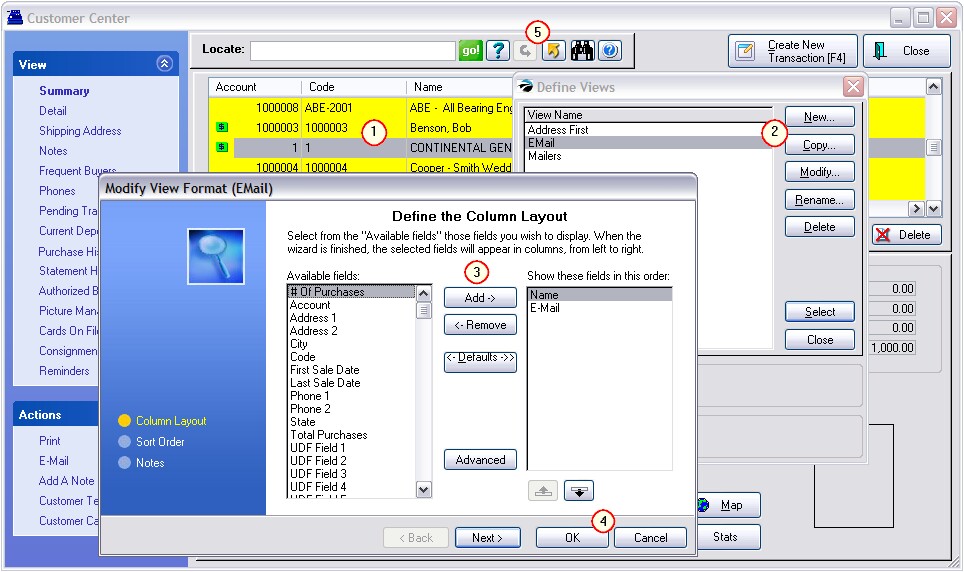
You may choose to Export select customer data. This is a useful tool for preparing mailing lists and for sharing data with other programs.
Step 1
Open the Customer Center and Right-Mouse-Click on a customer record.
Choose Define View

Step 2
Create a New View or modify an existing one.
Step 3
Determine which fields should be displayed. Transfer current fields out of or into the right hand box.

This is a list of customer fields from which you can choose.
# Of Purchases
Account
Address 1
Address 2
Cell Phone
City
Code
Credit Limit
Current Owed
Customer Category
E-Mail
First Name
First Sale Date
Last Name
Last Sale Date
License
Name
Over 30
Over 60
Over 90
Phone 1
Phone 2
Sales ID
State
Terms
Total Purchases
UDF Field 1
UDF Field 2
UDF Field 3
UDF Field 4
UDF Field 5
UDF Field 6
Zip Code
You may use the repositioning buttons to define sequencing and other functions as needed.
Step 4
Choose the OK button to save your definition. On the Define Views screen choose SELECT and the Customer List will be updated.
Step 5 To Export Data
Final Step: To export the listing as now defined, select the Send To button and you can choose your output file and format. (see Send To)
When FINISHED - Reset View
When you have finished you can reset the customer list by repeating Right-Mouse-Click on a customer record.
Then select Reset View. This will restore the default settings.
