|
POSitive Report Writer |
  
|
| Show/Hide Hidden Text |
|
POSitive Report Writer |
|
| Show/Hide Hidden Text |
This is currently the access to "Report Writer" forms which is only 1 of three types of designable forms.
There are two other sources of form design which you should be aware of to determine which will best meet your needs
With this feature you can design and run your own reports. There are some restrictions on employee and company access to the report designer. Contact your Dealer for more information.
Technical Note: Each workstation MUST have Net Framework 3.5 installed for Report Writer to function properly.
Accessing New Reports
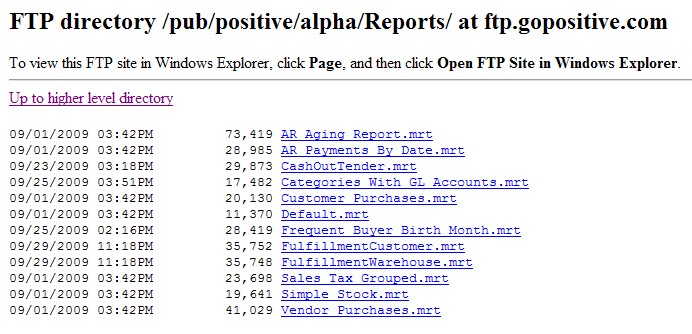
From time to time new reports are available for your use. Currently these new reports are stored on
Steps For Obtaining Reports
It is assumed you have internet access and want one of the listed reports.
1) go to ftp.gopositive.com/pub/positive/alpha/reports
2) Right click on a desired report and choose Save Target As. Select a location and save the report.
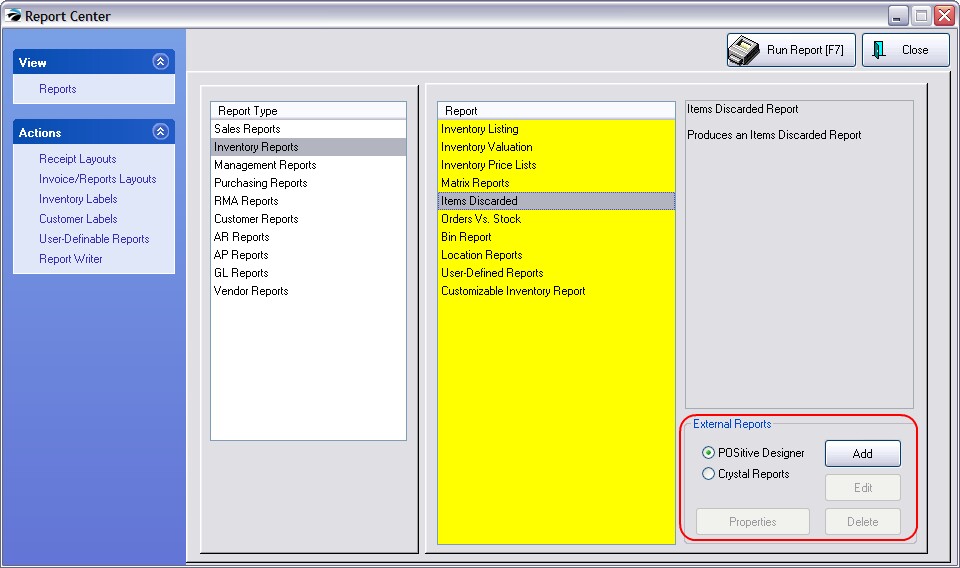
3) Go to Report Center and choose Add POSitive Report
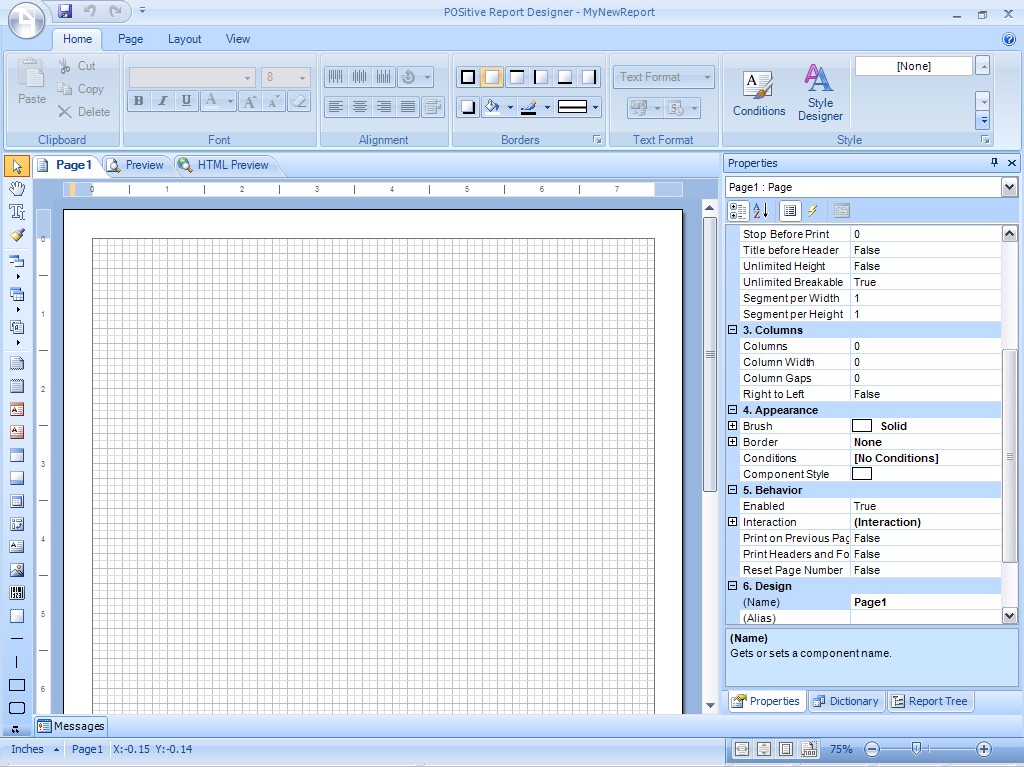
4) It will take a few minutes to open the POSitive Report Designer screen. Please be patient.
Steps For Installing Reports
It is assumed you have already obtained the report and you know where it was saved
1) Choose the Application button (upper right corner)
2) Choose Open Report.
3) Choose "From a File" button in the bottom left. Navigate to the location where you save the downloaded reports.
4) Highlight the desired report and choose Open. You will see the fully formatted report on screen.
5) Choose the Application button again and select Save As.
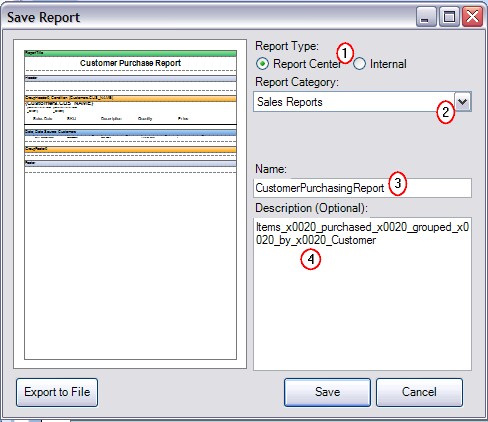
(1) Most reports should be saved to the Report Center, but a few reports should be saved as Internal.
(2) Select the Report Group Type appropriate to the report
(3) (Optional) Change the name of the report
(4) Erase the content. Or you may type a descriptive paragraph explaining the purpose of the report.
(5) Choose Save. Then exit the Report Center. When you open the Report Center again, the screen will be refreshed and you will find the report below a separator named --- Custom Reports ---.
The next step will define who can use the reports
Report Editing Security
Advanced Setup
To control who can and cannot create and utilize reports you need to activate two security options either under a Maintenance: Definitions: Security group or an individual settings under Management: Employees: Security: Reports
-- Add Custom Reports
-- Set Report Properties
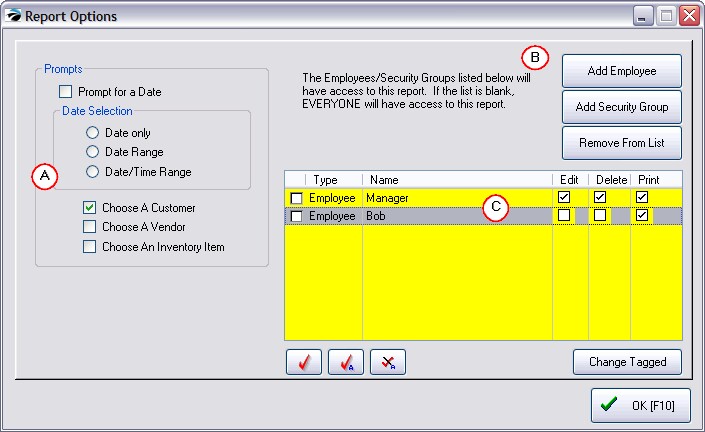
Setting Controls On a Specific Report
(1) Highlight the report
(2) Choose Properties button.

(3) Set Options as needed
A -- Choose an appropriate prompt when you begin to run the report.
B -- Select employees. If the list is left blank, then all employees will have access to the report.
C -- Set permissions for each employee
Running Reports
Run custom reports just as you would other reports. The printing options are different, but will be standardized in the future.