List Of Warranties |
  
|
List Of Warranties |
|
Different products and services have different warranty coverages. You may create an unlimited number of warranty records and assign them to various products. When servicing or returning products, you will then be able to determine if the product is still under warranty.
You may create or edit warranty types for a Warranties list. Go to Maintenance: Definitions List: Warranty Table
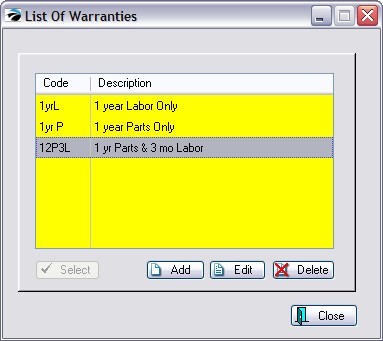
1) Choose the Add button
2) Fill in the details of the warranty
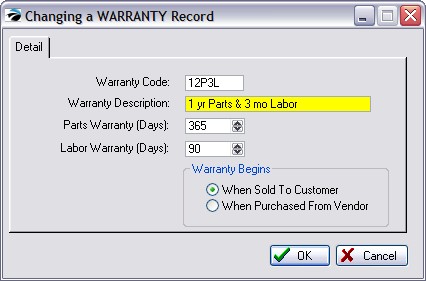
Warranty Code
Warranty Description
Parts Warranty (Days)
Labor Warranty (Days)
Warranty Begins
•When Sold To Customer
•When Purchased From Vendor
3) Repeat to create as many warranties as needed.
You may assign a warranty code to an individual inventory item by editing the Defaults of the item.
•Go to Inventory Center.
•Edit the Inventory item.
•Choose the Defaults tab. Under Warranty Code either enter the code or use the lookup button to find the appropriate code.
You may automate the assignment of a warranty code to all inventory under a specific category.
•Go to Maintenance: Categories
•Highlight the category.
•Choose the Defaults [F5] button at the top of the screen.
•Enter a Warranty Code. This code will be applied to all newly added inventory under this category.
Note: To assign the code to all existing inventory under this category, click on the Reset Inventory button.
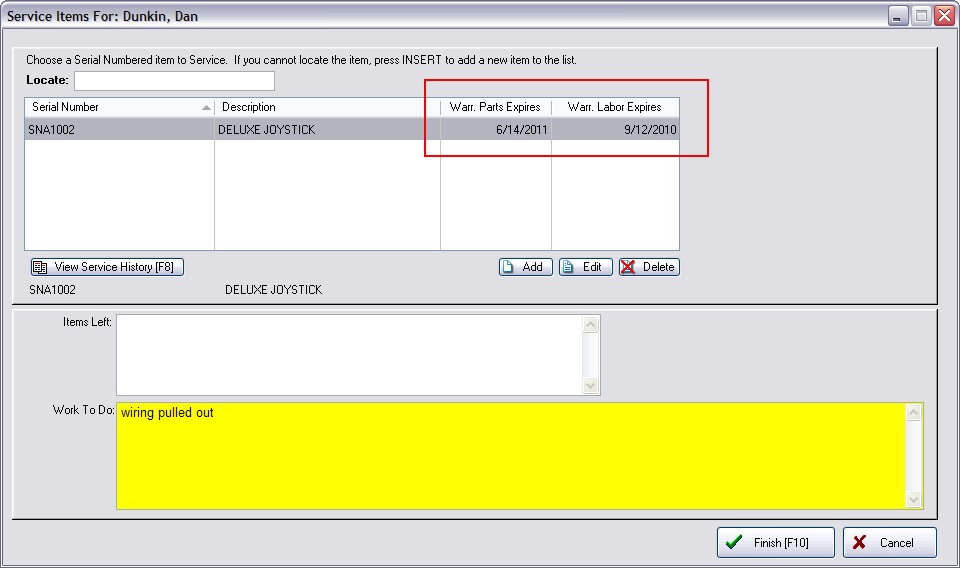
When an item is sold, the warranty code is recorded as part of the invoice. When the item needs to be returned or serviced, the warranty expiration is calculated and reported to you.