Reset Inventory |
  
|
Reset Inventory |
|
Reset Inventory is designed to make selective global changes to the existing inventory assigned to this category only. (Note: It is possible to Reset ALL Inventory by using the MASTER Category Default. See Reset ALL Inventory.)
Go to Maintenance: Categories: Highlight a category and Choose Defaults [F5]
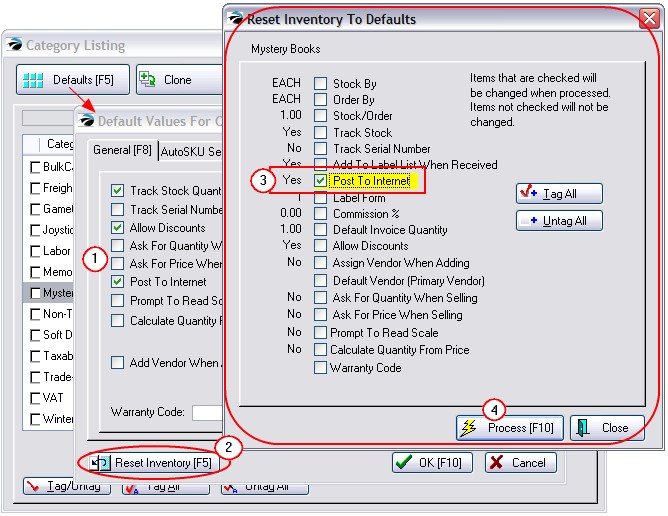
1) Activate desired default options.
2) Choose Reset Inventory [F5]
3) On the Reset Inventory To Defaults screen, activate only the field(s) to be changed.
Left Hand Column - the current settings for the category. If these are not what you want to be applied as changes, then choose Cancel and return to the tab and make adjustments.
Check Box - A checkmark in the box beside the setting makes it active. When you select the Process button, the value of the setting will be applied to all items in the category.
WARNING: If the values in the left-hand column are NOT correct, choose the Cancel button and make appropriate adjustments.
4) Choose Process [F10] When you are satisfied with the selection(s), select Process. Note: There is no warning notice nor option to abort.
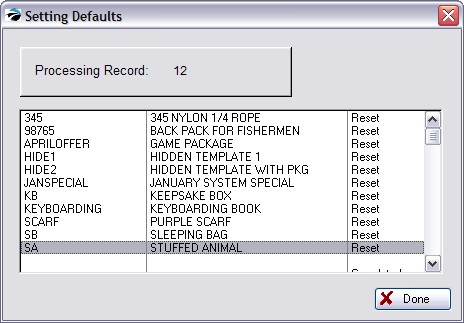
You will see a message "Processing Record xx" and a listing of inventory affected as the inventory items are being changed. You will be notified when the updates have been completed.
Tagging - Simply click in the box to turn it on or off. The Tag All and Untag All buttons can be used to expedite selections.
Setting Defaults
After choosing Process [F10], a screen will display inventory items as they are being reset.