MultiSite function only.
When the master site receives a purchase order, the PO Receive Summary screen includes an option for transferring products to one or more sites.
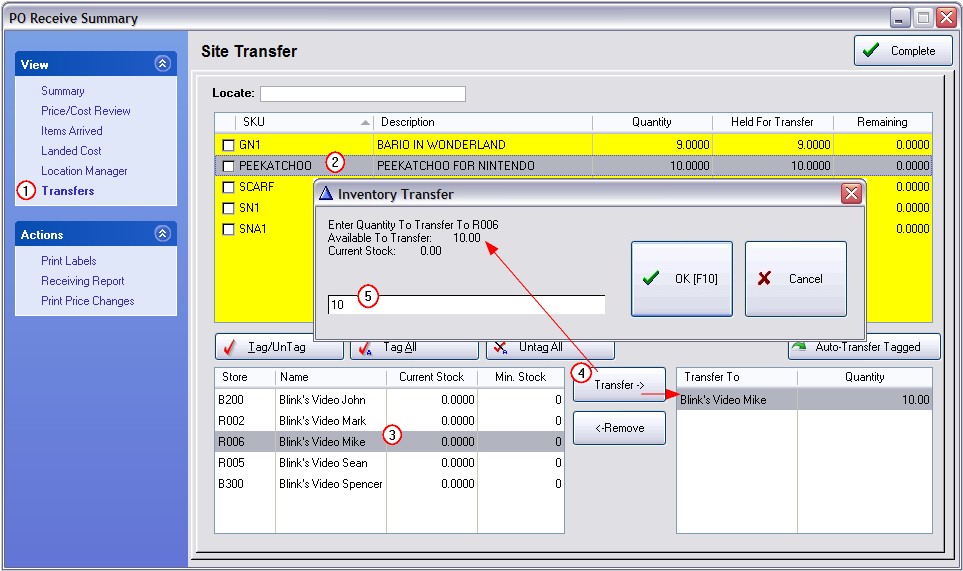
1) Choose Transfers
2) Highlight the item to be transferred.
3) Select the Site to receive the transfer.
4) Choose the Transfer button. This will open the Inventory Transfer screen which lists the number available to transfer as well as the current stock count at the selected site.
5) Enter the number to be transferred to the highlighted site.
6) When you choose OK [F10] the entry will be posted on the bottom right side.
Using this basic process, you can transfer various quantities of the same inventory item to multiple sites.
Repeat the process for each item on the purchase order.

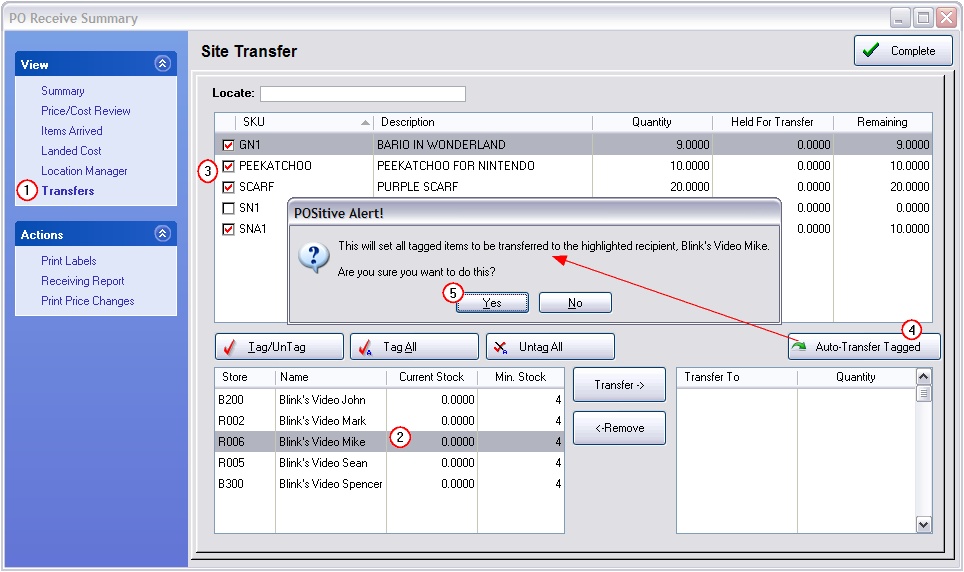
If all items on the purchase order will be going to one site, you can save time with the "Auto-Transfer Tagged" button.
1) Choose Transfers
2) Select the Site to receive the tagged items.
3) Tag the Items. Note: the full quantity received will be transferred to the selected site. (If this is not what you want to do then cancel this procedure.)

4) Choose the "Auto-Transfer Tagged" button. This will open an Alert: "This will set all tagged items to be transferred to the highlighted recipient: {name}. Are you sure you want to do this.
5) Answer Yes.
Several variations of this basic process are possible by tagging a different Site each time until all products are flagged to be transferred. Items not flagged to Transfer will update the master's sites stock counts without making a Transfer entry in Transfer Manager. (see Transfer Manager)
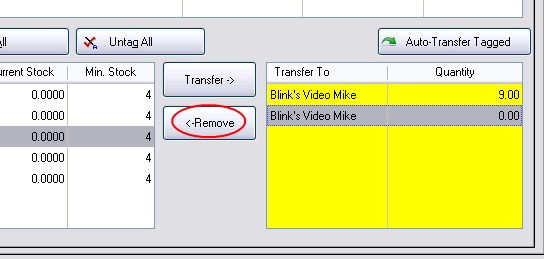
If you have made a mistake in setting the transfers, highlight the problem entry and choose the Remove button.

Once all assignments are made, choose the Complete button in the upper right to finalize the receiving of the purchase order.