Multi-Monitor Station Setup |
  
|
Multi-Monitor Station Setup |
|
If you have more than one computer with dual monitors, it is recommended that you setup one monitor and test to make sure that it is working to your satisfaction. Then you can Clone the one station setup to the other station(s). (See Clone Multi-Monitor )
1) Make a BACKUP. Go to File: Backups: Backup Files Now. This is important. If something goes wrong it is easier to restore the backup files than edit raw data to make corrections.
2) Go to Maintenance: Definitions List: Invoicing: Multi-Monitor Manager
3) Select Layout View and choose a layout. (see samples under Multi-Monitor Layouts )
4) Go to Setup and check mark the Register which has the additional monitor attached.
5) Assign Images (you may have stored your images in the C:\POSitive\PRM\data1\MIMAGES folder )
Select the type of image
•Full Screen
•Transaction Screen
•Item "No Display"
•Static Display
6) Choose Add
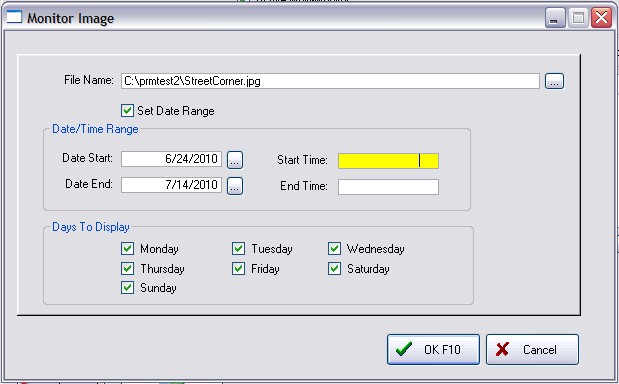
Navigate to where your images are stored, and select the image.
(Optional) Set Date Range with starting and ending dates and times
(Optional) Uncheck any days of the week the image will not be displayed.
Choose OK
The picture will be in the list with a display of the image in the bottom right of the screen.
7) Repeat adding additional pictures (optional)
8) (Optional) Change the sequences of pictures as needed
9) Set the default time in number of seconds for the pictures to change. Five seconds is recommended.
REPEAT STEPS 6 through 9 to assign each type of image needed.
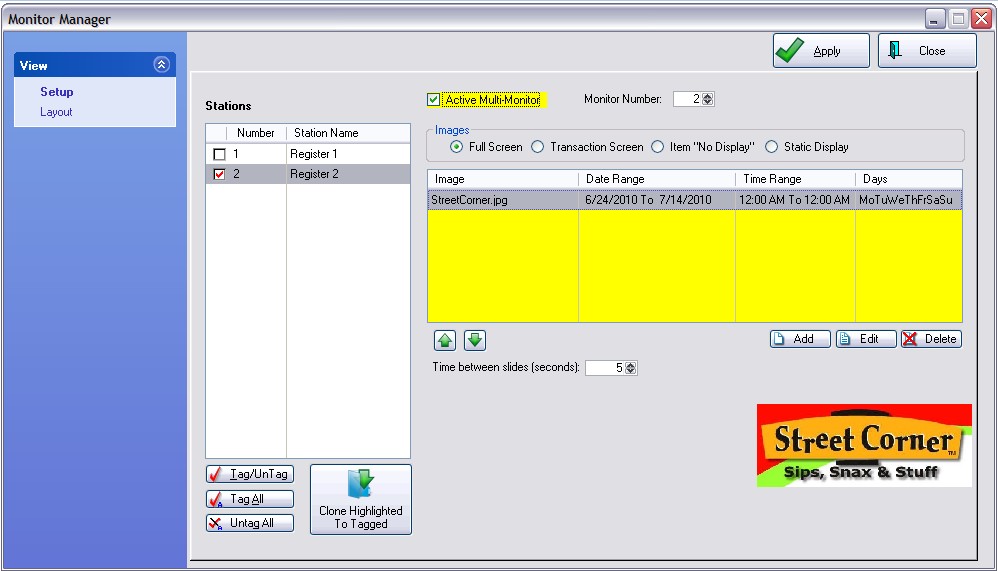
10) Place a checkmark on Activate Multi-Monitor Mode and select the Monitor Number to be used for the display
11) Choose Apply and the second monitor will be activated.
Restore Backup
If the monitor is not displaying correctly, restore your SQL backup. Review the preliminary setups.