Date Range |
  
|
Date Range |
|
Selecting a Date Range is a common practice in most all reports.
The report will encompass activity between the FROM date to the THRU date. Starting and Ending Time of day is assumed to cover the full 24 hours, but can be modified to a specific time segment.
Setting The Dates (optional Methods)
A) Type directly in the fields, use the scroll buttons, use the Calendar icon, or the Equals = icon for setting From and Thru dates.
B) Select a pre-defined date range button. Clicking on a button will automatically fill in the FROM and THRU fields.
C) Highlight a single date or a series of date and the From and Thru dates are automatically filled in.
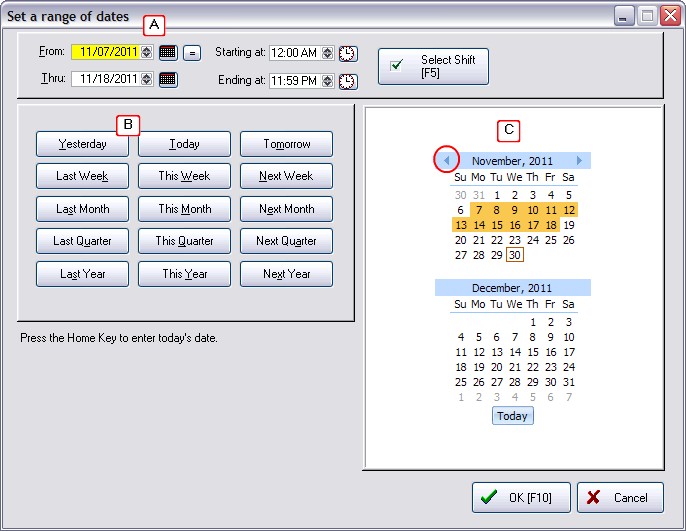
Methods For Selecting a Time Range
A 24 hour period is selected by default. To change the time, you can
Type the Time - Click into the field and type the time.
Scroll the Time - Using the up/down buttons, find the desired hour.
Lookup Time - Click on the clock icon to the right. Highlight, scroll, or type the hour on the left and minutes on the right. Choose AM or PM and then select OK.
Select a Work Shift for the Report - Choose the Select Shift [F5] button. Highlight a shift and choose Select. The Add button allows you to create a shift period. Shift periods should not overlap times.