|
Check Layout Setup |
  
|
|
Check Layout Setup |
|
POSitive can print checks to your vendors and your customers. After entering your bank account(s) you need to select a check layout.
POSitive has two check layouts which print to your windows default inkjet or laser printer.
| • | Standard Check layout is 3 checks per page |
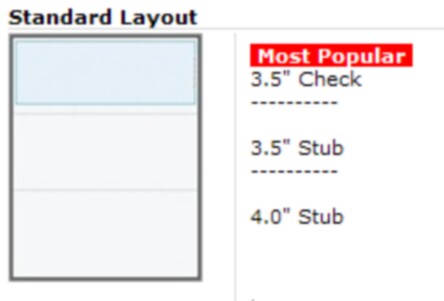
| • | Voucher Check layout has the check detail at the top of the page and two duplicate voucher sections below. You can print samples of these layouts and compare them with your actual check stock. You may also modify the layout by moving elements around on the page to precisely match your actual check stock. If you are ordering checks, you may want to ask for Letter Size, 1 Check per page, Check at Top of Page. (3.5" Check, 3.5" Stub, and 4.0" Stub), and Pre-Numbered. |
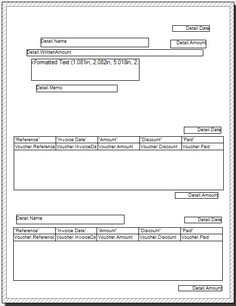
Example of Voucher Check Layout |
||
|
|
|
How To Select a Check Format
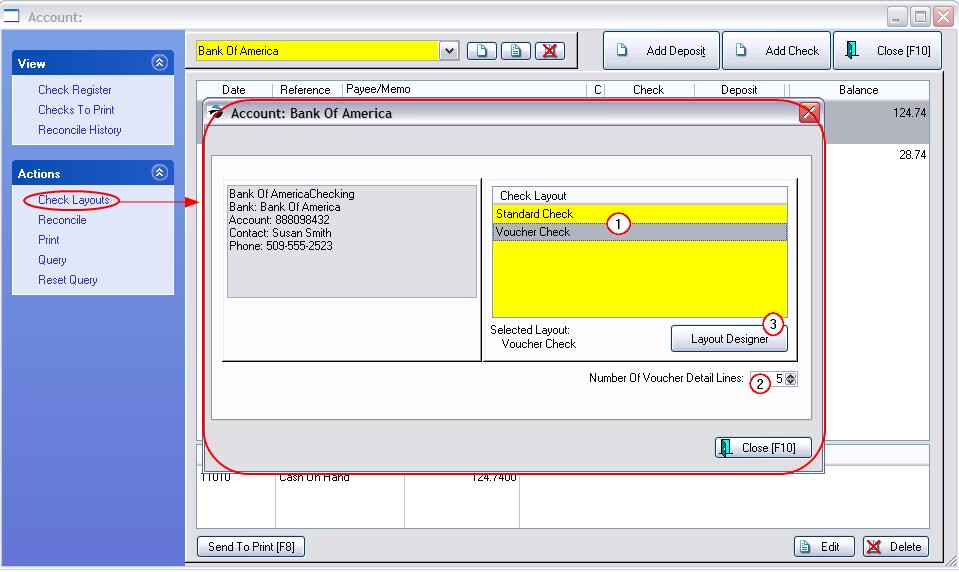
Go to Accounting: Checkbook
Select the Bank Account at the top and choose Check Layouts on the left.
1) Highlight either the Standard or Voucher Check
2) For Voucher Checks enter the number of detail lines desired (5 is recommended).
3) Click on the Layout Designer button.
It is assumed that checks will be printed to a laser or inkjet printer on single 8 1/2 by 11 sheets.
IMPORTANT: your checks must be pre-numbered
--- Standard Check is 3 checks per page. (partial pages can be reused)
--- Voucher Check is 1 check per page with two itemized areas
How To Design Your Own Check Layout
POSitive can print to almost any style of check layout. If you have not ordered check stock, you can choose Quickbook styles or any style of your choosing.
1) highlight the check layout you wish to edit
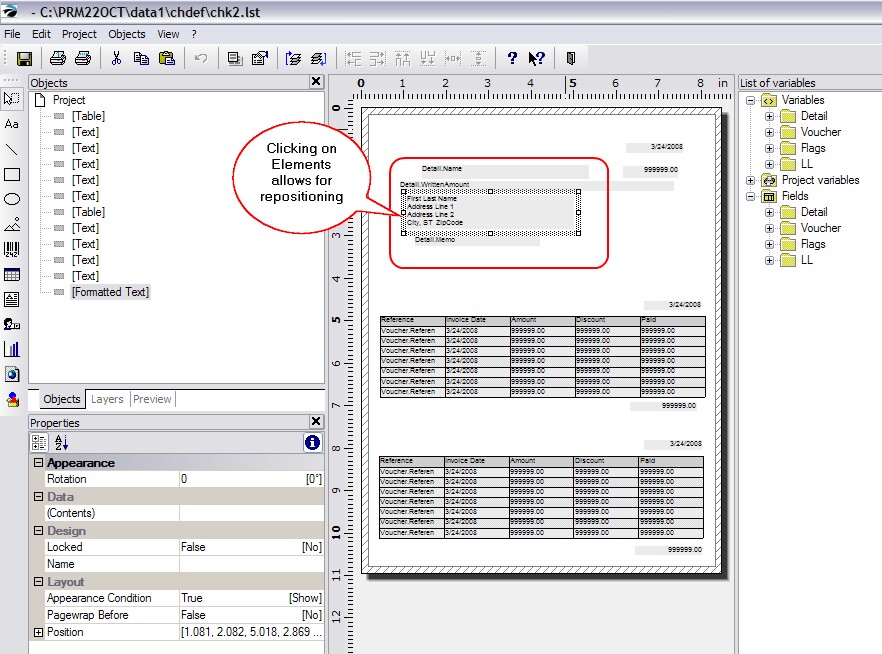
2) select Layout Designer button which will open an editor. You can re-position any element of the check printing fields.
Print A Sample Check
You should print a sample check before making any modifications to determine what changes need to be made. Go to File: Print Sample: Print Sample With Frames
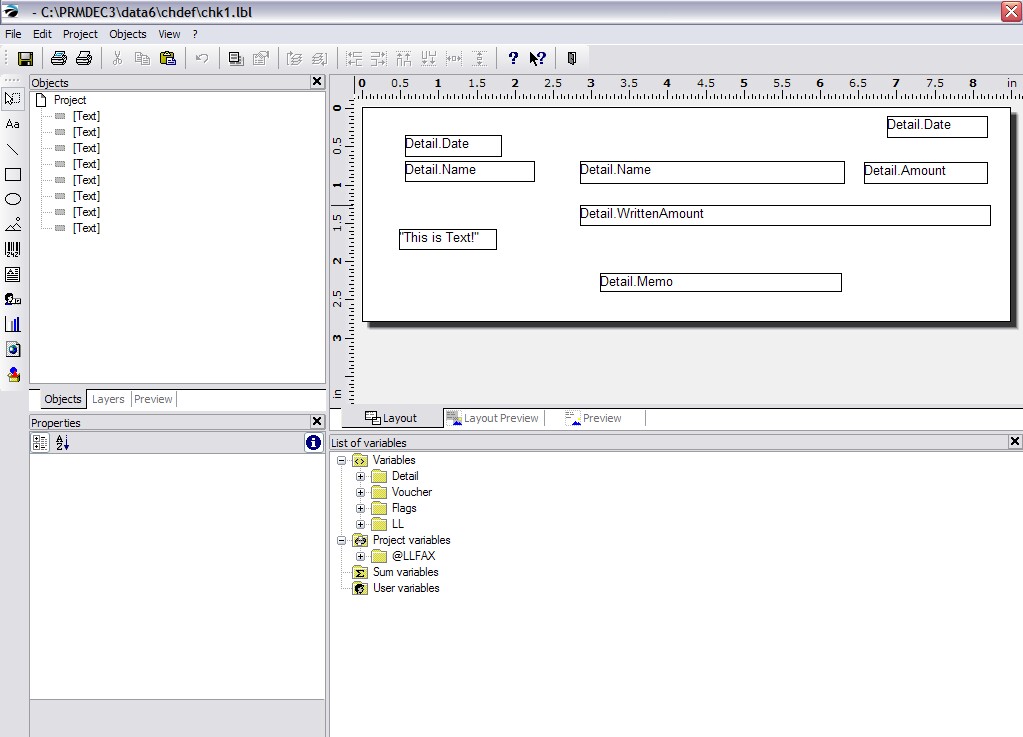
The elements in the white area can be repositioned as needed.
| • | Click on a "box" and it becomes highlighted |
| • | Drag the entire box to a new position |
| • | Use the "handles" in the corners and sides to resize the box |
| • | You can "highlight several boxes" by holding down the CTRL key and clicking |
TIP: If you are editing the Voucher Check layout and need to make the check printing section in the middle, between two voucher sections, highlight the entire check detail block and move it to the workspace at right. Move the voucher section up to the top and then move the check section back into the middle.
Note: On the standard check layout there is a field which prints "This is Text!" You may edit it and enter your own phrase promoting your store or services or you may simply delete this field.
Once the layout suits your needs, then exit the designer and save your changes.
Voucher Style
Number of Voucher Detail Lines - Enter the number of lines on your pre-printed checks. Depending upon how many vendor invoices you typically pay off with one check, you can purchase pre-printed checks with a set number of lines. Otherwise, POSitive will print to a second page.
TIP: copy the Payee field and place a copy above the second voucher list so that you have the payee name on the tear off portion
Not Printing Properly?
If you have printing problems, remember that POSitive automatically selected your windows default printer. If you have other printers defined, then, with the Layout Designer open, go to Project: Page Setup: Printer Selection. Most likely, your default printer name is listed. To select a different printer click on the Select button at right, highlight the proper printer driver and choose OK.