Preliminary Setup
It is important that you complete these setup steps before you activate the Multi-Monitor Support option in Station Detail. Important: Picture sizes are in "pixels" and you should be familiar with image editing software.
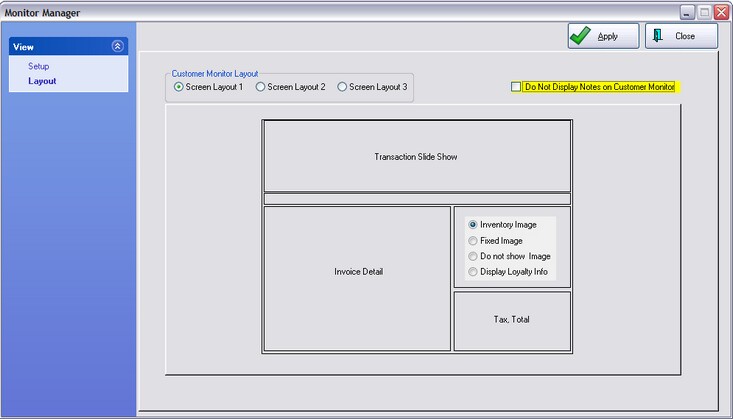
Here is an example of a Multi-monitor Layout: (click here for more information on Layout options.)

1) Hardware - Your computer must be able to support two monitors. The customer display screen is 1024 x 768 pixels, so your monitor must be able to support this resolution. Most current LCD monitors exceed this resolution, so the customer display may not use the full screen unless you change the screen resolution in Windows.
2) Windows Display Settings - Once you have installed your second monitor, it is important that POSitive will be running on monitor 1 and the customer display on monitor 2. To see which monitor is which, right-click on your desktop and select "Properties" and then select the Settings tab. You should see two monitors displayed and we recommend that the second monitor should be set at 1024 X 768 resolution.
3) Create an MIMAGES directory. Using Windows Explorer open your current data folder (most likely the C:\POSitive\PRM\data1 folder). Create a new folder and name it MIMAGES. This is where you will store graphics that will be displayed on the second monitor. Technical Note: It really does not matter where your images are stored, but having them in one place makes setup easy. Once you assign the images to the Multi-Monitor setup, the images are copied into BINPICS.dbo of the SQL database
4) Create images for the MIMAGES directory. These special full-screen pictures can be of products, photos of staff, local events, or anything else of your choosing. This is where image editing software may be required, because for best results you should use the images sizes listed below.
There are 4 types of images you will want to gather.
FULL SCREEN - The image(s) should be set at 1024 X 768 pixels resolution. You will have the option to show them in a slide show and/or display them on certain days and times.
TRANSACTION SCREEN - If you choose Layout 1 or Layout 3, you'll have a "banner" space that varies between 1024 x 225 and 1024 x 265 pixels. You may choose to rotate several pictures in this spot by number of seconds or on certain days. If you choose Layout 2 the images need to be about 1024 x 600 pixel size.
ITEM "NO DISPLAY" - If you use Layout 1 and if an inventory item does not have it's own image, then the previous image remains in place, which could cause some confusion. Instead, you may choose a simple image, or your logo, as a place holder for those times when there are no images on inventory items.
STATIC DISPLAY - The image(s) should be set at 1024 X 768 pixels resolution.