|
Import Matrix Items |
  
|
| Show/Hide Hidden Text |
|
Import Matrix Items |
|
| Show/Hide Hidden Text |
This is a special use of the inventory importer and requires a very structured import file. The objective is to import items so that they are linked together as a matrix group.
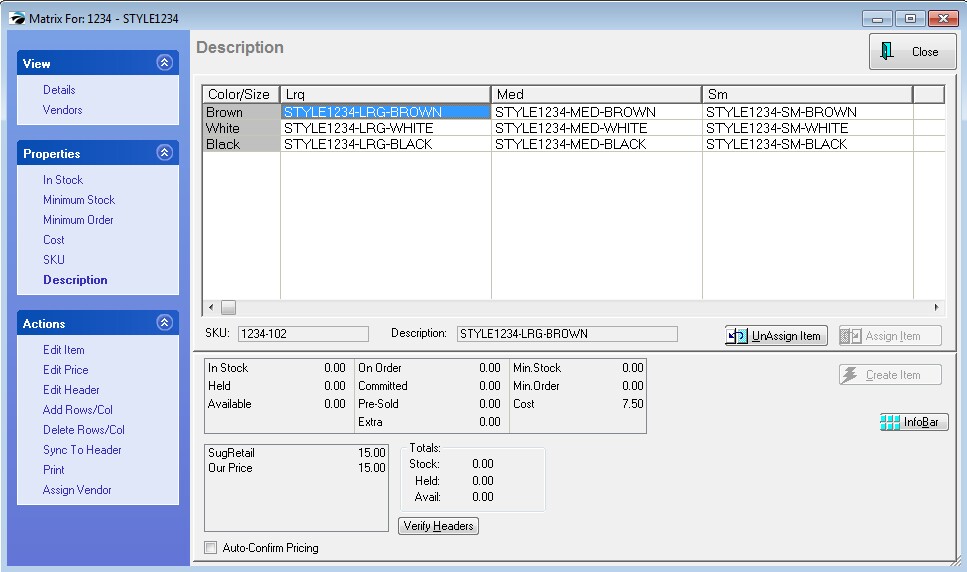
This is the desired end result: like items by color (per row) and size (per column)
Prepare The Import File
Create a spreadsheet because it is easy to copy and fill in cells with like information.
Make sure that you are consistent in your entries.
SAMPLE SPREADSHEET of Matrix Items
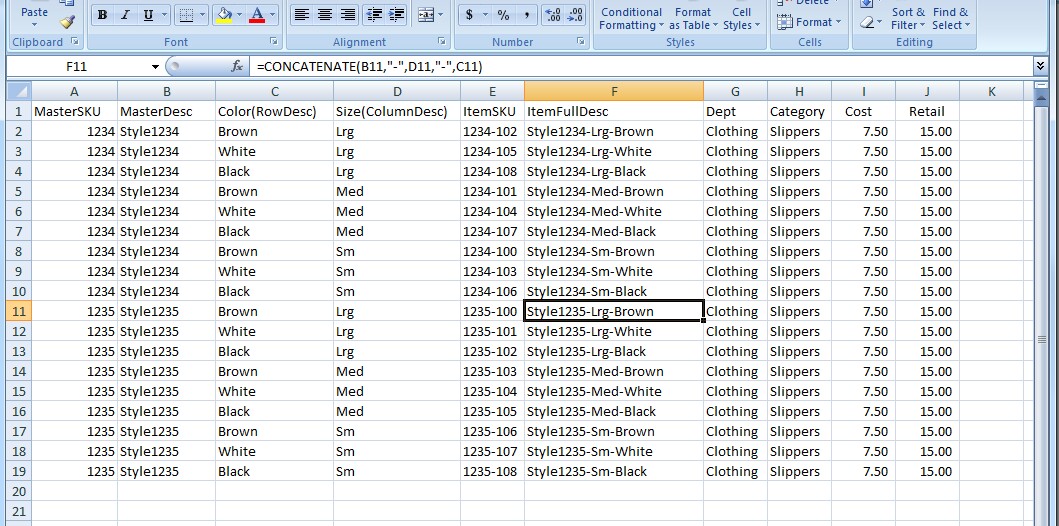
Minimum fields for the spreadsheet
MasterSKU - the SKU for the matrix header - to which all individual items should be linked
MasterDesc - the Description for the matrix header - to which all individual items should be linked; therefore the spreadsheet needs this information duplicated for every individual item of the group IMPORTANT NOTE: these two fields will generate the matrix header of the matrix grid; do not attempt to create a separate line item in the spreadsheet to serve as the matrix header.
Color(RowDesc) - the value to be placed in the row IMPORTANT NOTE: be sure the SIZE field is sorted properly If you want your columns to line up S, M, and L then row 1 must be S, row 2 must be M, and row 3 must be L. If you have grouped them as in the pictured example, the result in the matrix will be Lrg, Med, and Sm
Size(ColumnDesc) - the value to be placed in the column
ItemSKU - the barcode or SKU of the individual item
ItemFullDesc - the description of the individual item should include the style, size and color (35 character limit for this field). There is a tool in Microsoft Excel spreadsheets called "Concatenate" which will generate a full description by combining the contents of other fields)
Dept - the name of the inventory department
Category - the name of the inventory category
Cost - the cost to purchase the item from the vendor - link this to Cost and Vendor Cost in the importer
Retail - the selling price of the item can be used for Price1, Price2, etc. Or you can have additional fields in the spreadsheet
Save The File - Comma Delimited
When you have finished building the spreadsheet, save it as a comma delimited or tab delimited file. POSitive cannot import an Excel spreadsheet directly.
Then exit Excel fully. If Excel is using the file, then POSitive cannot properly define the import parameters.
Defining The Import
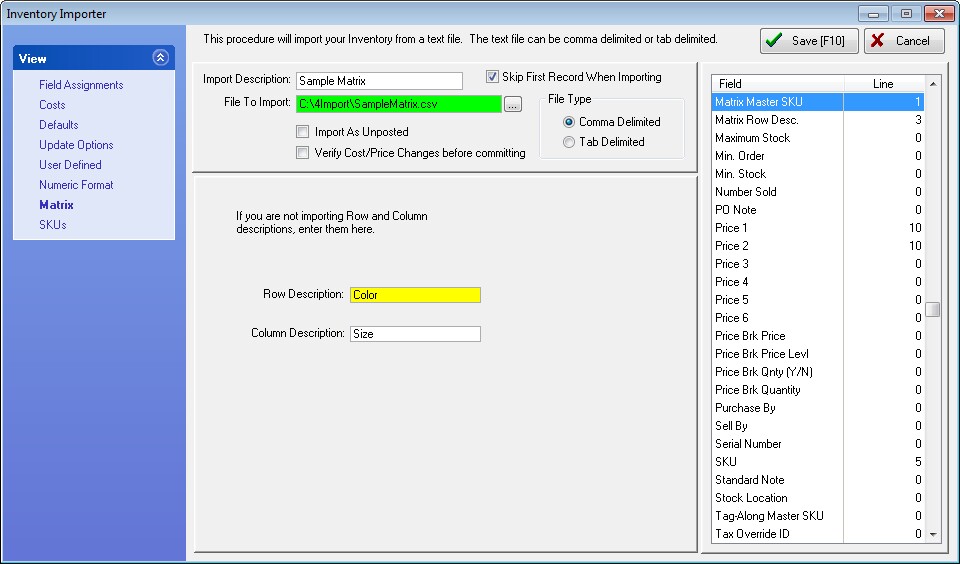
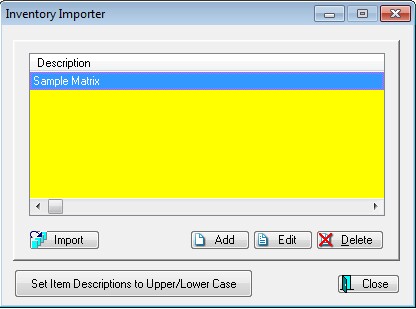
Go to File: System: Import: Import Inventory
After giving the import definition a name and selecting the file to be imported, choose the Display File button to reveal the data of the first record. (Note: if you are not seeing list of numbered fields, then change the type to either Comma Delimited or Tab Delimited and choose Display File button again. If you are still having troubles see the file, you may need to edit the file and remove any blank or extraneous rows from the top of the spreadsheet.)
Field Assignments View
You will then link the appropriate fields in the center of the screen (white list) to the POSitive fields on the right (yellow list).
This is done by highlight a field in the center, hold the left-mouse button down, and drag the field to the appropriate POSitive field on the right.
MasterSKU field links to MATRIX MASTER SKU
MasterDesc field links to MATRIX MASTER DESC
Color(RowDesc) field links to MATRIX ROW DESC
Size(ColumnDesc) field links to MATRIX COLUMN DESC
ItemSKU field links to SKU
ItemFullDesc field links to DESCRIPTION
Dept field links to DEPARTMENT NAME
Category field links to CATEGORY
Cost field links to COST and also to VENDOR COST fields
Retail field links to PRICE1 but can also be linked to PRICE2 if needed.
You should also activate "Skip First Record When Importing" if you have column titles included in your import file.

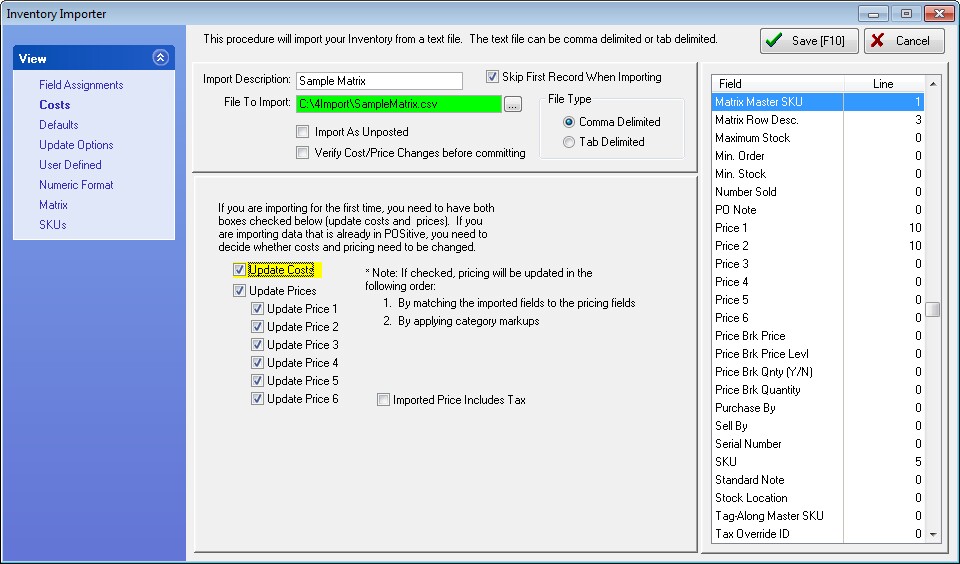
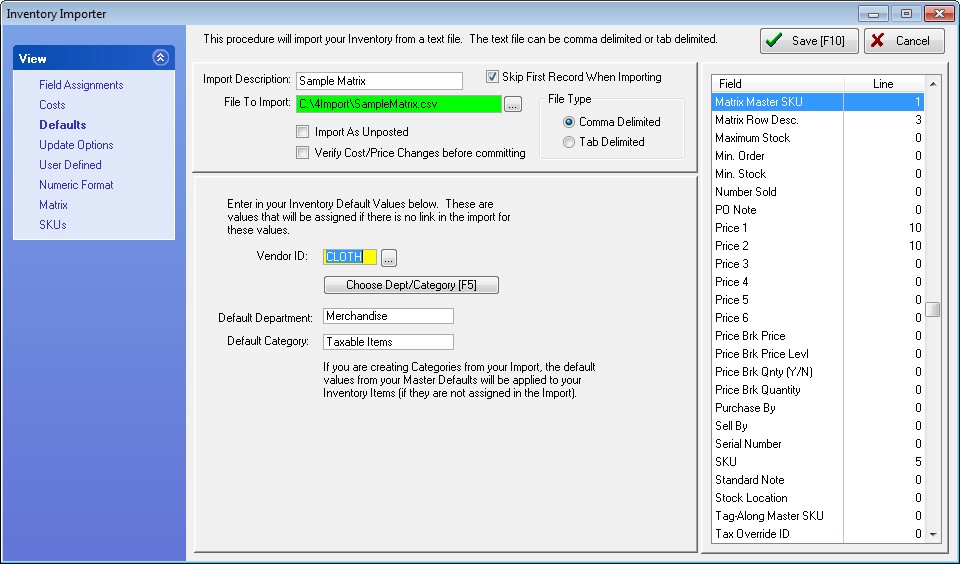
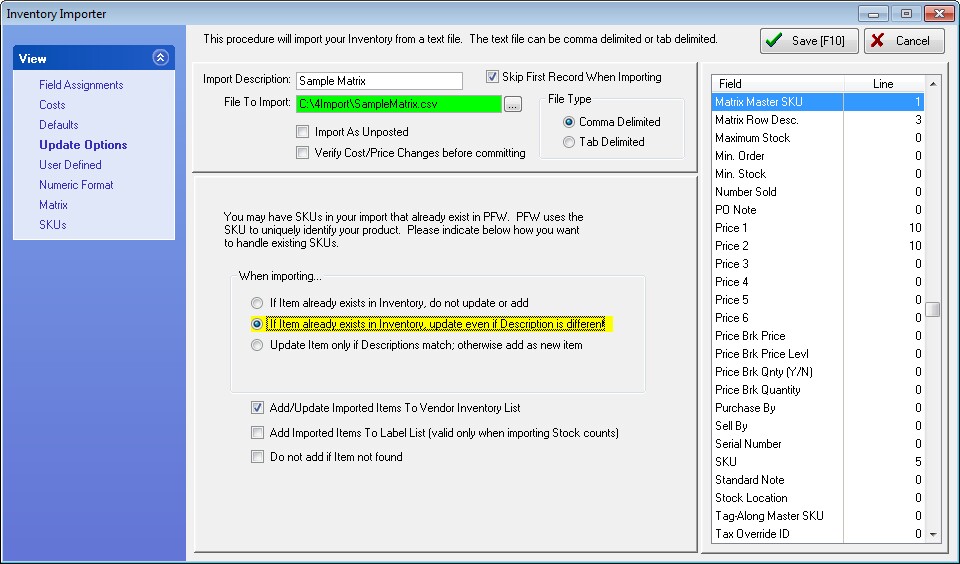
VERY IMPORTANT: Select and Fill in the other tabs (Cost, Defaults, Categories, UDFs, and Format) as explained in Importing Inventory.
Here are some typical Screenshots
Costs View
Defaults View Vendor ID - select the vendor who will provide you with all of these items Choose Dept/Category - select a taxable category and its department.
Update Options View
|
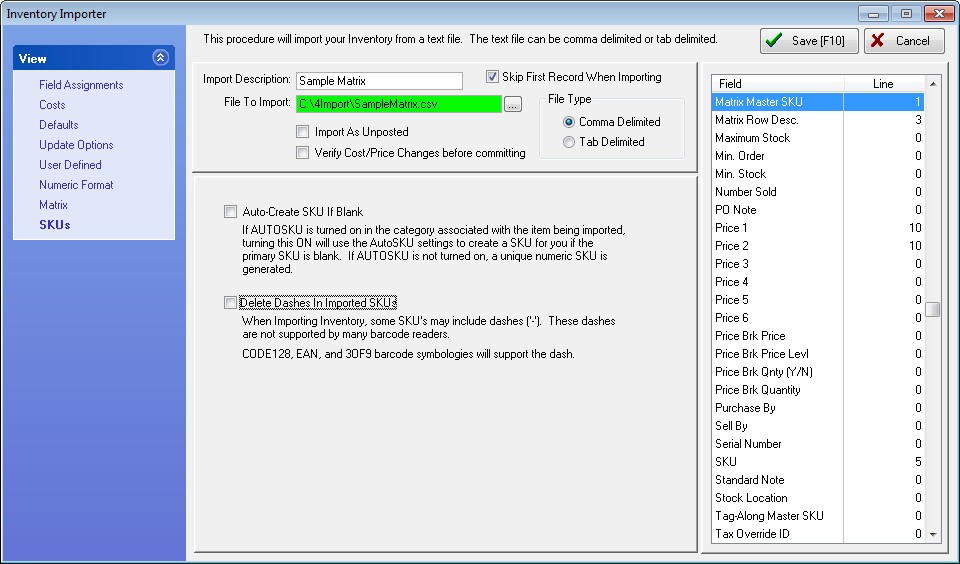
On the Matrix tab enter titles for the Row and Description fields of the completed matrix.
Very IMPORTANT: On the SKUs tab uncheck both fields.
Choose to SAVE your import definition.
Do not choose the Import button until you have checked and double checked your settings.
Backup Before Importing
It is always a good practice to make a backup of your SQL database before making major changes to POSitive data.
If necessary, restore the backup and perform the import again after making necessary corrections.
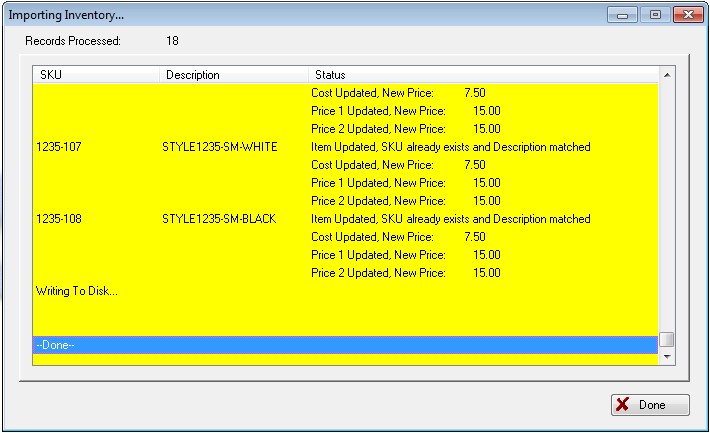
Perform the Import
You will see the SKU and Description of the items being imported. When they have all been imported, you will see a line titled -Done- and you can close the screen.