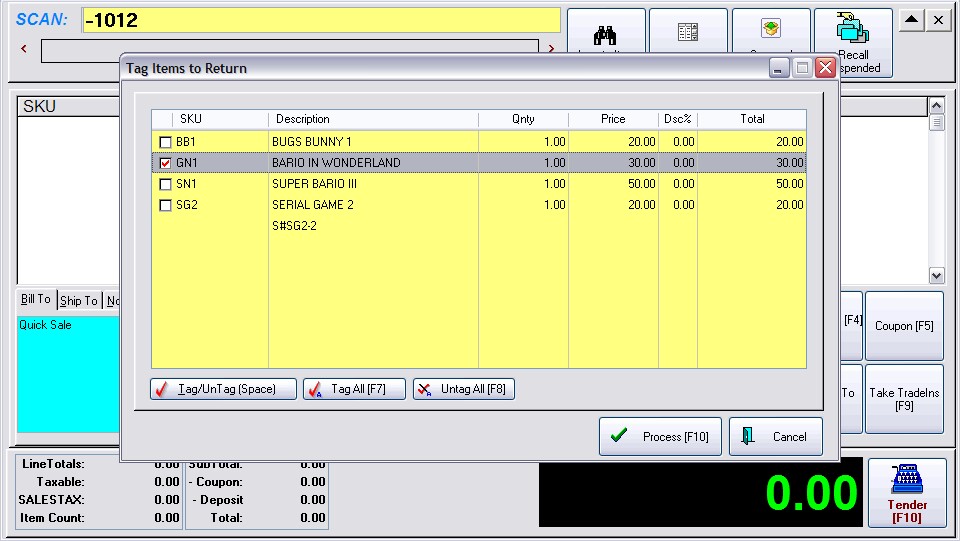
A gift receipt is typically a duplicate invoice without SKUs and pricing. This receipt is given with the gift so that recipient can easily make an exchange if necessary.
NOTE: The directions below assume that you will be using a 40 column receipt printer for printing of invoices and gift receipts. If you are using a different printer, contact your dealer.
Advanced Printing Setup
Using the Advanced Printing feature, you can set POSitive to print a specialized form at the time of invoicing.
1) Go to File: Station Manager
2) Highlight and edit your station (note each computer using POSitive should have it's own station setup)
3) On the left hand side, highlight Invoice just below Printers/E-Mail
4) Select the Advanced Printing tab See Advanced Printing
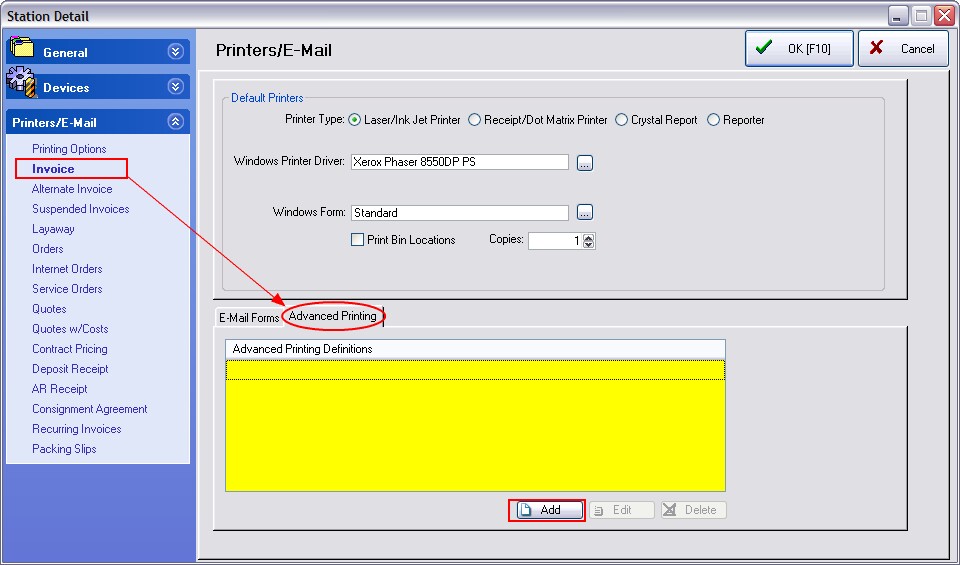
5) Choose Add
6) Fill in the fields as illustrated here.
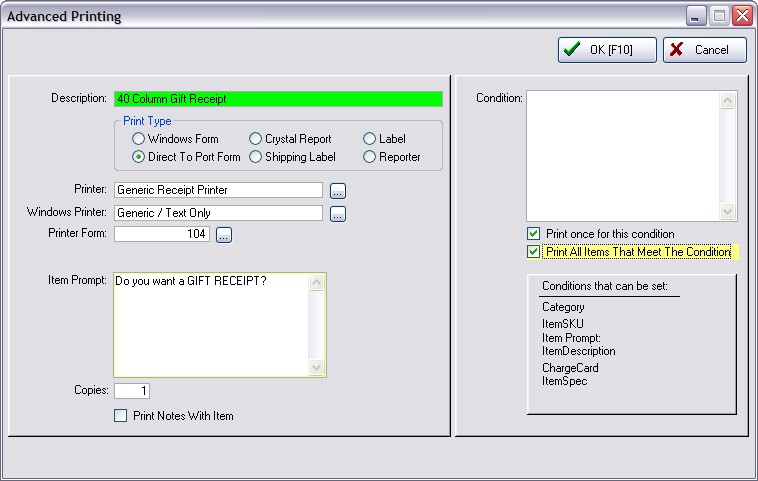
Printer Form. Choose the ... lookup button to find a predefined Gift Receipt form.
IMPORTANT - If a Gift Receipt Form does not already exist, then you will need to create one. This is a one-time process. Just follow these steps.
How To Create A Receipt Form (if not already viewing this screen, Go to File: Editors: Transaction Receipt Editor)
A) Highlight Form 7 (or any 40 col form of your choice)
B) Click on Clone button (lower left corner)
C) Give it a number greater than 100 and a name for the new form. (using the number 107 reminds you of the source form number)
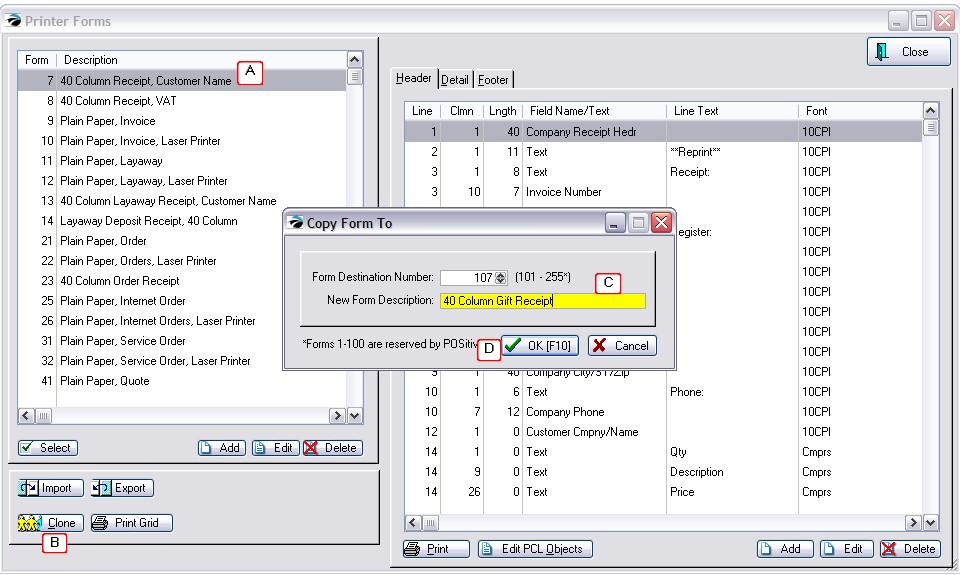
D) Choose OK
E) Choose to clone the Entire Form
F) Highlight the new form #107
On the right are 3 tabs: Header, Detail, and Footer which need to be edited.
--- Modify the Header ---
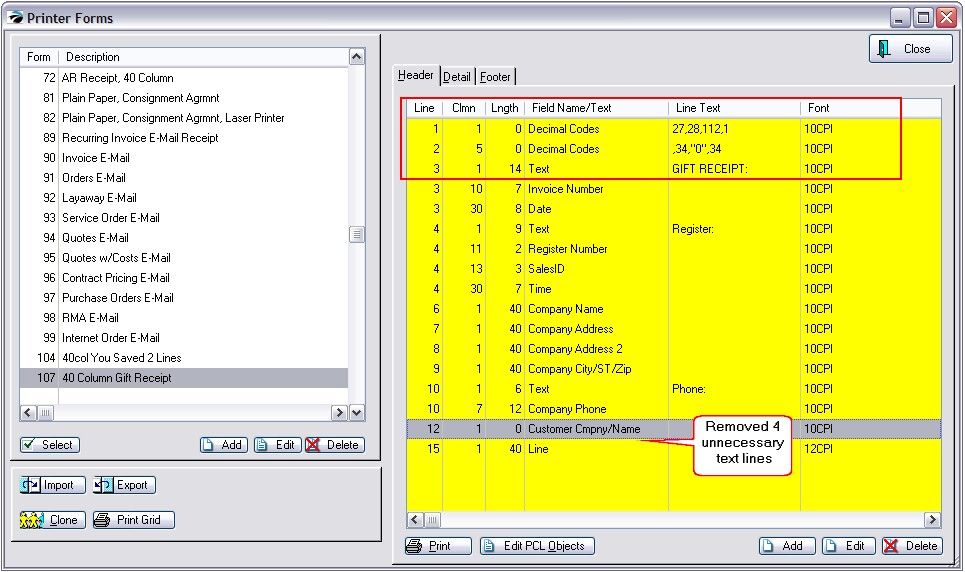
On the Header tab, you will be editing 3 lines.


1) edit line 1 and change Length from 40 to 0
change Field Name from Company Receipt Header to Decimal Code
In the Line text field enter 27,28,112.1 and say OK to save.
2) edit the line 2 which says "Text - Receipt:
change Column from 1 to 5
change Length from 11 to 0
In the Line Text Field change it to read GIFT RECEIPT:
3) Remove unneeded lines
At the bottom of the Header section, delete the 4 Text lines
for Qty, Description, Price, and Total. Highlight the line and press the Delete button for each entry.
After your changes the layout could look like this:
--- Modify the Detail ---
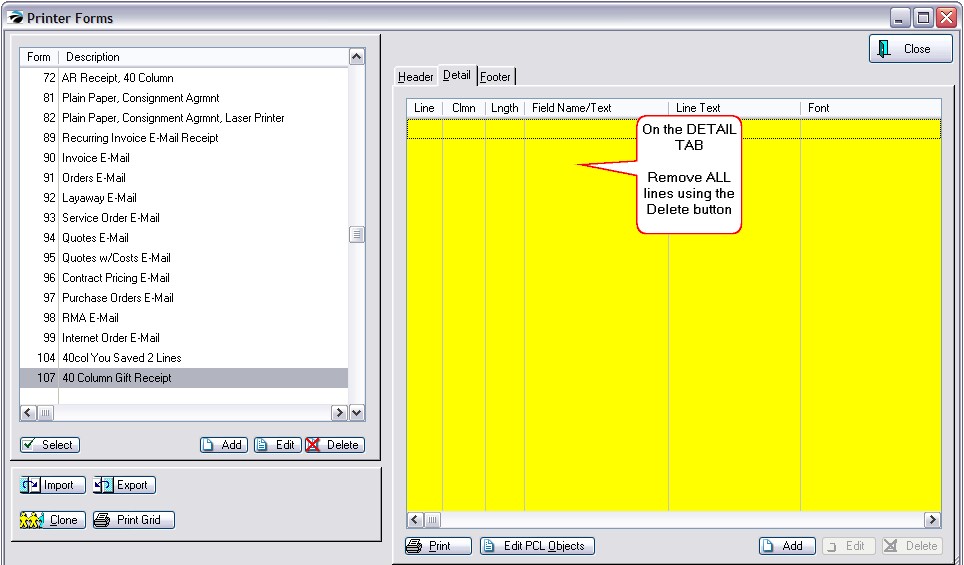
Since a Gift Receipt needs no information about individual line items, delete all lines from the Detail section.
--- Modify the Footer ---
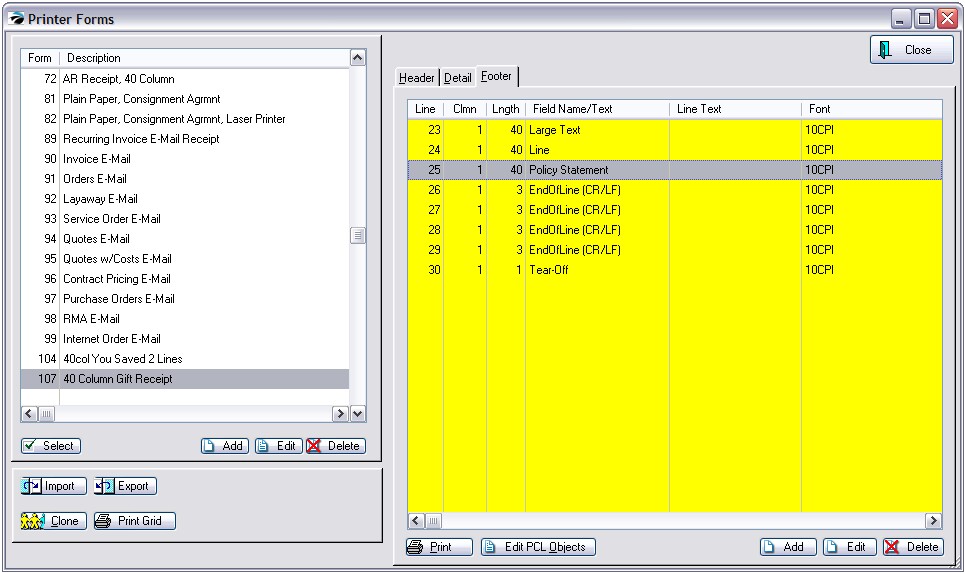
On the Footer tab you will erase all entries referencing tender. Leave only the lines as pictured here.
2) You now have a choice.
a) leave the Policy Statement Line and your standard invoice policy will print at the bottom of the Gift Receipt.
or
b) Delete the Policy Statement Line and Edit the Large Text line to print a new policy for Gift Returns.
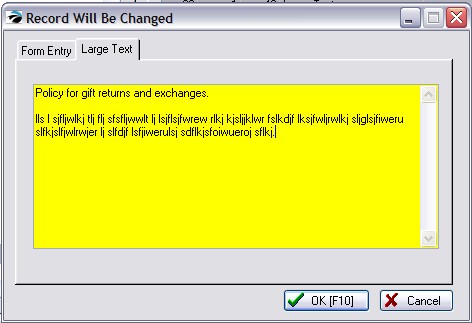
How To Edit Large Text Line
1) Erase anything in the Instructions line.
2) Click on the Large Text tab and type your policy for returns and exchanges.
3) Close and Save your form.
4) You are all done creating the form (Choose Select button to assign it to the Advanced Printing form.)
How To Print A Gift Receipt
Create an invoice and tender it.
After the Change Due screen you will be prompted to print a Gift Receipt.
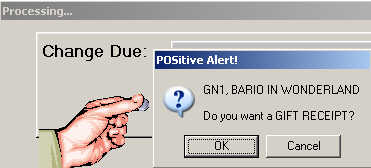
Press Enter to print the receipt
Press ESCape to not print the receipt
How To Make A Refund Using The Gift Receipt
When a customer comes to make an exchange and presents you with a gift receipt follow these simple steps.
1) create a new invoice
2) when prompted for the SKU type a minus sign and then the Gift Receipt number. For example -1012. Then press Enter.
3) select the item from the list to be returned.
4) and process the invoice.
