|
Checks To Print |
  
|
| Show/Hide Hidden Text |
|
Checks To Print |
|
| Show/Hide Hidden Text |
Checks can be created manually (choose Add Check) or created automatically through the Posting of Accounts Payable. (setup required)
If you want AP processing to automatically create a check entry in the checkbook, the System Setup: Accounts Payable needs to be properly defined. |
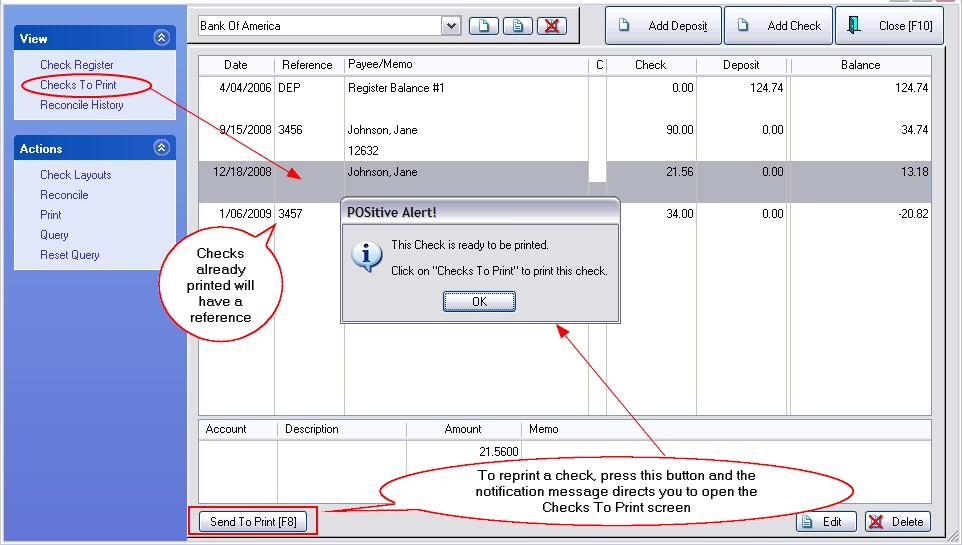
The checks are typically printed in batches through the Checks To Print screen.
| • | If a check entry does not have a Reference number, then it has not been printed yet. |
| • | If a check needs to be reprinted, highlight the entry and select the "Send To Print [F8]" button. |
| • | Choose "Add Check" in the upper right to manually create new entries. |
How To Print Checks
1) Select Checks To Print option under View
2) In the bottom left is a listing of checks ready to be printed.
Remove - this button will drop the highlighted check from the list so that it can be printed in a later batch.
(Note: you may review each check to be printed by highlighting it in the list. To create a new check highlight the top blank entry, and fill in the upper portion of this screen. Then choose Accept [F7]. The new check will be added to the list at bottom left.)
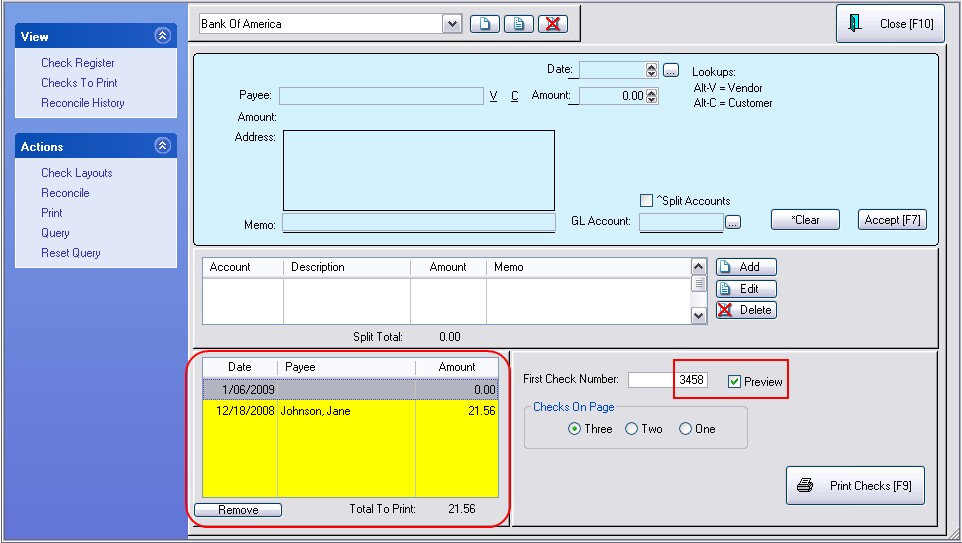
3) Load the printer with blank check paper. Make note of the check number of the first blank check.
4) Enter the check number of the first blank check in the field at right named "First Check Number."
5) Select the number of blank checks per sheet of paper.
6) (Optional) Choose to Preview the check before actual print so that you can review the contents first.
7) Choose "Print Checks [F9}"
8) This screen will close and returns to the Check Register.