|
Department/Category Verification |
  
|
| Show/Hide Hidden Text |
|
Department/Category Verification |
|
| Show/Hide Hidden Text |
The purpose of Department/Category Verification is to search the inventory list for items which are not assigned to a valid category and inventory items which were sold without a proper category link in the invoice record.
When problems are found, they are listed at the right in two separate sections.
STATUS
On the left you will see the status of the verification processes. You should wait until the message "Verification Complete" appears before taking further steps. It may take several minutes if you have many inventory items and invoices in invoice history.
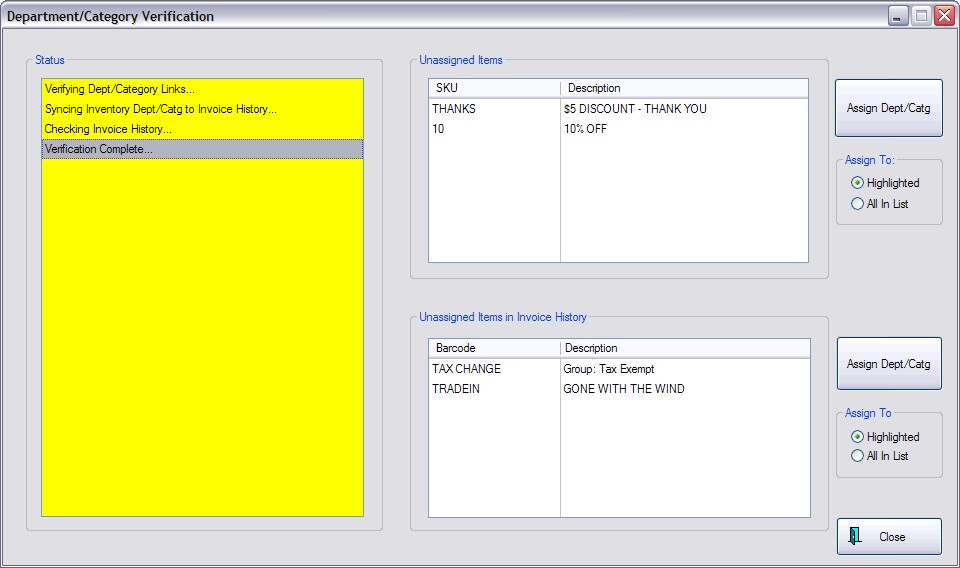
UNASSIGNED ITEMS
Items listed in the top section on the right are inventory items which currently do not have a proper assignment to a department or category. This could be a result of importing inventory or attempts to correct category/department assignments. Whatever the case, there is a method to correct the problem.
One By One Correction
Make sure the option "Assign To: Highlighted" is selected.
Then Highlight an item in the list and choose the Assign Dept/Catg button. This will open the Departments screen. (see Departments)
Highlight the desired Category under the correct Department name. Then choose Select.
The item will be assigned to the category.
All In List To Same Category
Make sure the option "Assign To: All In List" is selected.
Choose the Assign Dept/Catg button. This will open the Departments screen. (see Departments)
Highlight the desired Category under the correct Department name. Then choose Select.
All items will be assigned to the category.
If you are unsure, you can move all items to a Department called ADMIN and a Category called FOR REVIEW. You will need to first create them if they do not exist in the Departments screen. (see Departments) Later, you can open Inventory Center, use the Category Filter button, and only view items which are in the For Review category. There is a method for reassigning individual or multiple items for this review category to a permanent assigned category. (see |
UNASSIGNED ITEMS IN INVOICE HISTORY
Items listed here, in the bottom section on the right, are part of old invoices and for one reason or another the invoice still does not know which category they belong to. It is important to get this corrected because your sales reports and profit might exclude these items from your reports.
Before proceeding, you should research these inventory items to confirm which category was used for other invoices with the same item.
If you have questions about which Dept/Category to assign the item to, you should do some research before proceeding with corrective actions. Run a department Sales Report for just that department and category to which the item should belong. If other like items were sold in that category, then that is the assignment you should make to the Department/Category Verification screen. If you need to research even further, look at Item Activity of the item
Another option Open Report Center: and run Sales Report: Inventory: By One Item. Set the date range which will match the items sold. |
One By One Correction
Make sure the option "Assign To: Highlighted" is selected.
Then Highlight an item in the list and choose the Assign Dept/Catg button. This will open the Departments screen. (see Departments)
Highlight the desired Category under the correct Department name. Then choose Select.
The item will be assigned to the category.
All In List To Same Category
Make sure the option "Assign To: All In List" is selected.
Choose the Assign Dept/Catg button. This will open the Departments screen. (see Departments)
Highlight the desired Category under the correct Department name. Then choose Select.
All items will be assigned to the category.