|
Additional Pole Display Setup Info |
  
|
|
Additional Pole Display Setup Info |
|
You will need to enter the manufacturers’ codes for activating the 1st and 2nd lines of the display. Each pole display requires codes to display text. You will need to enter the codes as provided by the manufacturer of the pole display.
NOTE: consider using a flat screen Multi-Monitor instead of a pole display
If you have a Partner Tech model CD-5220
Select Pole ID: 200
Choose the Port
Enter your messages on Pole Line 1 and Pole Line 2
Click the Test button.
If you have a different brand and model, you will need to create and define a new Pole ID.
Description - The model of the pole display.
Codes For Line 1 the code numbers separated by commas
Codes For Line 2 the code numbers separated by commas
Characters/Line - the number of characters per line.
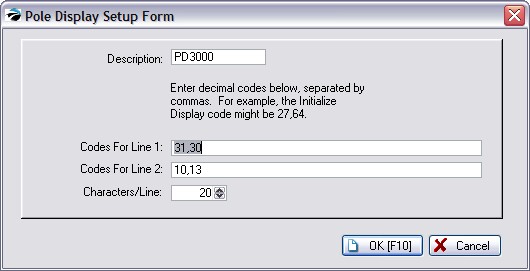
For example, if you have a Logic Controls model PD3000:
Click on the ![]() button and the end of the Pole ID line.
button and the end of the Pole ID line.
Highlight ID #251 and click on Edit.
For a Description type PD3000
For Codes for Line 1 type 31,30
For Codes for Line 2 type 10,13
For Characters per line type 20
Then Click on OK.
If you have any other brand and model, check with the manual for codes to enter.
Pole Display Port - Choose the port to which the pole display will be attached.
Message Lines - When the pole display is not showing products and prices, you may choose a greeting or message for display. The message can be changed as often as you wish. The length of the message is dependent upon the brand of pole display.
Pole Line 1
Pole Line 2
Test Button - Sends a signal to the pole display to confirm that settings are correct and to display the message lines.