|
Receive Inventory (RMA) |
  
|
|
Receive Inventory (RMA) |
|
Inventory items sent to the vendor will be repaired or replaced and sent back to you. You receive these items into inventory.
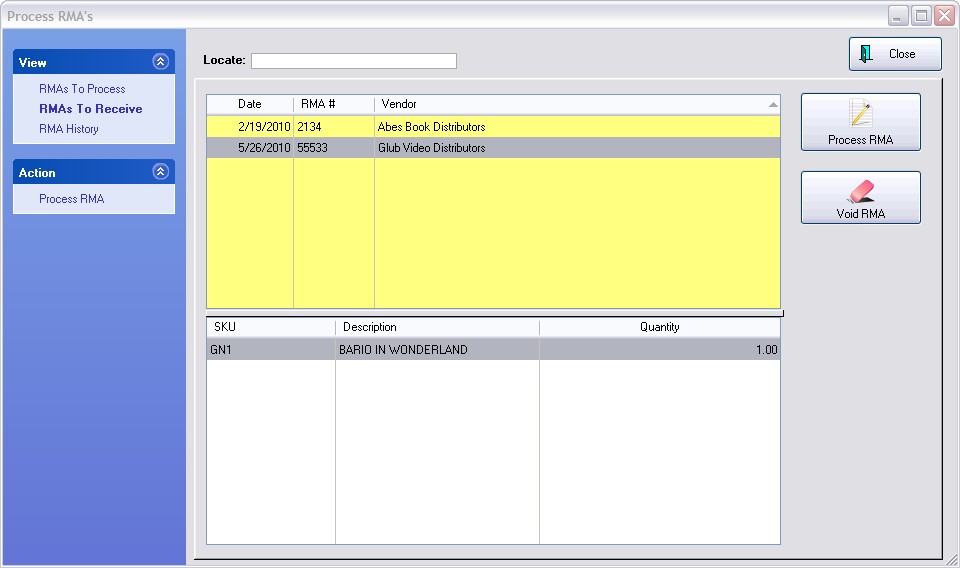
How To Receive An RMA
1) Go to Purchasing
2) Select Receive Inventory ("RMAs To Receive" under View should be selected)
3) Highlight the vendor shipping the product and the product being received should be visible in the list below.
4) Click on Process RMA
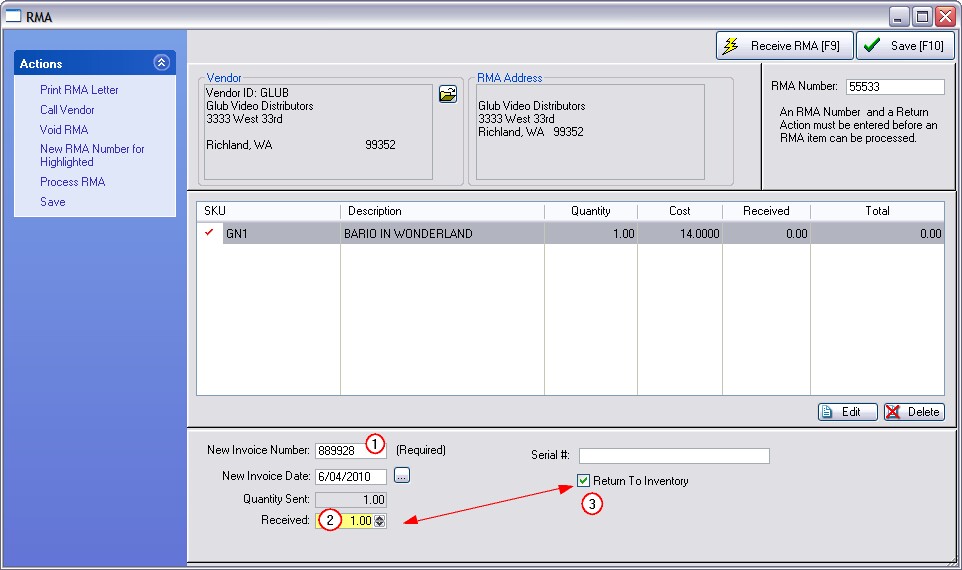
Choose To Receive Item(s)
1) Enter the new vendor invoice number
2) Be sure to enter the Qty received. VERY IMPORTANT: Make sure Return To Inventory is checked.
3) Return To Inventory is checked by default because it is assumed that you want this received product to change your current stock count
If it is unchecked this RMA will be processed but it will not change your stock count. In only rare circumstances would you uncheck this option, such as receiving an inventory item on which you are doing service work and is not a normal part of your inventory. (see Special Returns)
4) Repeat for each line item as needed
5) Choose Receive RMA [F9] and your inventory will be updated with a reference to this RMA invoice.
ACTIONS
Print RMA Letter - at this point, such a letter is unnecessary, but you could print it for your own records.
Call Vendor - if you have questions of your vendor the phone number is provided.
Void RMA - If the RMA is of no consequence or no longer valid it can be voided..
New RMA Number for Highlighted - All of the items in this RMA group are assumed to be approved by the vendor under just one RMA number. However, vendors sometimes issue different RMA numbers for different items. It is recommended that you first process the items with different RMA numbers separately and individually. Then process the remaining items as a group under the general RMA number.
Receive RMA [F9] - This will process the tagged item(s) as having been received from your vendor and place them as transactions in the Purchase Order History listing.
Save [F10] - You may choose to save this and process this at another time.