|
Merge Inventory |
  
|
| Show/Hide Hidden Text |
|
Merge Inventory |
|
| Show/Hide Hidden Text |
Purpose: To combine the information of two inventory items and remove the unwanted item. The SKU of the item to be removed from the Inventory Center will be assigned as an Alternate SKU of the item retained.
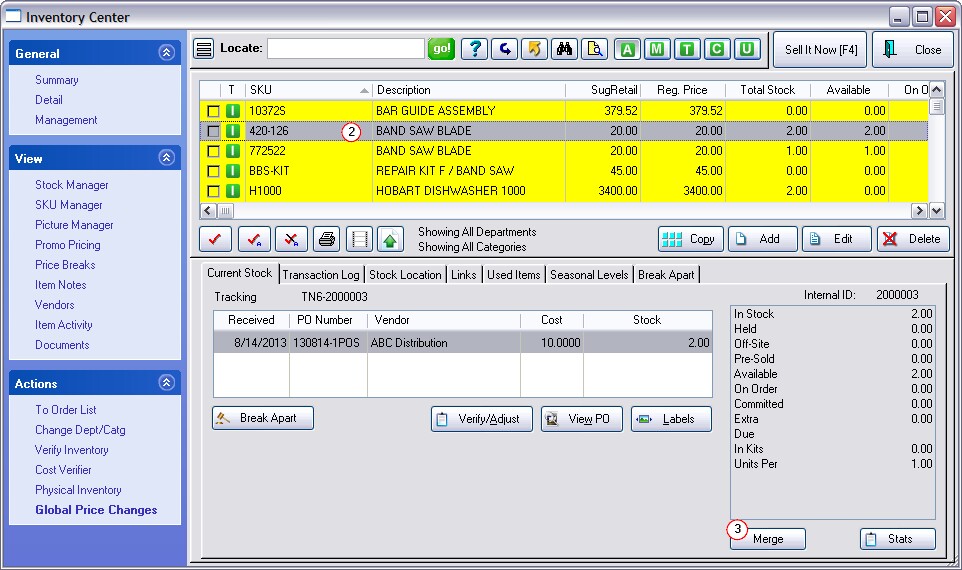
At the bottom right of Stock Manager: Current Stock tab is a "Merge" button.
In the event that an import of inventory or a manual creation of a particular item creates a duplicate (two distinct items with different Internal ID numbers) which should be combined, you can highlight the item to be removed and choose the Merge button.
WARNING: Make sure the Internal ID's of the two items are different.
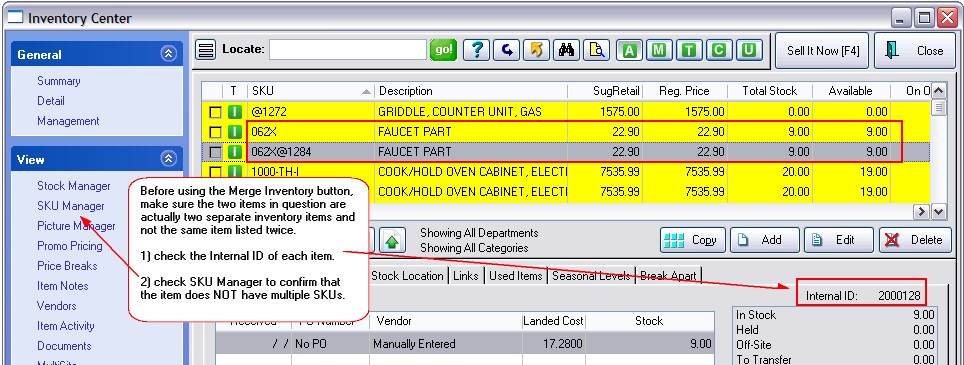
When you choose Stock Manager: Current Stock tab, you will see the internal ID of the highlighted item at the far right. The internal ID is used to identify the item even if the SKU or the Description of the item is changed. Before using the Merge Inventory button, make sure the two items in question are actually two separate inventory items and not the same item listed twice. 1) check the Internal ID of each item. If they are identical, DO NOT attempt to merge the items.
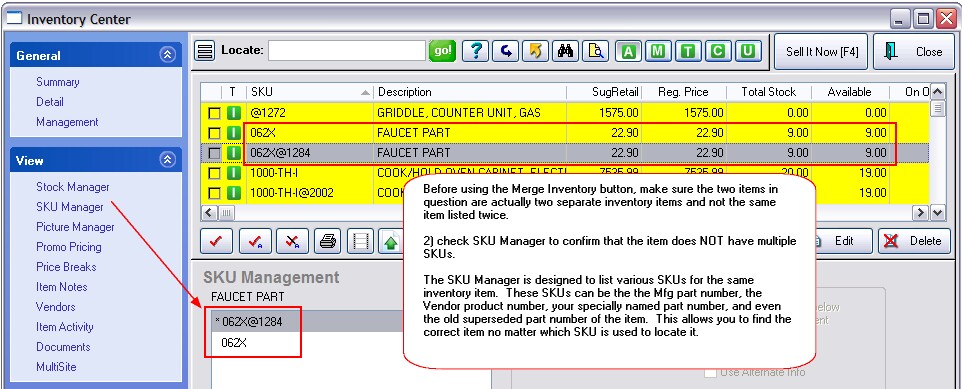
2) check the SKU Manager to confirm that the item does NOT have multiple SKUs.
The SKU Manager is designed to list various SKUs for the same inventory item. These SKUs can be the the Mfg part number, the Vendor product number, your specially named part number, and even the old superseded part number of the item. This allows you to find the correct item no matter which SKU is used to locate it. Another indicator that the items are NOT different will be that the stock counts and pricing will be identical. |
2) Highlight the inventory item to be REMOVED from the Inventory Center
3) Choose the Merge button located at the bottom right of Stock Manager: Current Stock tab.
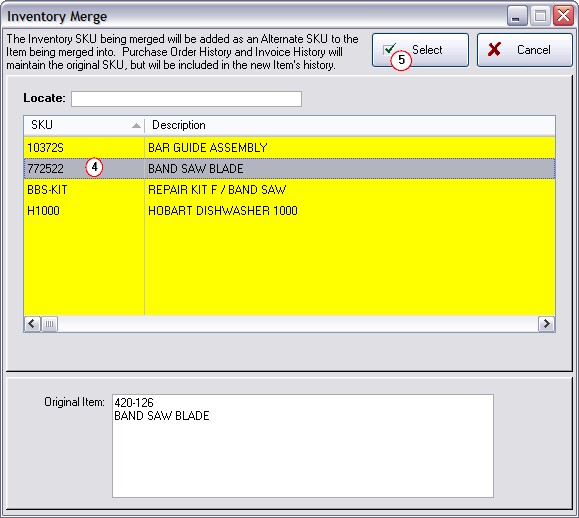
You will be prompted to Select the item into which the highlighted item will be merged.
Note: "The Inventory SKU being merged will be added as an Alternate SKU to the Item being merged into. Purchase Order History and Invoice History will maintain the original SKU, but will be included in the new Item's History."
4) Highlight the item which is to receive the information of the deleted item.
5) Choose Select
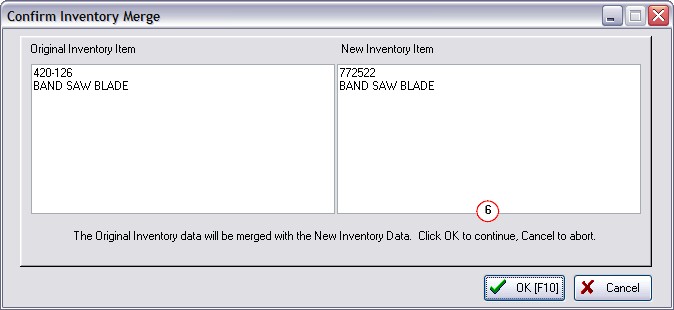
6) Confirm that the two items displayed are the desired items. Then choose OK.
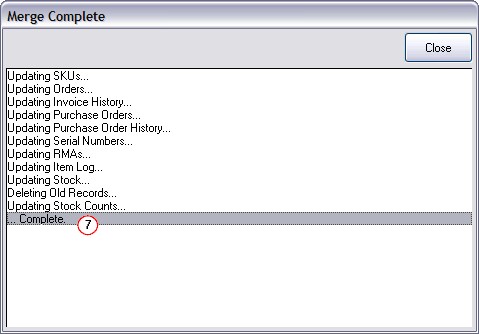
7) A progress window will show what aspects of POSitive are being affected by the merge.
When it is finished, the last line will say "Complete"
You may then close the window.
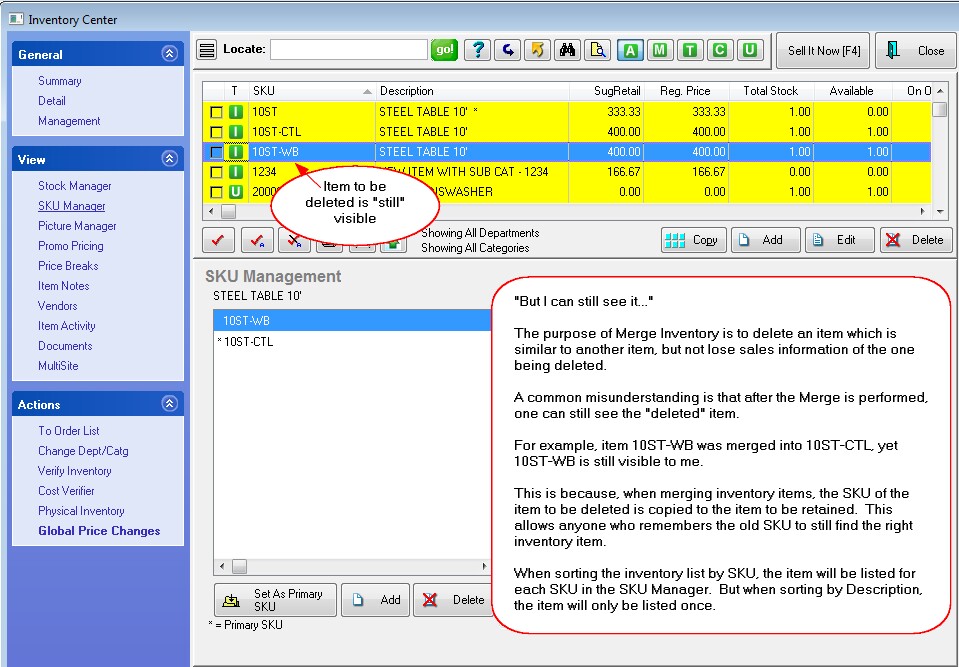
But I can still see the item I just deleted
The purpose of Merge Inventory is to delete an item which is similar to another item, but not lose sales information of the one being deleted. A common misunderstanding is that after the Merge is performed, one can still see the "deleted" item. For example, item 10ST-WB was merged into 10ST-CTL, yet 10ST-WB is still visible to me.
This is because, when merging inventory items, the SKU of the item to be deleted is copied to the item to be retained. This allows anyone who remembers the old SKU to still find the right inventory item. When sorting the inventory list by SKU, the item will be listed for each SKU in the SKU Manager. But when sorting by Description, the item will only be listed once. |