You may create and modify labels for printing customer addresses to better suit your needs.
POSitive comes with two labels already defined: one with the bill to address and the other for the ship to address. They are both standard sized address labels designed to print on a full sheet of paper with 3x10 layout (3 labels across and 10 rows of labels).
How To Edit Customer Labels
Go to Report Center and select Customer Labels under Actions on the far left.
When you begin to edit customer labels you will see the following screen. These labels are stored in C:\POSitive\PRMPFRE\CUSLABS directory. The cuslabel.lbl is the label for Bill To information. The shplabel.lbl is for the selected ship to address. On the far right is a sample view of the label layout.
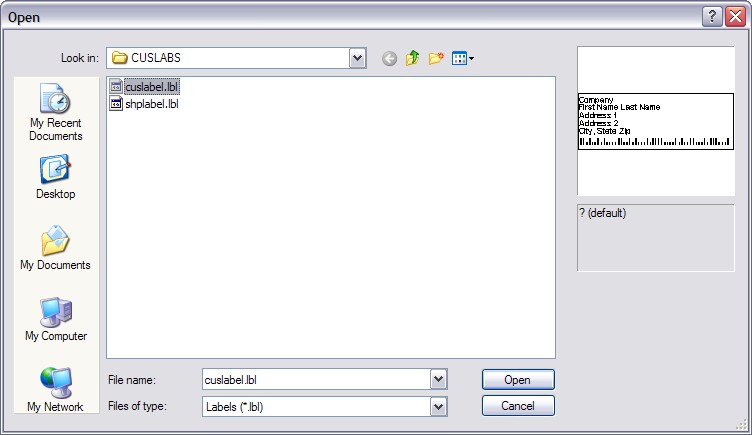
The file cuslabel.lbl is standard POSitive label. Highlight it and choose OK.
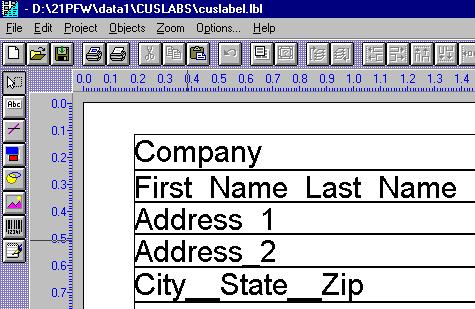
The editing window will look similar to the following
Change Label Size
If your labels are printing on paper other than 8x11 with labels 3 across x 10 rows you will need to change the Label Size and Page Setup.
Go to Project pulldown menu
Select Page Layout
First, SAVE AS a new name. You do not want to lose the original layout, so go to File and choose Save As.
Second, Select Project and click on Page Setup.
Click on Printer Choice tab.
Select Printer page independent
Click on Choice button.
Select your printer, Paper Size and Source.
Choose OK.
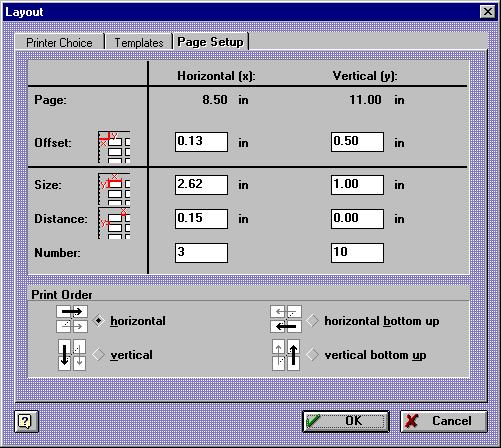
Third, make changes to Page Setup (above illustration.)
Click on Page Setup tab.
The dimensions of the page will change based upon the selections made above.
Measure the physical distances for each dimension and enter the decimal values.
Offset x and y distances between left edge and top of paper to the first label
Size x and y heigth and length of individual label
Distance x and y spacing below and between labels
Number x and y number of labels across and down the page
Fourth, arrange and set properties of elements of the label.
The currently selected elements are Company, First Name Last Name, Address 1, Address 2, City__State__ Zip, and PostNet (USA postal barcode)
To edit an element, click on the element to select it. (A pink dotted border will display.)
Rightmouseclick and choose Properties. You may reset fonts, justification and orientation.
For Example
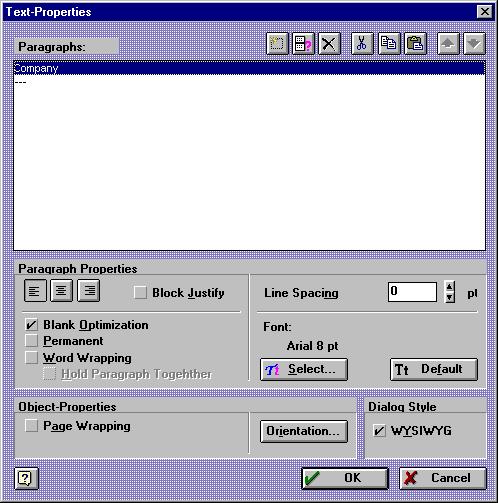
Fifth, you may preview your changes as you go. Maximize the Preview window.
Finally, save your work and exit. Assign the Customer Label type on Station Detail.
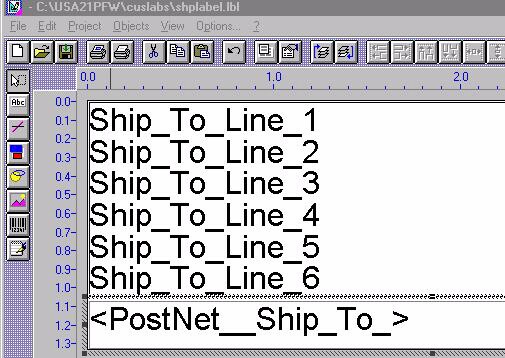
Ship To Label Layout
The ship to label is different in that it is one field with multiple lines whereas the bill to label consists of numerous separate fields.
