Landed Cost Setup |
  
|
Landed Cost Setup |
|
Setup
To track the Landed Cost of an inventory item, you must first activate three options in System Setup and GL Setup.
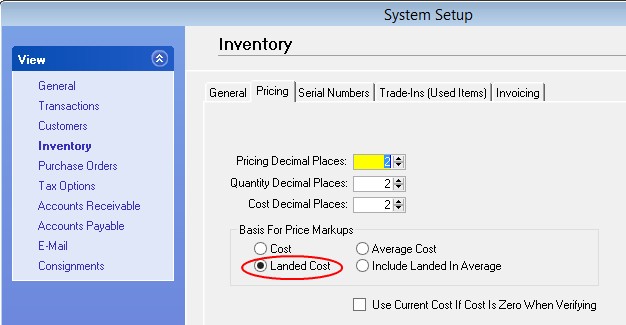
1) Go to System Setup: Inventory: Pricing tab and choose "Landed Cost" under "Basis For Price Markups"
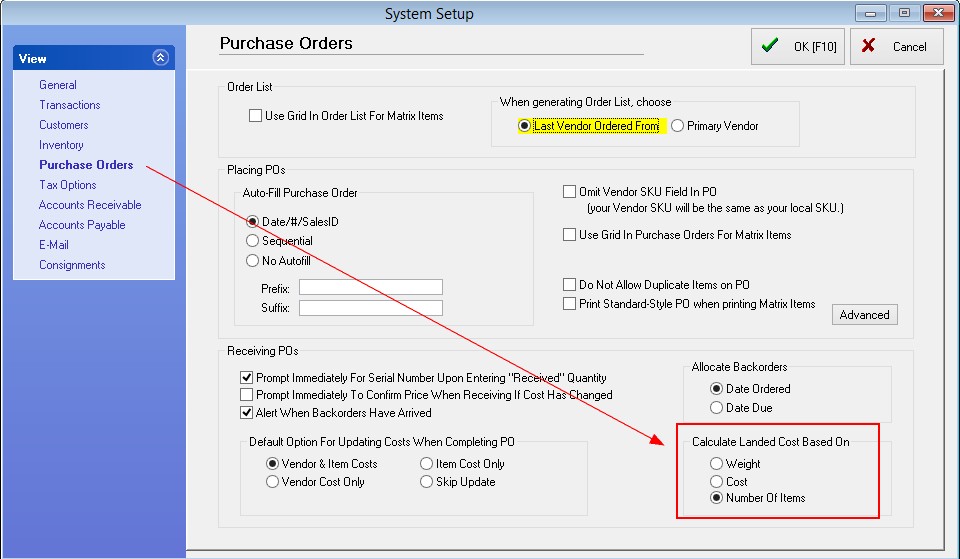
2) Go to System Setup: Purchase Orders and choose the method for applying freight charges to the items on the PO. Note: this setting will be used automatically, but while reviewing the PO Summary screen, last minute changes can be made.
3) Go to Accounting: GL Setup: Cost of Sales (Expenses) and checkmark "Treat Landed Cost as Actual Cost"

Application
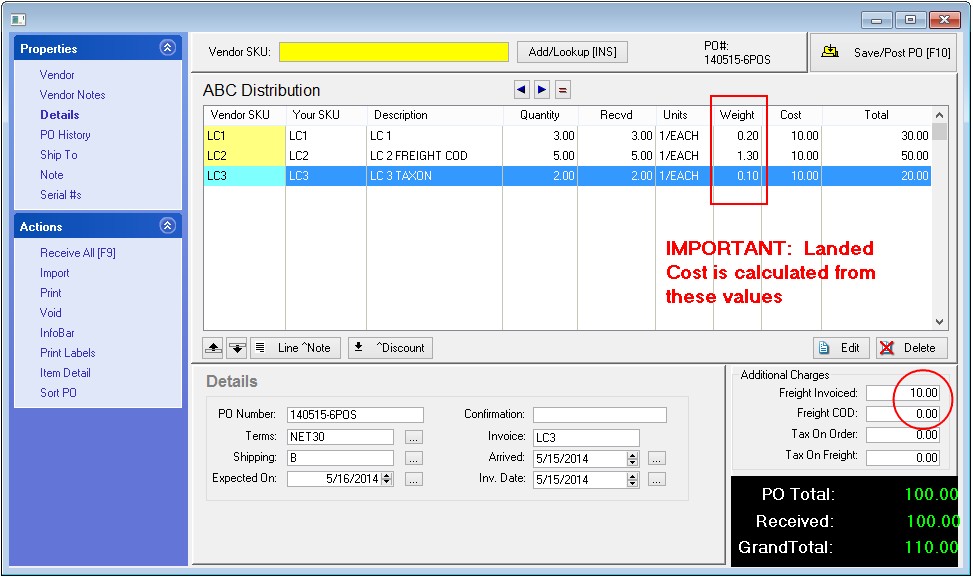
1) Before receiving a purchase order, fill in the Freight and/or Freight COD fields of a purchase order. These values must be filled in before the purchase order is received. That may mean that you must wait until the vendor sends the final invoice before receiving the purchase order because freight charges added after the PO has been received will not update the landed costs of the items on the PO.
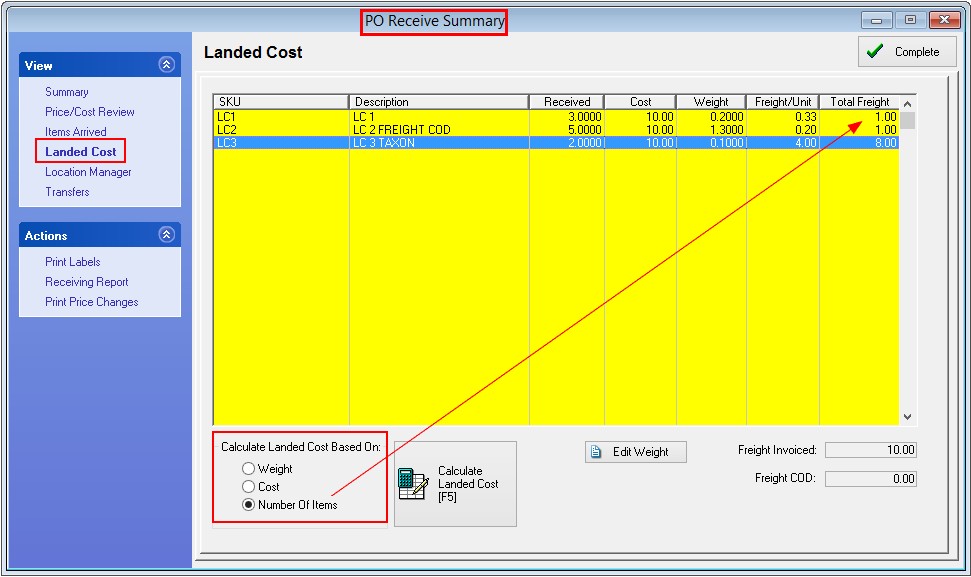
2) When receiving a purchase order, pause at the Receive PO Summary screen and review the Landed Cost settings.
POSitive will take the Freight value ($10.00) and distribute it per 1) Weight or 2) Cost or 3) Number of Items being received.
Manual Adjustments
The Edit Weight button allows you to manipulate the weight of an item so that the item carries more of the freight charges.