POSitive Legacy Report Writer |
  
|
POSitive Legacy Report Writer |
|
The legacy Report Writer is a built-in tool that allows you to edit and create reports in the legacy report format. However, we recommend that new reports be created with the new POSitive Report Writer. Please contact your dealer, or POSitive, for more information.
Legacy reports may be accessed from the Report Center and are the following types:
Receipt Layouts: These are forms designed for receipt and similar printers, and are referred to as "Direct To Printer" forms. (See: Direct To Printer and Printer Forms)
Invoice/Reports Layouts: These are full-size invoice (and similar forms) and reports. In Station Settings, forms marked "Windows" are full-size reports designed to be printed on inkjet or laser printers. Legacy reports in this section are selected by default unless replaced with a custom report.
Inventory Labels and Customer Labels: These are label forms designed for use with dedicated label printers, or label stock, such as Avery labels.
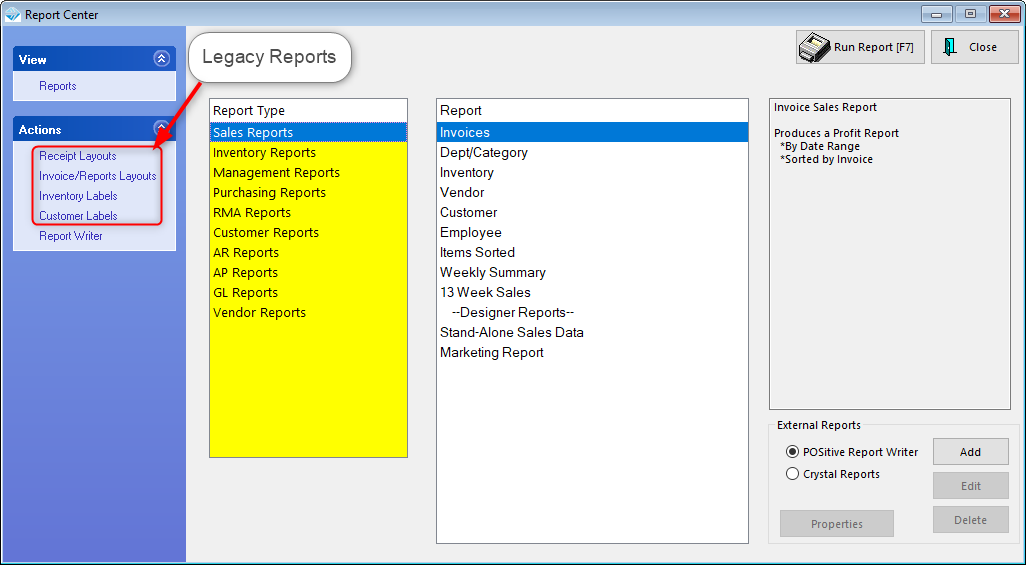
The following Windows reports can be edited using the Legacy Report Designer. Go to Reports: Actions-Invoice/Reports Layouts.
•AR Balance Forward – statement for accounts receivable
•ARStatement - statement for accounts receivable
•CustomerList - customer listing
•Inventory Price List - a catalog for customers
•Invoices - a smart form used for all windows printing of invoices, orders, service orders, quotes, etc. You may clone and design the form for each type of transaction.
•Physical Stock Count - report of inventory stock levels
•POHistory - a reprint of a received purchase order
•Print Promo Pricing - a list of items with promotional dates
•Purchase Order - a printout of a current purchase order
•Service Work Schedule - printout of service work assignments
•WorkOrders - a service department printout for on-site repair work
NOTE: Report Designer will NOT allow you to create reports. You can make slight modifications to existing reports only. You may edit control items, add some control items, add a graphic, and reposition control items. You cannot add or modify bands, define calculations, or apply other elements.
Editing of forms in not a simple task and it is not within the scope of this help file to detail all the options and steps required for editing your forms. However, here are some basic guidelines.
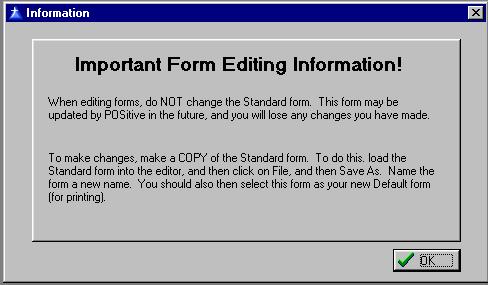
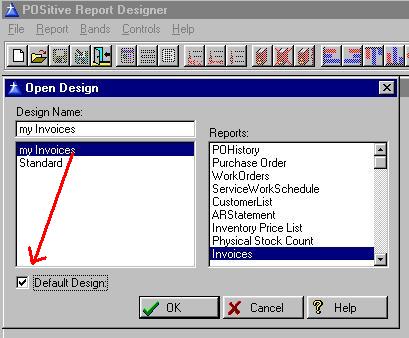
To edit the Windows Forms, go to File: Editors: Reports Editor. Choose to Open the Invoices Layout. Immediately choose SAVE AS and save this layout with a different name so that any changes made will not be made to the original Standard file.
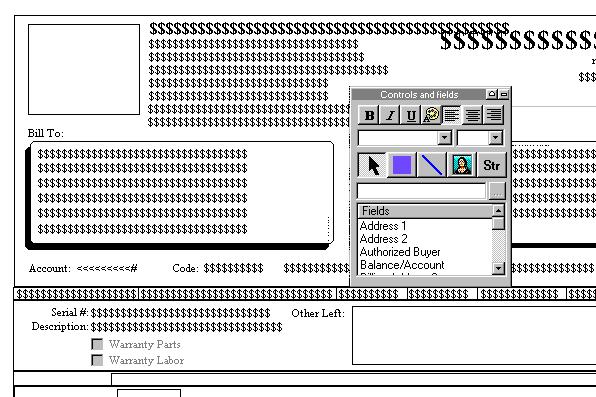
The layout follows standard graphic object editing. The strings of dollar signs are place holders for data. They can be moved, deleted, and formated.
When you have redesigned your Invoices layout, exit the Designer. Open the Designer again, highlight Invoices layout and you will see both the original Standard and YourNamed layouts listed. Highlight YourNamed layout and checkmark the Default Design option directly below the list. Exit Designer and your new invoices will use your edited layout.
By default, the Invoice Layout is used for all types of transactions. Its SmartFeatures automatically adjust for the type of transaction in process. However, you may create distinct forms for Layaways, Orders, Service Orders, etc.
1) Edit the Standard Invoice layout.
2) Choose Save As Layaway, or Order, or Service Order.
3) Then when you are setting up the workstation for printing invoices, orders, layaways, service orders, etc., one of your options is a Windows Form. The default choice is Standard. However, once you have created these custom layouts, you can select them as needed.
Add Quantity Shipped To Invoice Printout
You may modify your invoice to show Qty Shipped, instead of Backordered, which is a calculation of the quantity ordered less the quantity backordered.
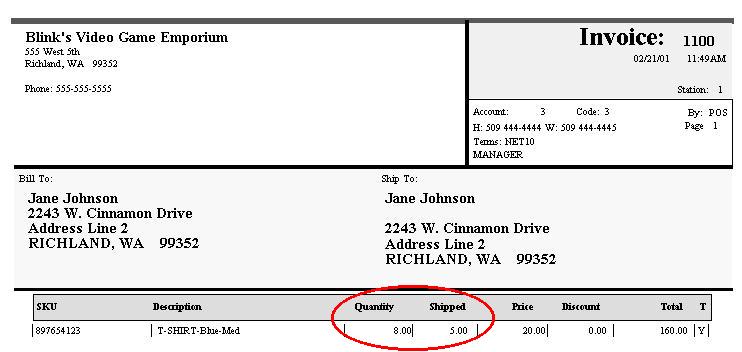
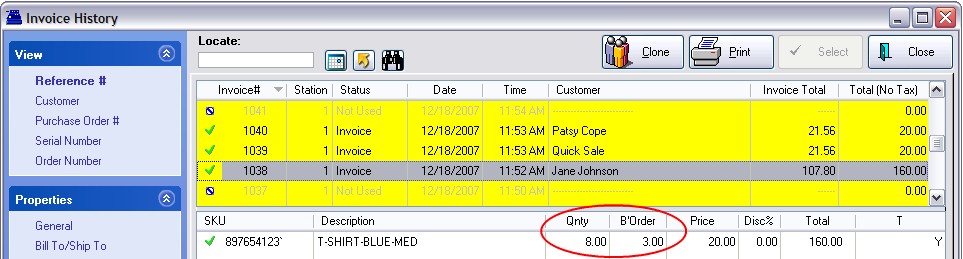
Invoice History in POSitive will still show the quantity ordered and the quantity backordered, but the actual printout will deduct the backorder amount from the ordered amount and print the quantity shipped.
1) Go to Reports: Actions: Editors: Reports Editor
2) Go to File: Open Layout and select Invoices
3) SAVE AS It is important to save this as a new layout. Go to File: Save Layout As. Type in a name for the layout.
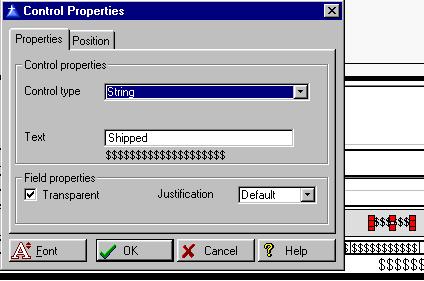
4) Go to the section of the layout where you can see Quantity and $$$$$$$. Click on the $$$$$$$. This is the Title Field.
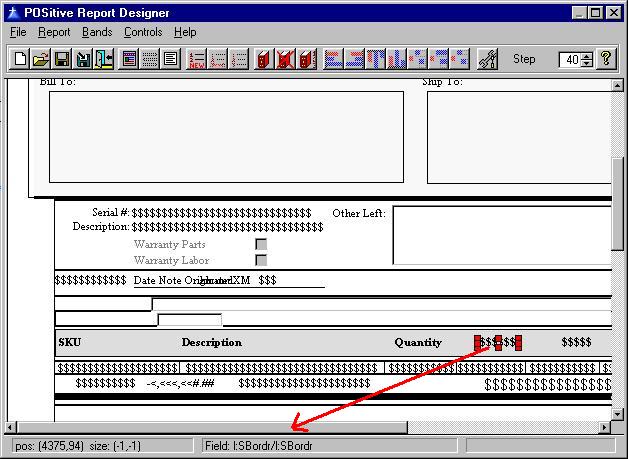
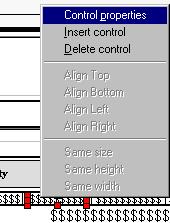
5) RightMouseClick on it and choose Control Properties.
6) Instead of the "control type" FIELD select STRING. And instead of the current "Text" type Shipped.
7) Click on the data field in the line directly below the new Shipped text.
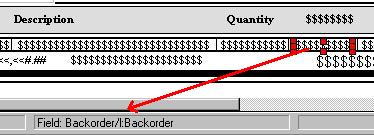
8) RightMouseClick and choose Control Properties. Change the "field" from Backordered to Quantity Shipped.
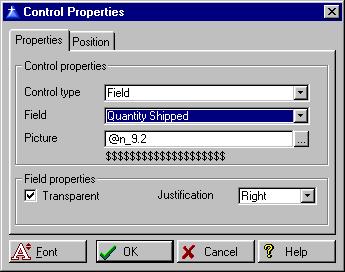
9) The resultant setup should now look like this.

10) Save and Exit.
11) The final step is to make this new layout your Default Layout.
Go to File: Editors: Reports Editor
Go to File: Open Layout and select Invoices. DO NOT choose OK. Instead, highlight your newly named layout and place a check on the default option.