Defining the Desktop Buttons |
  
|
| Show/Hide Hidden Text |
Defining the Desktop Buttons |
|
| Show/Hide Hidden Text |
Advance Setup: You will need to create your own set of graphics for each button function. The graphic should also include a title. To create desktop buttons, go to Maintenance: Definitions List and select Desktop Buttons.
1) Each button is created by selecting the Plus button
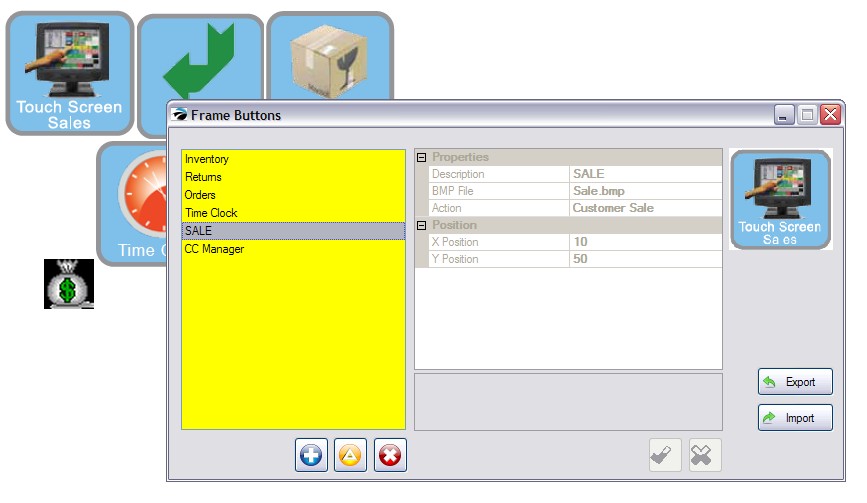
2) Define the button with
•Description - a title of the function of the button (it does not appear on the screen). Your graphics will need to include titles.
•BMP File - select the graphic. It will be visible at the right as you are editing the button definition. NOTE: You must use a 100 x 100 pixel BMP image. If there is no graphic displayed, then the graphic is incompatible as a desktop button OR the file name is too long. (Note: POSitive expects these images to be stored in a folder named Buttons under the root folder of POSitive so that all workstations will have access to the images. For example: C:\POSitive\buttons or for workstations P:\POSitive\buttons
•Action - select from the listing of Pre-Defined functions (see Pre-Defined Desktop)
•X Position - the number of pixels from the left side of the screen. In the above picture the black money bag graphic is 50 pixel from the left, the Time Clock is 100 pixels, and the Touch Screen Sales button is 10 pixels from the left.
•Y Position - the number of pixels from the top of the screen. In the above picture the black money bag graphic is 300 pixel from the top, the Time Clock is 180 pixels, and the Touch Screen Sales button is 50 pixels from the top.
When placing buttons you should leave space at the bottom to adjust for times when the Ribbon Menu is selected for display, If possible, the Y Position will be from the bottom of the Ribbon Menu. This means that your graphic buttons will shift down on the screen.
However, if your graphics are already to the bottom edge of the screen, the ribbon will have to overlay on some buttons. Samples
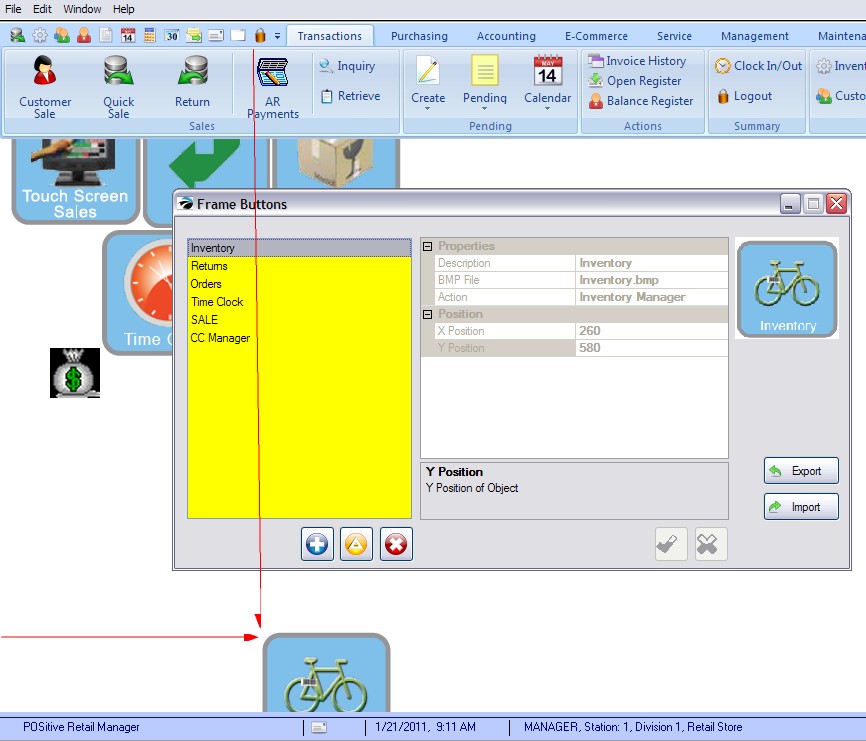
In this picture, an Inventory Graphic is positioned at X=260 and Y=580 pixels. The bottom portion of the graphic is partially obscured.
When the Ribbon Menu is activated, there is no room for images to shift, therefore, the ribbon obscures the tops of the desktop buttons.
|
3) Select the green Check button to save your settings. The graphic will then appear on the background.