Create and Process an Invoice |
  
|
| Show/Hide Hidden Text |
Create and Process an Invoice |
|
| Show/Hide Hidden Text |
Before going into details about working with invoices, you should learn which style of invoicing screen management wants you to use. There are three choices: Register Style, Classic Invoice Style, and a very customizable Touchscreen Style.
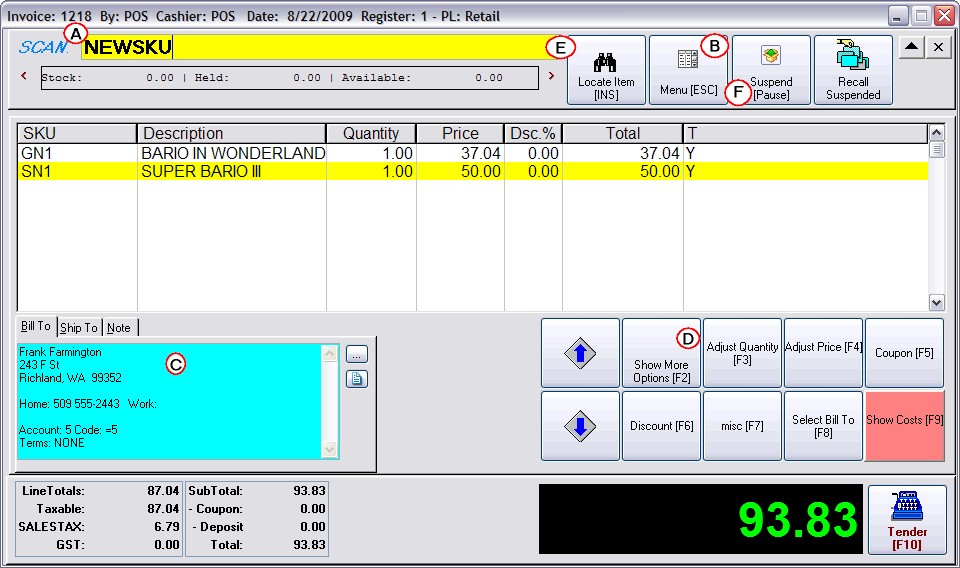
The Register Style layout is designed for general merchandise sales. It is assumed that changes to pricing and discounts will be minimal, that splitting commissions and changing Sales ID are not typical practices. This screen is simple in it's layout and function.
A) Once set for the workstation, this screen will be used for ALL types of invoicing transactions: Invoice, Layaway, Order, Service Order, Web (Internet) Order, Quote, Recurring Invoice, and Contract Pricing.
B) The ESCape key will open a menu of additional options.
C) The customer information is readily visible.
D) Line items are edited using the array of Invoice Buttons; highlight the item and select the appropriate button. This set of buttons is customizable.
E) Adding a product is done by scanning or typing a SKU in the yellow field, or by pressing the Locate Item or INSert key to see a listing of inventory.
F) An "invoice" can be temporarily suspended and recalled by any station on the network as a means of cutting down long lines.
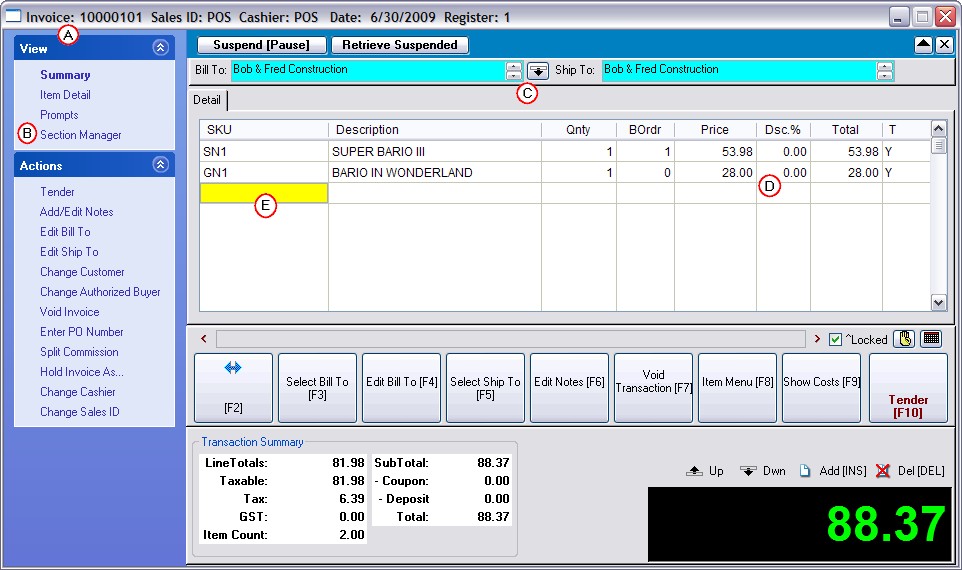
Unlike the Register style screen which is activated by default when you install POSitive, this classic Invoice Layout is enhanced to make editing easier. It also supports grouping items into sections.
A) Once set for the workstation, this screen will be used for ALL types of invoicing transactions: Invoice, Layaway, Order, Service Order, Web (Internet) Order, Quote, Recurring Invoice, and Contract Pricing.
B) The far left displays advanced menus which are always visible and readily accessible. (In Register style screen you choose from the ESC Menu each time.) The Section Manager is a feature unique to this invoicing screen.
C) The customer information is tucked away on one line at the top of the screen. Choosing the Down Arrow will display the full information.
D) Line items are easily edited; highlight the item and press Enter to change the quantity, price, or discount. The button bar is also functional and can be customized.
E) Adding a product is done by scanning or typing a SKU in the yellow field, or simply by pressing Enter to see a listing of inventory.
F) An "invoice" can be temporarily suspended and recalled by any station on the network as a means of cutting down long lines.
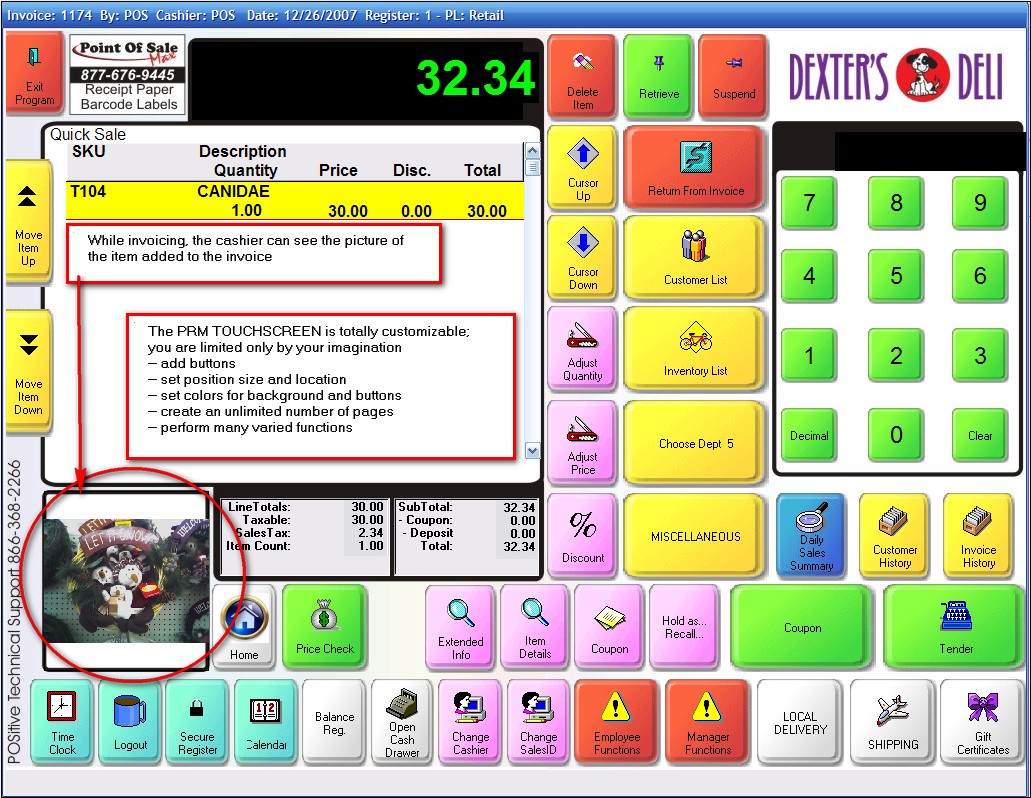
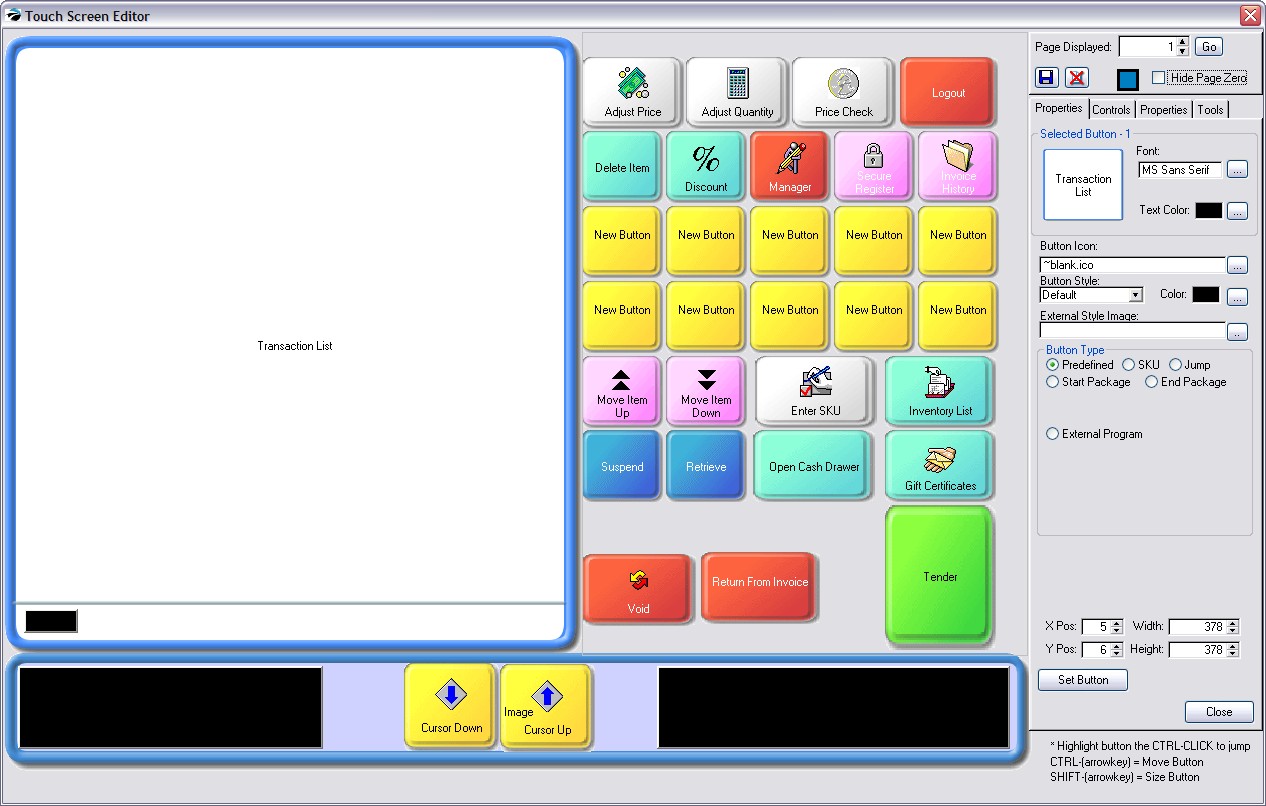
These are just samples. You will need to review your customized touchscreen and get specialized training on it's use.
PRM provides a fully customizable Touch Screen. They are limited only by your imagination. Contact your dealer for help in planning and creating a touchscreen which will meet your needs.
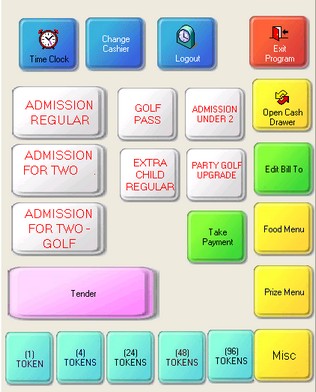
Choose C:\\POSitive\PRM\Buttons\DEFAULT.BTN
This is a simple starter screen with essential invoicing buttons. What is missing are links to your inventory items through the renaming and setup of the yellow "New Button" buttons. Your dealer may have a touchscreen layout more suited for your business type.
There are many ways to being an invoice and management will have chosen one method for you to use. Be aware that each computer could operate differently based upon Station Settings.
From the Transactions master menu, choose the Customer Sale or Quick Sale button.
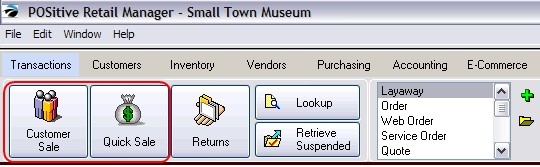
Quick Sale Invoice •extremely simple to create and process: 1) list the items to be purchased, •no need to ask customer for personal information Customer Sale Invoice Customer Sale invoices are just as easy, but first you select the customer by name, phone number, or account number. Then you have enhanced services beyond just invoices: options like layaways, special orders, service orders and quotes, purchase histories, preferential pricing, rewards programs, contract pricing, store accounts and credit options, specialized mailings, e-mail marketing, tax exemptions and more. |
Enter Multiple Quantities
How To Enter Multiple Quantities of an Item
Methods for Adding Inventory to an Invoice
Methods for adding Inventory.
If using
•Register Style: press F10 or Tender button to open the Invoice Tender screen.
•Invoice Style: press F10 or Tender button to open the Invoice Tender screen.
•Touchscreen: click on Tender button and the Balance Due screen is streamlined.
1. Highlight the method of payment.
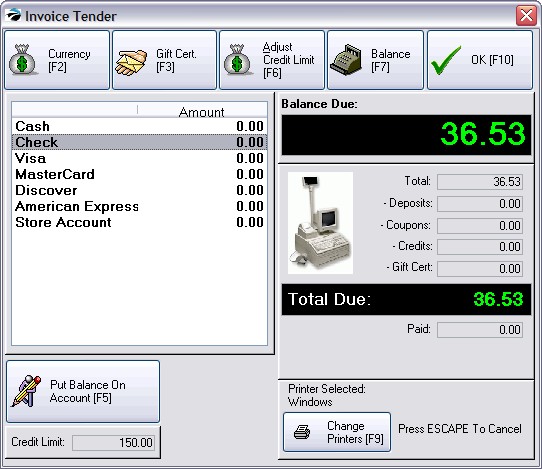
2. Press Enter to fill in the amount due. (Note: another method is available more suitable for stores which accept payment in cash. Choose Tender Screen In Edit Mode on the POSitive Setup Form. With this method you type the amount tendered first, and then press Enter.)
3. The full amount due will be entered automatically.
4. Enter the actual amount of payment.
•If payment is in excess of the amount due, you will prompted with the amount of change to give to the customer.
•If payment is less than the amount due, you must highlight another method of payment and repeat the process until the entire balance is diminished to 0.00.
If the customer wishes to redeem a gift card or gift certificate,
1) choose the Gift Cert [F3] button first.
2) Enter the Gift Card/Certificate number and press Enter. If the certificate number is not on file, you should contact a manager, otherwise the amount of the gift card will be subtracted from the total amount due. (see Gift Certificates)
If you are not yet ready to tender payment, press the ESCape key on the keyboard or select the X in the upper right of this screen. You will be returned to the invoice.
If the number is green then that is a charge amount. If the number is red that is a refund amount.
Several factors can affect the Total Due field.
Total - the grand total on the invoice
-- Deposits - if prior payments were received when the transaction existed as an order, layaway, internet order, or service order
-- Coupons - value of coupons being redeemed
-- Credits - value of store credit being applied to this invoice
-- Gift Cert - redemption of a gift certificate
If food stamps are applicable as payment towards items on this invoice, processing food stamps must be done first, even before tendering Gift Certificates. There are some special setups which should be reviewed. (see Food Stamps)
As you are processing an invoice, you may want to print the receipt to a different printer. In the lower right corner is a display of the currently selected printer. With an [F9] option button to change to a different printer for this invoice only.
1) Before filling in the amounts for tender, press F9, Change Printers. Note: a Station Setting can be set to always prompt for which printer to use.
2) A list of defined printers will open. Highlight one and press Enter.
3) The lower right corner displaying the currently selected printer will change.
4) Process the Tender amount.
You may use multiple payment types, known as splitting the tender, to pay for purchases. For example, the customer may want to put some of the charges on a credit card and pay the rest by check.
1) Highlight one method of payment, such as a credit card.
2) Press Enter, which will fill in the full amount due.
3) Type the amount to be charged to the credit card.
4) Highlight a different method of payment, such as a check.
5) Press Enter, which will fill in the balance due.
6) Repeat as often as necessary.
You may choose to defer payment by placing all or a portion of the amount due on store account. This option is not available on Quick Sale invoices or Customer Sale invoices if the customer record does not have an entry in the Address line.
1) Press F6 to Adjust Credit Limit. POSitive will raise the customer's credit limit to cover the exact amount due.
2) Press F5 to Put Balance On Account.
3) Answer YES to Process Now. The sale will be closed and the customer AR records will be updated. Printing of an AR Statement for the customer will include these charges.
With proper approval you can transfer liability for purchases to a third party. Third party billing could be a Finance Company or an employee's company which will pay all or a percentage of the purchase.
1) Enter the amount which will be covered by the third party agreement in the Finance Company field. When you place the balance due under Finance Company, you will be prompted to select an appropriate company or third party.
2) Enter any remaining balance which would be the individual's responsibility under cash, check, credit card, or store account.
If you are willing to take foreign currency as tender, select Foreign Currency [F2]. Select the defined foreign currency. (If necessary, you may edit the exchange rate to the current rate.)
Enter the amount of payment, and complete processing. The change due will be calculated in your local currency. You will not be making change in the foreign currency.
When you Press F10, the Change Due window will appear with the amount you need to give to the customer.
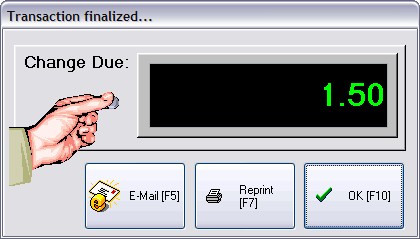
The E-Mail [F5] button allows you to send this invoice via e-mail to the customer.
The Reprint [F7] button allows you to immediately print another copy of the invoice.
The OK [F10] button will close this window.