You may print or e-mail Accounts Receivable Statements for your customers monthly or any time on-demand.
The type or layout of the statement and contents of an AR Statement is controlled through Maintenance, System Setup, Accounts Receivable.
To Open AR Statements
* Accounting: AR Statements (print or e-mail options)
* Report Center: AR Reports, AR Statements (print or e-mail options)
* Customer Center: Select Customer Record, AR Detail, Print Statement (print option only)
Two Types of Statements
| • | Transaction-Based Statement - an AR Statement will print details of active invoice charges and payment |
| • | Balance Forward Statement - an AR Statement will print details of invoice charges and payment for the current time period. The previous period will be reflected only as a balance forward amount. (see AR Statement Form) |
Periodic Closing of Statements
It is important that this process be done MONTHLY before processing statements. This insures that the correct invoices for the period appear on the statements.
1) go to Accounting: Accounts: AR Statements
2) click on Close Monthly Statements [F9]
Printing or E-mailing of Statements
Statements are processed for printing or e-mailing based on settings in Maintenance, System Setup, Accounts Receivable, Statement Batch Printing:

* Include ALL Transactions on Statements Whenever Printed - all active charges and credits will be printed on the statement.
* Include ONLY Transactions for the Statement Period Being Printed - only the active charges and credits up to the designated cut off date will be printed on the statement.
* Do Not Print AR With Zero Balance - If a customer has a zero balance POSitive will not print AR Statements during batch printing. You will still be able to manually print an AR Statement for the customer.
Note: If the customer has a store credit and no charges, the statement will print with a negative amount owed.
Customer Settings

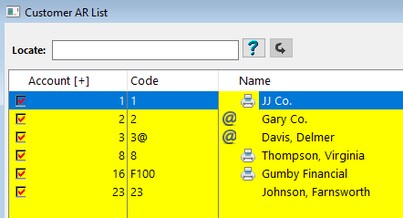
You have the option of printing or e-mailing statements to customers. In our example above, customer's with a "printer" icon will have a printed statement, and customers with an "@" icon will have their statements e-mailed as a PDF (make sure those customers have only one e-mail address listed in the Customer Record). Statements will not print or e-mail for customers without an icon.

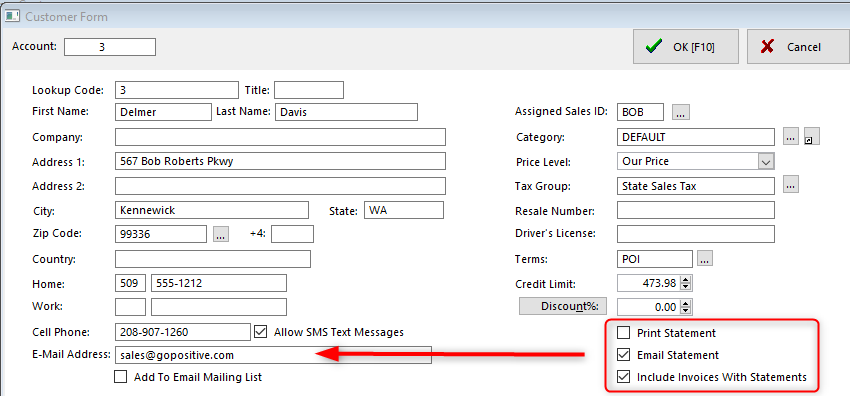
To assign a statement option, go to the Customer Center, select a Customer and Edit. As shown above you may select the following options:
* Print Statement
* Email Statement
* Include Invoices With Statements Note: Invoices will on separate pages, or you may imbed them into the statement (see Imbedded Invoices).
If you select Print Statement, POSitive will print the statement to your default Windows printer. If the option to Include Invoices With Statements is selected, each invoice will be printed on a separate page.
If you select Email Statement the statement form will be converted to a PDF and e-mailed using the EMail method specified in System Setup. If the option to Include Invoices With Statements is selected, each invoice will be converted to a PDF and attached to the statement e-mail. (see E-Mail Setup)
In our example above the customer will receive an e-mailed statement with invoices included. We recommend that only a single e-mail address be listed in the customer record.

The example above shows what a customer will receive when a statement and invoices are e-mailed. The invoice number is used for the name of the PDF file.
On-Demand Printing of Statements
| • | Find the customer in the customer list, |
| • | Choose AR Detail |
| • | Choose Print Statement [F7] |
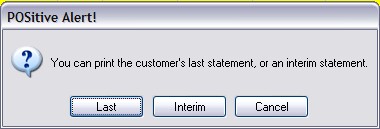
You will be prompted according to settings in System Setup: Accounts Receivable, Statement Batch Printing.
You may be asked if you want to print an Interim statement. An interim statement will ignore the cutoff date and print all open transactions up to current moment.
