|
POSitive Connect |
  
|
|
POSitive Connect |
|

What It Does
POSitive Connect connects you to your store data from any web browser. You can
| • | View sales data |
| • | Run reports |
| • | Lookup Customers, Inventory, Vendors, Invoices, Employees |
| • | View streaming video (security cameras) |
What It Is
POSitive Connect is a web server that can run as a service on the store's server. The web server connects to the live store data and information is served to any browser in real time.
Requirements
There are several requirements necessary to successfully run POSitive Connect
| • | POSitive™ (SQL) installed and running |
| • | Connection to the Internet |
| • | A Static IP Address from your Internet Provider. If you do not have one, you can register with a dynamic IP Address such as DynDNS |
| • | A Router with the ability to do port-forwarding |
Installation Instructions
(Please read the POSitive Connect document (PDF format) available on the web for additional information about port-forwarding and other technical options.)
POSitive Connect is typically installed into the POSitive directory on your SQL File Server. Here are the steps necessary to install and run POSitive Connect:
Install POSitive Connect. Run the Installation program for POSitive Connect. Typically, you will install POSitive Connect directly into your POSitive™ directory (for example, C:\POSitive\PRM). If you decide to install POSitive Connect into a different directory, you will need to copy the COMPANY.TPS file from the C:\POSitive\PRM directory into the POSitive Connect directory.
Static IP Address
The computer that will run POSitive Connect needs to have a static IP Address. This is configured in your Network Settings. Right-click on the Network icon in your System Tray, and choose Status. Next, click on the Support tab, and then the “Details…” button. You will see a screen similar to the one below.
Take note of the IP Address, Subnet Mask, Default Gateway, and the top two DNS Servers. Write these numbers down. Close this window, select the General Tab, and click Properties.
Highlight Internet Protocol (TCP/IP) and click Properties. Select “Use The Following IP Address” and fill in the values you wrote down into the appropriate fields.
Click “OK” and then “OK” again to close these screens. Click the “Support” tab again on the Connection Status screen, and click the “Repair” button. Click the “Close” button when done.
Now you need to configure port-forwarding from your router to the computer that will be running the server. Each router is different as to how you accomplish this. You can use any port above 1000 and below 65000.
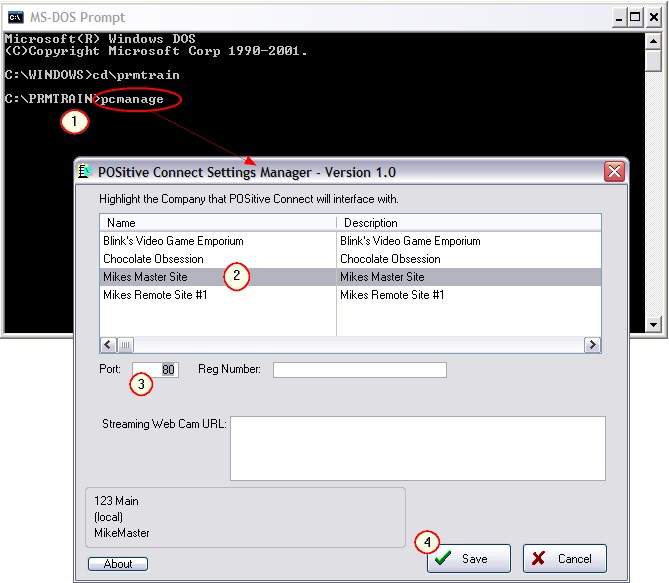
Establish Company Connection
At the computer that will run POSitive Connect, run PCManage. Choose the company you will be connecting to, and the port you chose earlier. Also enter the REG (registration) Number. Leave other fields blank for now.
1) Run PCMANAGE.exe in the C:\POSitive\PRM directory
2) Highlight the Company name with which POSitive Connect will interface and gather data
3) Set the port number and REG (registration) Number.
4) Save the settings
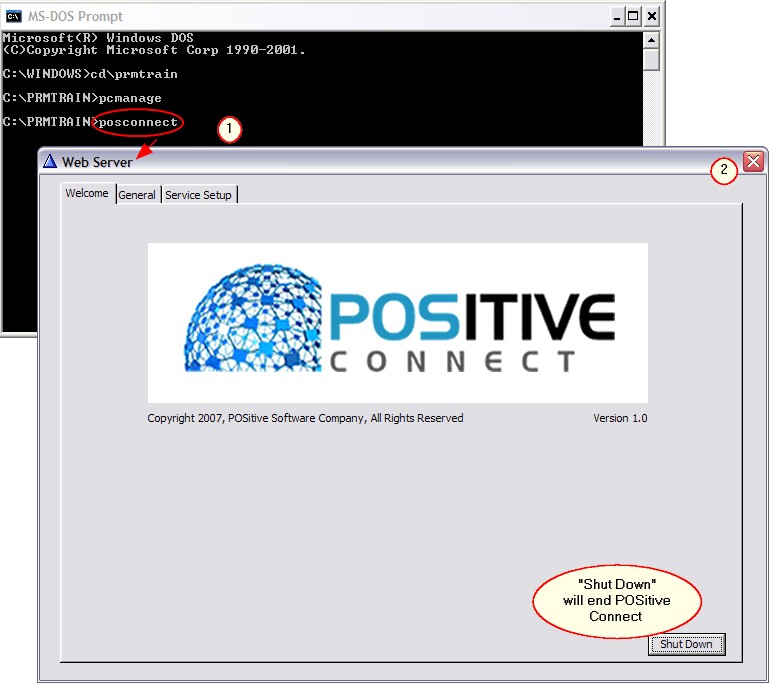
Activate Web Server
1) Run POSCONNECT.exe in the POSitive directory
2) Choose to Close by selecting the X in the upper right corner.
Positive Connect will show this icon ![]() in your system tray to indicate that it is still running. Clicking on this icon will re-open the Web Server screen. Choose Shut Down when you want to end the web server.
in your system tray to indicate that it is still running. Clicking on this icon will re-open the Web Server screen. Choose Shut Down when you want to end the web server.
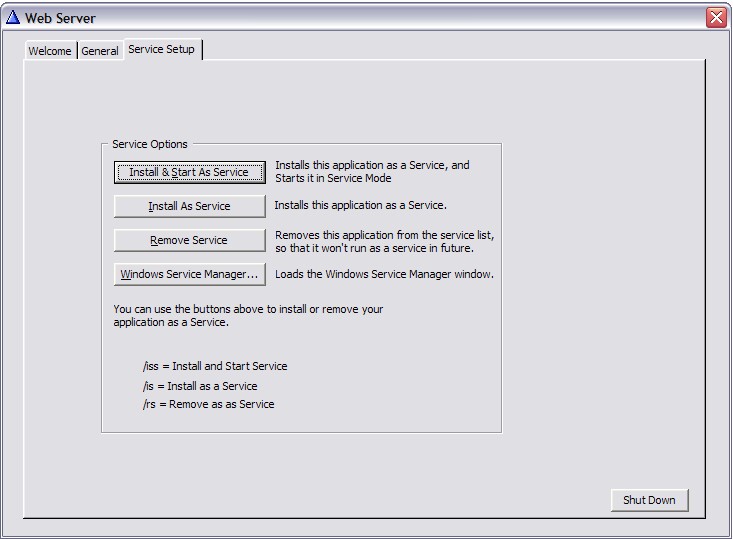
Web Server - Service Setup tab
Using POSitive Connect
In POSitive Retail Manager, you need to give access to the employee(s) you want to be able to use POSitive Connect.
| • | At the Employee screen, enter an ID and password for logging in to POSitive Connect. |
| • | At the Security screen, grant access to POSitive Connect. |
In a web browser, enter the web address and the port to connect to the web server. For example, http://connect.gopositive.com:4155 will connect to our demo site.
| • | If you are on your local network, you can just enter the IP address of the computer hosting POSitive Connect, along with the port. In our example above, you would enter http://192.168.2.101:4155. |
| • | If you are on the same computer that POSitive Connect is running on, you can just use localhost. Again using our example, on the address bar you would type localhost:4155 . |
You should now see the POSitive Connect login screen. If not, make sure you have used the same port number that you entered when configuring PC Manager.
Log in with the user id and password you assigned in POSitive Retail Manager. In the previous example, the login is demo and the password is demo. This is case sensitive.
Done! You are greeted with the "Fast Stats" screen. You can now review sales, invoices, customers, inventory, generate reports, even view streaming video!
Google Gadget
If you have an iGoogle page, you can embed POSitive Connect as a gadget on your page.
| • | From your iGoogle page, choose "Add Stuff" |
| • | Next choose "Add By Url" |
| • | Enter in the URL of your web site, with a "/gadget" on the end. In our example, the URL would be http://connect.gopositive.com:4155/gadget |
| • | Go back to your iGoogle page. Your POSitive "Fast Stats" page is there. |
Licensing
POSitive Connect is licensed per company.
POSitive Connect can access multi-store data, so only one license is required to check all stores.
FAQ
Q: I do not have an assigned IP address from my Internet Provider. What can I do to access POSitive Connect from my home?
A: You need to register your location with a Dynamic DNS provider, such as www.dyndns.com . This service is free. All you need to do is select a static hostname from any of the many domains they offer, and you’re ready to go. You will then access your store by using the host name you have chosen, again appending the port to the end of the URL.
Q: I am printing a Tender Report, and it is taking a long time to display on my screen.
A: When you make a request for a report, the report needs to be generated in its entirety on the server, converted to a PDF, then transferred to your browser. Depending on the amount of data, this can take some time. Unfortunately, there is no “progress bar” that can be displayed, as all the work is done remotely. Just be patient, eventually the report will display,