|
Adding New Employees |
  
|
| Show/Hide Hidden Text |
|
Adding New Employees |
|
| Show/Hide Hidden Text |
You should add your employees to this list to enhance accountability and initiate program security. When POSitive is first installed, only one employee is included to allow you access to the program for setup and experimentation.
Benefits
If your business is a one-man operation, you could still benefit from entering your own name.
| • | You can personalize your invoices with your own name or initials as the sales person rather than the title of manager. |
| • | You can shorten your ID and Password to just one letter, making entry easier. If you have other employees, there are additional benefits. |
| • | You can enhance accountability. Key activities such as making sales, receiving inventory, balancing the register, can always be traced back to the individual who logged in. |
| • | You can restrict access for some employees to selected areas and limit rights to perform some of POSitive's transactions. |
| • | You will have a handy list of employee names and addresses. |
| • | You can leave 'e-mail' messages globally for all employees, selected groups of employees, or individual employees. |
Editing Employee Information
You may edit employee information or change the password for security reasons. There is also a view for Notes for any comments you choose to write regarding the employee.
The top of the Employee File screen gives a quick summary of each employee. The Locate and Query options assist in finding an employee if the list is extensive.
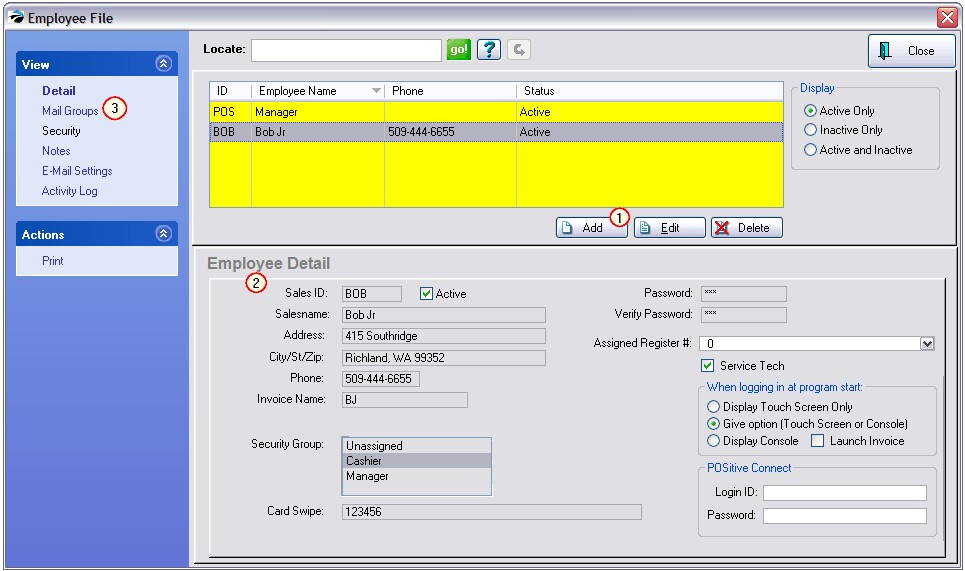
How To Add New Employees
From the Employee File screen, choose the ADD button just below the Employee Listing and fill in the employee information fields.
Employee Detail
Sales ID - A unique code of up to 3 characters in length. This can be any combination of letters and numbers. It is frequently the initials of an employee. If security is not a major issue, it could be just one character to speed up entry into POSitive.
Active - Currently able to use POSitive
Salesname - Full name of employee: First and Last Name.
Address - This will be used for internal purposes only.
City, State, Zip - Employee's city, state, and zip code
Phone - Employee home phone
Invoice Name - This entry will be printed on the customer invoice. For privacy reasons, you may choose to print only the first name or an employee number on invoices.
Security Group Assignment
Security Group - A preset assignment of security settings. Select one of the presets or make the entry Unassigned.
Special Assignments (optional)
| • | Assigned Register # - This should always be set to 0. Only in rare instances would you want to use any other number. (see Employee File for more information) |
| • | Service Tech - If this employee will be serving as a service technician at times, then this box should be checked. The employee will then be included in the Service Order module and will be listed with in the Service Scheduler. If service work is not part of your business, then this can be left blank. |
| • | When Logging In At Program Start |
| • | Display Touch Screen Only - Do NOT USE until touchscreen has been created. |
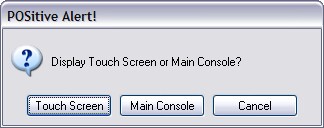
| • | Give Option (Touch Screen or Main Console - Do NOT USE yet.) Click to see Choices |
When you select this option, the employee will be prompted with the following.
|
| • | Display POSitive - (Recommended) ALWAYS use this |
Password Authorization
Password - A code of up to 6 characters using any combination of letters and numbers. This code should remain confidential. If security is a major issue, it can be changed as often as needed. As you type, the code characters will only be displayed as asterisks.
Verify Password - Re-enter the password to verify that the original entry is correct. As you type, the code characters will only be displayed as asterisks.
SAVE CHANGES NOW
Before selecting any other options be sure to click on the SAVE button.
Be sure to complete all 4 of the following Views listed on the left.
Mail Groups
All Groups - a listing of common teams of employees such as Sales, Management, Techs, etc. Choose the Mail Group Manager button to add or edit.
Groups Belonged To - This employee is automatically included in the ALL group and can be included as a member of any other available Mail Group. If groups have not yet been created, you may designate them now using Group Manager button below the All Groups list. (see Group Manager)
Mail Group Manager - Create new groups and assign specific employees to each group.
TIP: To send messages: see My POSitive
Security
Already Assigned - Displays the message: "Security has been set using a Global Security Setting:" with the name of the Security Group at the end. If changes need to be made, edit the employee record and set to a different security group.
Security UNASSIGNED - A list of settings for each Access Module can be individually customized for an employee. At this stage, it is best to just continue on with Next because you already chose the security group at the beginning of the Employee Wizard.
See List Of Security Options for details.
Notes
You can record the hire date, performance reviews, and any other useful information about this employee on the Notes tab at this time.
E-Mail Settings
By default, POSitive uses your Windows default e-mail client, such as Outlook, when you e-mail copies of invoices, quotes and etc., to your customers.

Go to Maintenance, System Setup, E-Mail and select "Outlook" as the E-Mail Client, then choose if you want transactions sent as "Plain Text", "Attached PDF" or "Embedded HTML". Also choose how you want Purchase Orders to be sent.
POSitive can also has a built-in a e-mail client, allowing employees to send and receive personal e-mail through the My POSitive section. Define the e-mail settings for each employee.
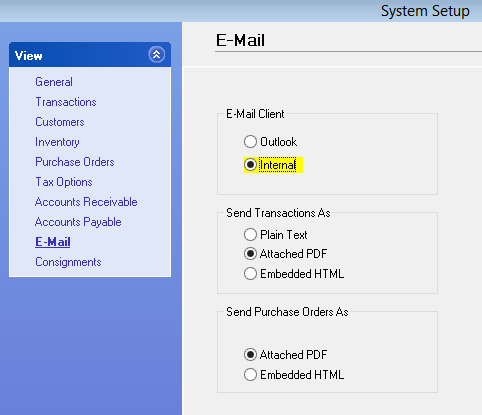
To set-up internal employee e-mail, go to Maintenance, System Setup, E-Mail and put a check next to "Internal", then choose the format you wish to send.

Then go to Management, Employees. Select the employee, then click on E-Mail Settings. This is where you will enter the information that pertains to your e-mail service and will have to be done for each employee. Because each business is different, there are no standard settings to use for this section. You probably need to consult with your e-mail provider, IT support person or POSitive dealer for assistance with setup.