|
Re-Assign Category |
  
|
| Show/Hide Hidden Text |
|
Re-Assign Category |
|
| Show/Hide Hidden Text |
With the Re-Assign Category button you can move an entire category and all of the products from one department to another.
IMPORTANT: This should be done if a category is currently assigned to a grouping called "Unassigned" which is in fact a non-department.
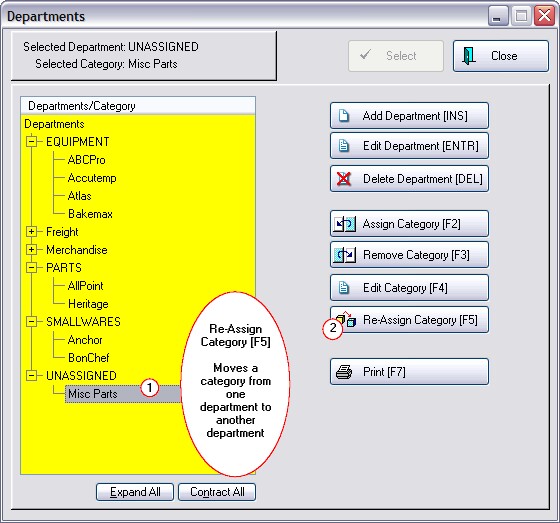
1) Highlight the category to be moved Note
UNASSIGNED is not a true department so there should never be any categories below this title. If you had once chosen "Remove Category [F3]" or if an inventory importer was not defined correctly, then the category was unlinked and classified as Unassigned. |
2) Choose the Re-Assign Category [F5] button
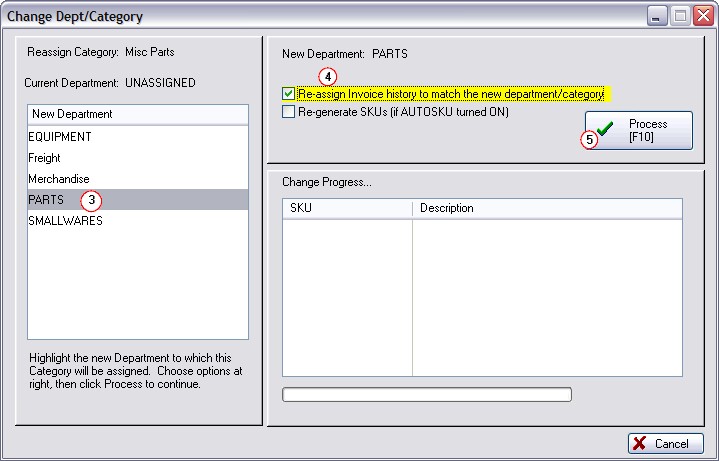
The Change Dept/Category window will open.
3) Highlight the new department to which the category will be assigned.
4) Recommendation: Activate the option to "Re-Assign Invoice History To Match The New Department/Category" This will improve sales reports by Dept/Category. Any item sold under the old Dept/Category name combination will be changed as a sale under the new Dept/Category name combination.
5) Choose "Process [F10]" In the "Change Progress" section you will be able to see individual items being reassigned.