| Show/Hide Hidden Text |
If you have chosen to drop ship customer special orders, (see Create PO From Pending) you will still need to receive the purchase order and convert the customer order to an invoice once, after you have received confirmation from the vendor and customer that the product has been shipped and arrived in good condition.
Why Convert The Order To Invoice?
|
Handling the Purchase Order
Go to the Purchase Order Center and receive the products even though you do not physically have the products in hand.
This will update the customer order so that the items are no longer backordered.
Accounts Payable and General Ledger will be updated.
Handling the Customer Order
Highlight the Customer Order and choose Convert if all items on the order have been shipped, or Partial Convert if there are still items pending shipment.
Documentation of Shipment
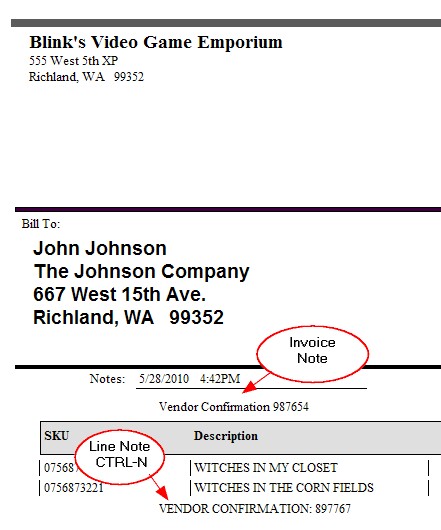
TIP: Before converting the order or while editing the invoice, consider adding a Shipment Confirmation note stating the details you have received from the vendor. This can be done as a...
| • | line note - press CTRL-N and type the information. Press F10 when done. The note should be directly below the item. When partially receiving the PO, the notes of items not received will be retained. |
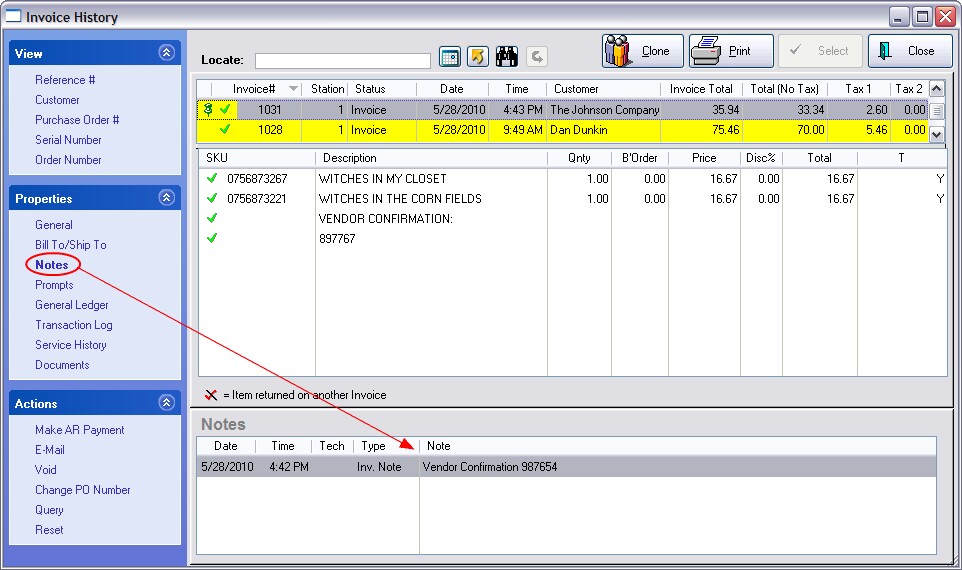
| • | Invoice Note field - while invoicing choose the Notes menu and enter the note |
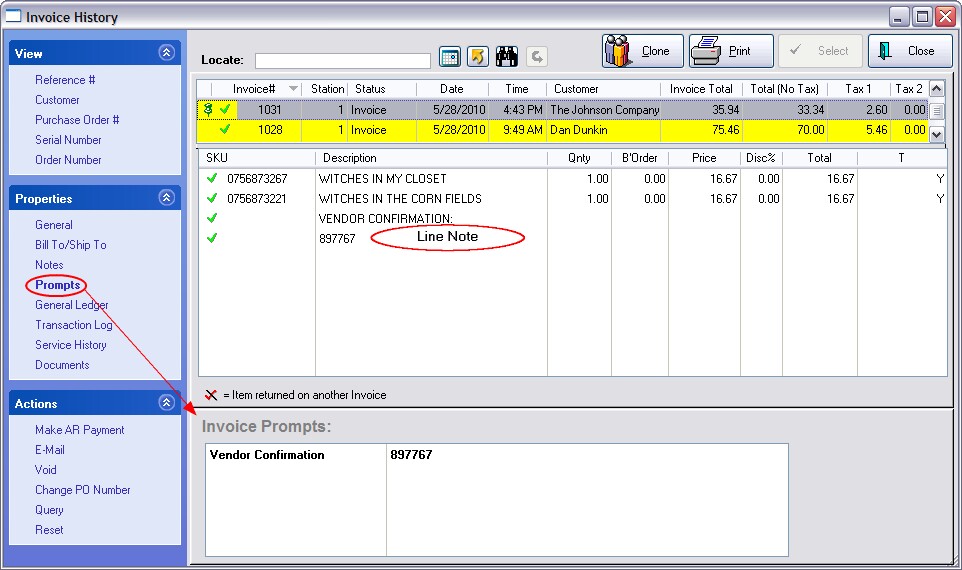
| • | either an Invoice Prompt or an inventory item with selling prompts (see Invoice Prompts and Category Screen Prompt) |
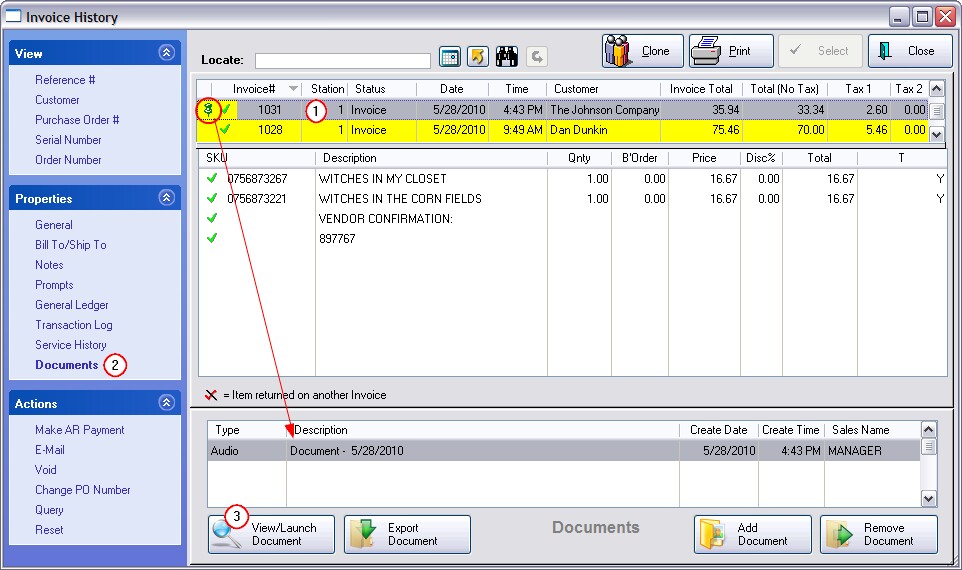
| • | attached Document - add voice message, scan a document, attach a file. (see Document Manager) |
One advantage is that you can always go to Invoice History at any time and search using the Find button for the vendor's confirmation information.

Take Payment
It is assumed that payment has already been made in full or will be made in full at the time of invoicing. Deposits on the order will be deducted from the invoice total.
Tender the Invoice as you normally would, taking final payment as needed.
The customer's Purchase History is updated.
Retrieving Documentation
Invoice History has documented the drop ship confirmation and can be searched and found at any time.
Go to Invoice history
A) Choose the Find (binocular icon) feature. (see Invoice Quick Find) You can enter any known information such as the customer's original order number, the inventory item on the invoice, the vendor confirmation number or even just the word "vendor confirmation".
B) The invoice can display your documentation in one of several ways.
-- Line Note
This is visible on screen among the inventory items sold
-- Invoice Prompts
Choose "Prompts" under Properties

-- Invoice Note
Choose "Notes" under Properties

-- Attached Document
1) Highlight the customer invoice. There will be a "Document Pin" beside the Invoice number.
2) Choose Documents under Properties
3) Choose "View/Launch Document" to review documentation.
