|
Enter Bad Check |
  
|
| Show/Hide Hidden Text |
|
Enter Bad Check |
|
| Show/Hide Hidden Text |
How To Handle A Bad Check
1) Go to Management: Check Management: which opens the Checks Tendered screen.
2) Find and review the returned check to confirm invoice number, date, customer name etc.
3) Choose Enter Bad Checks under Actions at the left.
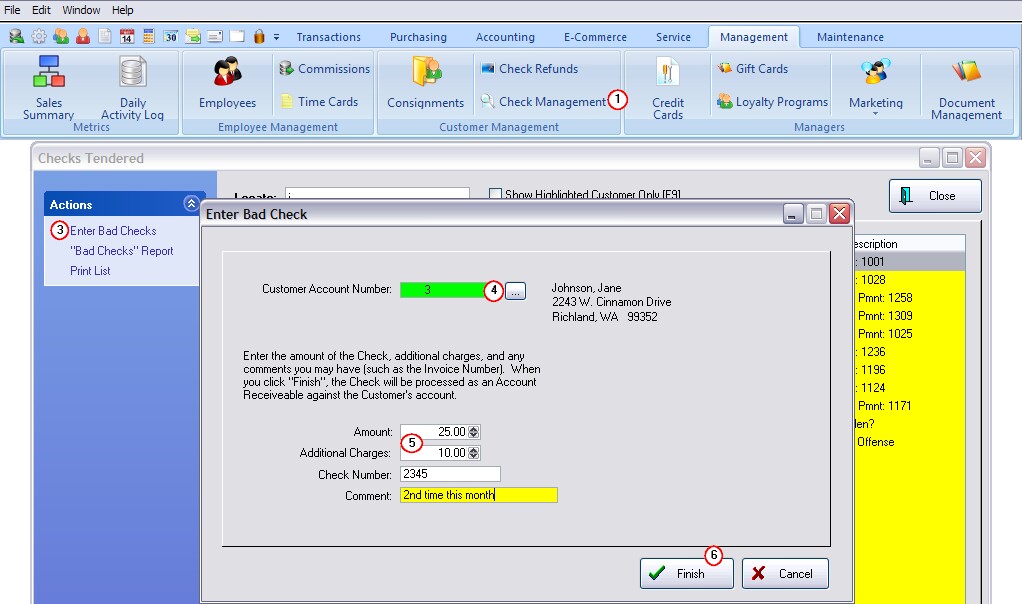
4) Enter the customer's account number or use the lookup button to find the customer. If you open the Customer List use the normal locate tools to find the customer. If the check was originally written for a Quick Sale invoice you will need to add the customer using the information on the check.
5) Fill in Charge Details - This process will add the value of the check and any additional charges to the customer's AR Details as an amount due.
| • | Enter the amount of the check |
| • | Enter the amount of your processing fee or penalty charges ALERT |
Note that this processing fee plus the check value will be posted to the customer's AR Details and to the POSitive checkbook. The additional processing fee should equal the actual bank charges. But if you choose to charge more, then you will need to make an adjustment in the checkbook to the actual bank charge. |
| • | Enter the check number |
| • | Enter a comment. TIP: entering the Check number and Invoice Number will print the same on a customer AR Statement) |
6) Choose Finish.
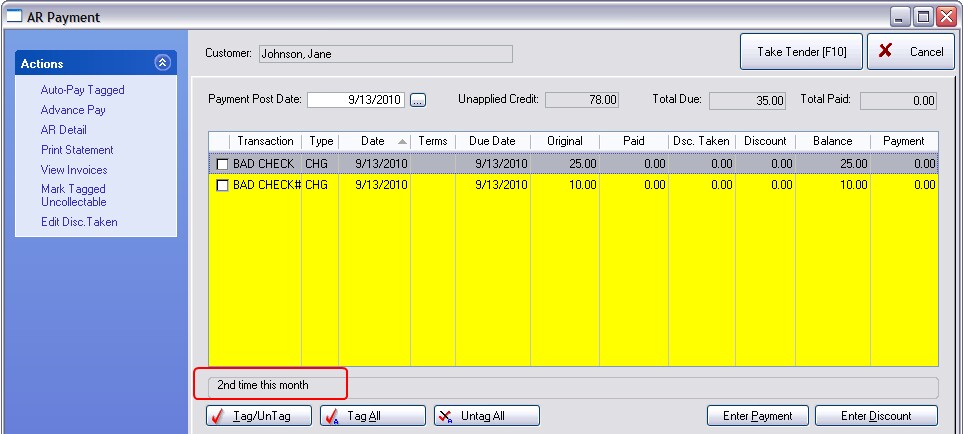
You can now lookup the Customer in Customer Center and you will find that AR Detail will contain those two charges as separate line items.
When the customer is contacted and ready to pay the charges, choose the TAKE AR PAYMENT button on the Customer Summary view. (see AR Payments )