|
Deleting A Matrix |
  
|
| Show/Hide Hidden Text |
|
Deleting A Matrix |
|
| Show/Hide Hidden Text |
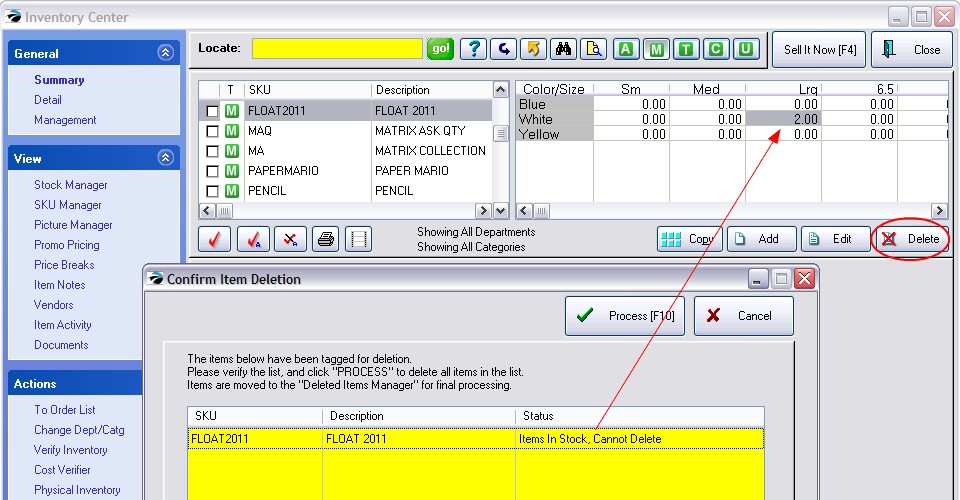
A matrix consists of a Header and individual Matrix items. These can be deleted entirely or in part, however they MUST have a stock count of 0.00 for each component. Any inventory item with a stock count cannot be deleted.
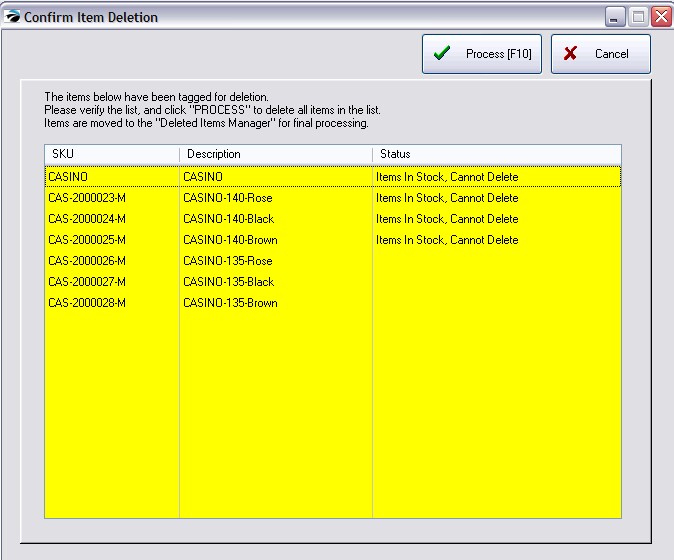
In this example, one item has a stock count.
When you choose the Delete button at the far right, you are notified that the Matrix Header cannot be deleted.
TIP: Print a current stock count of the matrix items before making any deletions, then you can add the stock counts back as needed.
Delete Matrix Header Only
Before you can delete the matrix header, you must get the stock count down to 0.00 for the header and for all items.
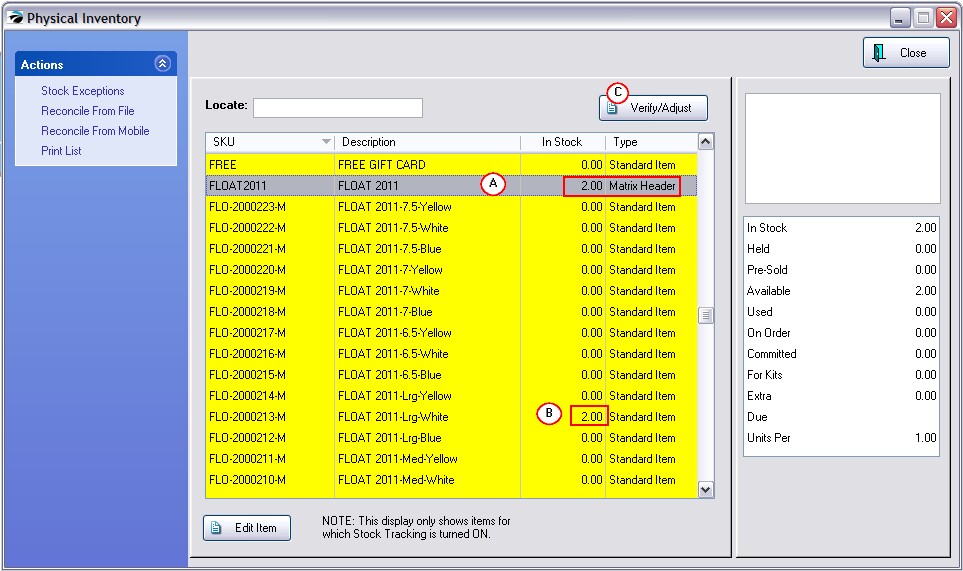
Option - Use the Physical Inventory Listing to edit the Header Stock Counts How To
1) Open the Inventory Center 2) Choose Actions: Physical Inventory from the blue menu at left. 3) Find and highlight the Matrix header of the desired item. a) If you highlight the header you can change the stock counts off ALL items in the matrix. Note: Type = Matrix Header b) if you highlight the individual item you can change the stock count of just that ONE item. c) choose Verify/Adjust to make the change in stock count
4) Select the Verify/Adjust button in the upper right of the screen. 5) This will open the Matrix and show only the stock counts of each item in the matrix. CAUTION: Before changing the stock quantities, you may want to print a report showing the current stock counts so that the counts can be added back after the Matrix Header is deleted. |
Option - If you use Verify Adjust to change the stock count of the individual item. How To
If you choose to change the stock count of just an individual matrix item you will see this screen
Enter 0.00 in the New Stock Quantity Choose OK [F10] NOTE: this screen can be accessed in two ways. 1) from the Stock Manager: Current Stock: Verify/Adjust of the individual matrix item 2) from Physical Inventory list, highlight, and then Verify/Adjust. (Note: this requres a few extra seconds to process) |
Delete Matrix And Associated Inventory Items
If you determine that a matrix is no longer needed, be sure to delete both the matrix header and the associated matrix items.
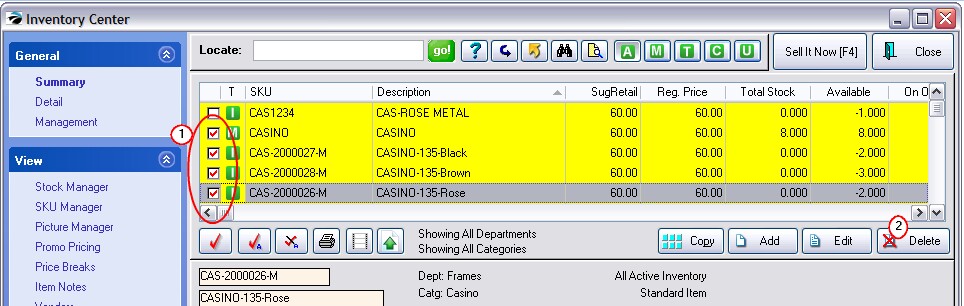
Open the Inventory Center and sort the inventory so that you can see both the matrix header and its matrix items. You
1) check mark the header and all the associated matrix items
2) choose the Delete button at the far right.
While highlighting a matrix header, choose the Delete button at the far right to delete all or portions of the matrix.

If you answer NO, you will delete only the matrix header. The matrix children will remain in the inventory list.
If you answer YES, you will be deleting both the header and the matrix children.
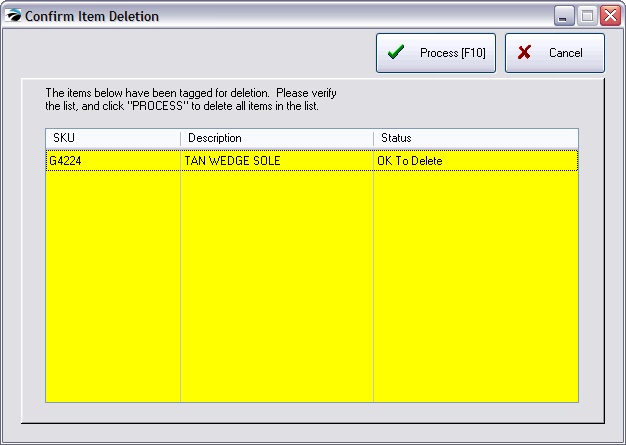
Choose Process [F10] to complete the deletion. The matrix and all matrix children are removed from the inventory list.
IMPORTANT: If you plan to recreate the same matrix, you must permanently purge the items just deleted.
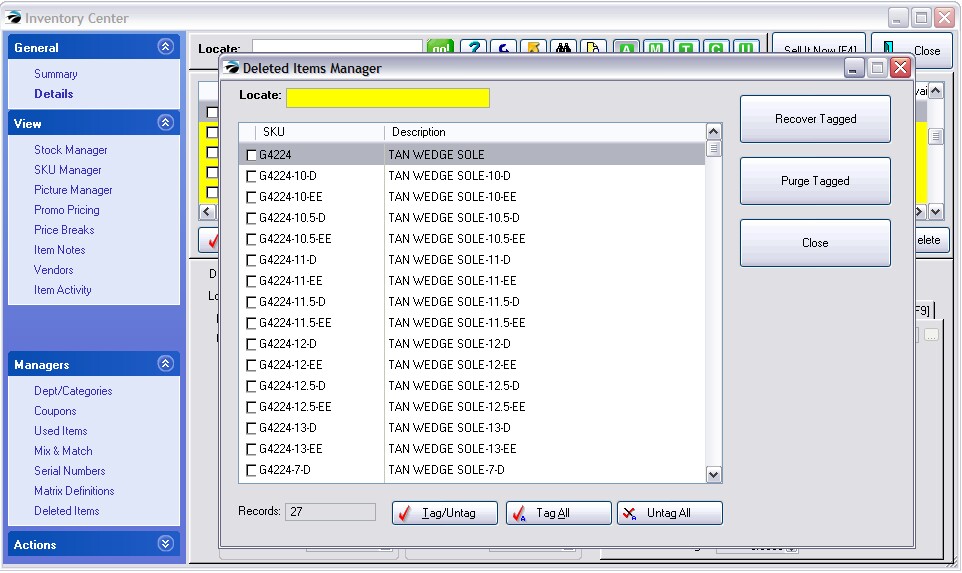
Purge Deleted Items
Use the Deleted Items Manager to finalize the deletion or recover items deleted by mistake. (see Deleted Items Manager)