Accounts Receivable |
  
|
| Show/Hide Hidden Text |
Accounts Receivable |
|
| Show/Hide Hidden Text |
Accounts Receivable allows you to sell to your customers and bill them later for their purchases. These settings will control how AR Statements are generated and printed. Contact POSitive support for more information.
AR Statements Close On The ____ Day Of Month
Statements will include all transactions up until a cutoff date. The cutoff date could be the day of or a few days before you plan to mail out statements. In this field, enter the cut-off date of your choice.
If you wish statements to close on the 5th of the month, choose 5 or on the 10th of the month, choose 10.
However, to make the cutoff date the last day of the month, enter a 1 and POSitive will make adjustments for months with only 28, 30, and 31 days as needed.
IMPORTANT: once a day is selected, do not change it. POSitive does not support rotating or floating AR closing dates.
There is an AR Aging report to show how long it has been since the purchase was placed on Accounts Receivable. This Aging information is also included at the bottom of the customer's AR Statement if you are using Transaction Based statements rather than Balance Forward Statements.
•By Month - Aging of an invoice on AR will begin on the last day of the month of the invoice. The number of days as defined in the terms on the invoice will be counted from month's end.
•By Number Of Days Due - Aging of an invoice on AR will be calculated based on the Customer Terms selected at the time of invoicing. The number of days as defined in the terms on the invoice will be counted from the date the invoice was created. (This has been the standard method in POSitive.)
Check Options - Choose ONE
•Prompt For Check Number (Using External Account) - Allows you to enter the number of a handwritten check or of the check being printed from a check writing program other than POSitive's checkbook feature.
•Generate Checks When Processing Management: Check Refunds - When you select and process vendor invoices for payment through POSitive's Accounts Payable, a check will be automatically printed for the vendor and drawn from the designated account.
Checking Account - Select the name of the checking account setup in POSitive for paying Check Refunds.
•Do Neither
Statement Batch Printing
•Include ALL Transactions on Statements Whenever Printed - all active charges and credits will be printed on the statement.
•Include ONLY Transactions for the Statement Period Being Printed - only the active charges and credits up to the designated cut off date will be printed on the statement. (see "AR Statements Close On The...Day Of Month" below)
Do Not Print AR With Zero Balance - If a customer has a zero balance POSitive will not print AR Statements during batch printing. You will still be able to manually print an AR Statement for the customer.
Note: If the customer has a store credit and no charges, the statement will print with a negative amount owed.
Statement Printing Options
There are two basic AR Statement styles. Transaction Based and Balance Forward. Each has various controls.
•Transaction-Based Statement - an AR Statement will print details of active invoice charges and payment
•Balance Forward Statement - an AR Statement will print details of invoice charges and payment for the current time period. The previous period will be reflected only as a balance forward amount. Other Effects
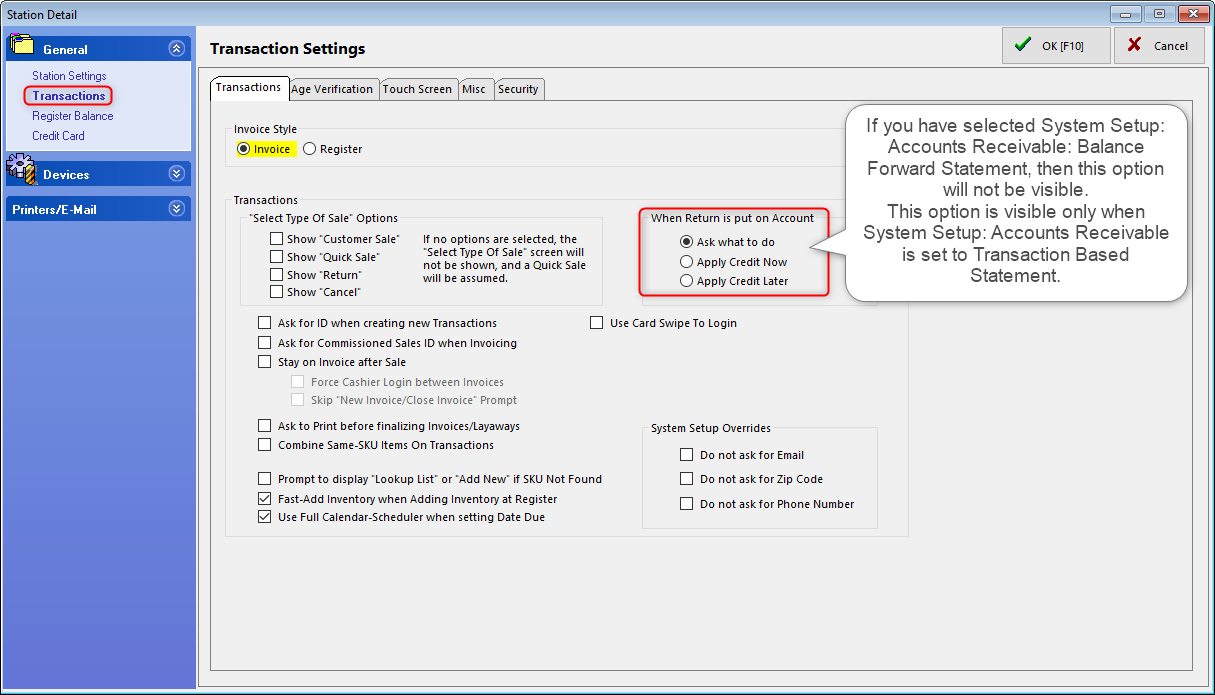
When you choose Balance Forward Statements a Station Option to pre-set how Return Refunds posted to Accounts Receivable will be removed. By default, Refunds to AR will be automatically applied to the oldest invoice charges. You will not have the option to save the Refund to be applied later.
|
•Days After Statement Close That Payment Is Due - Printed on the invoice will be the calculated payment due.
•Minimum Payment (Percent of Total Due) - enter 100 if you expect full payment.
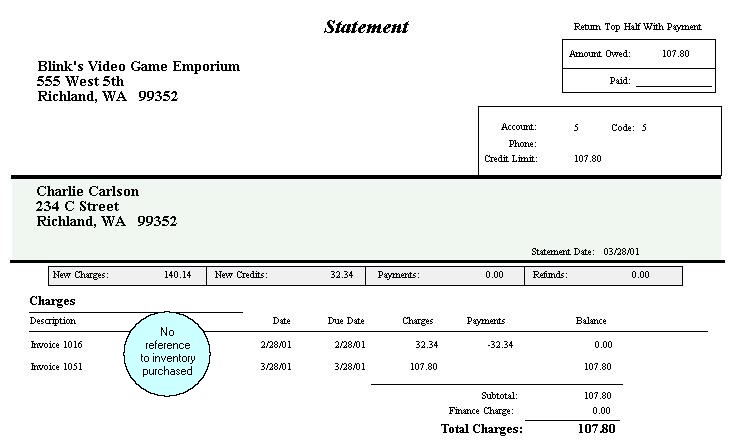
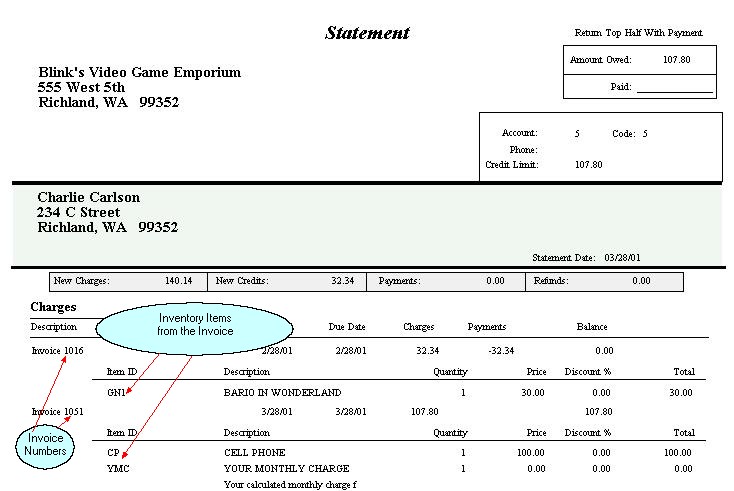
Integrate Invoices Into Statements When Printing Invoices with Statements - Rather than printing separate invoices with the AR Statement, this option saves paper by printing line item details for each open invoice. A Customer's Account allows for a setting "Print Invoices With Statements" which governs this option.
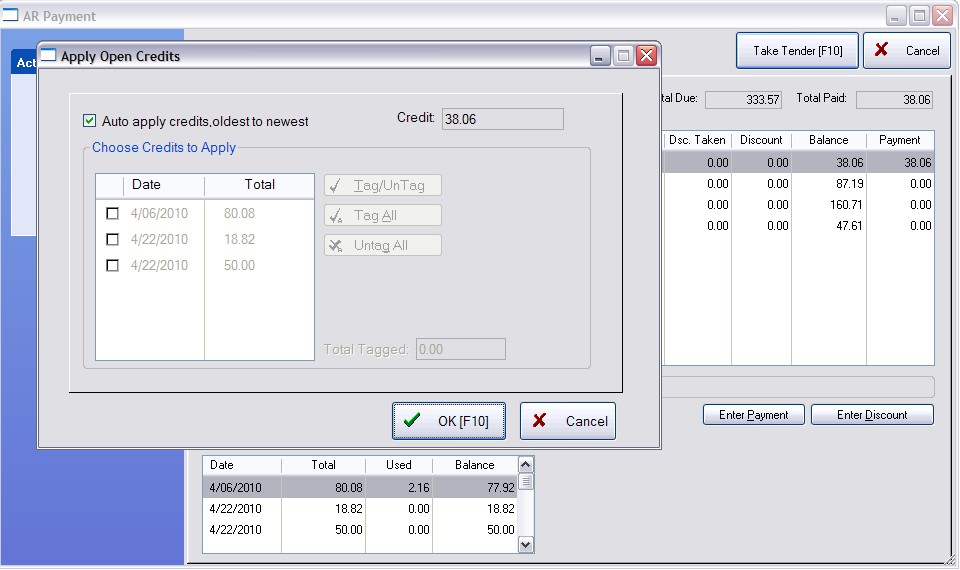
Typically payments and applying credits will apply them to the oldest invoices first. Here you can give yourself more control over how payments and credits are handled.
•Auto-Apply from oldest to newest Sample
|
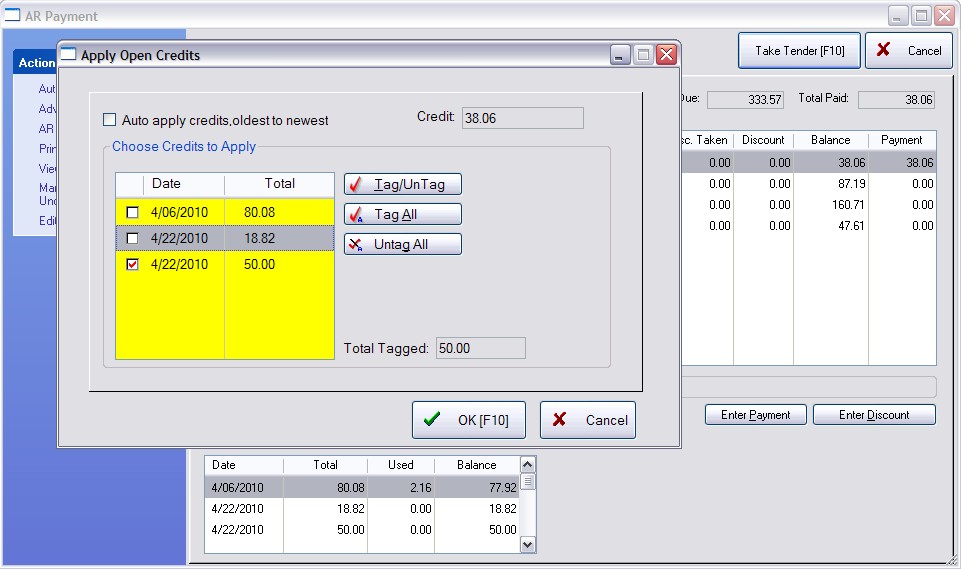
•Let me choose the credits to apply Sample
|
For Example - A Statement With Integrated Invoices
For Example - A Statement Without Integrated Invoices